Industrial Clothes Racks: What to Gather Before Setup
I have lost count of how many times someone has proudly shown me a freshly bolted “industrial” clothing rack, only to wince when I lean on it. The thing is, the assembly isn't where most setups actually fail.
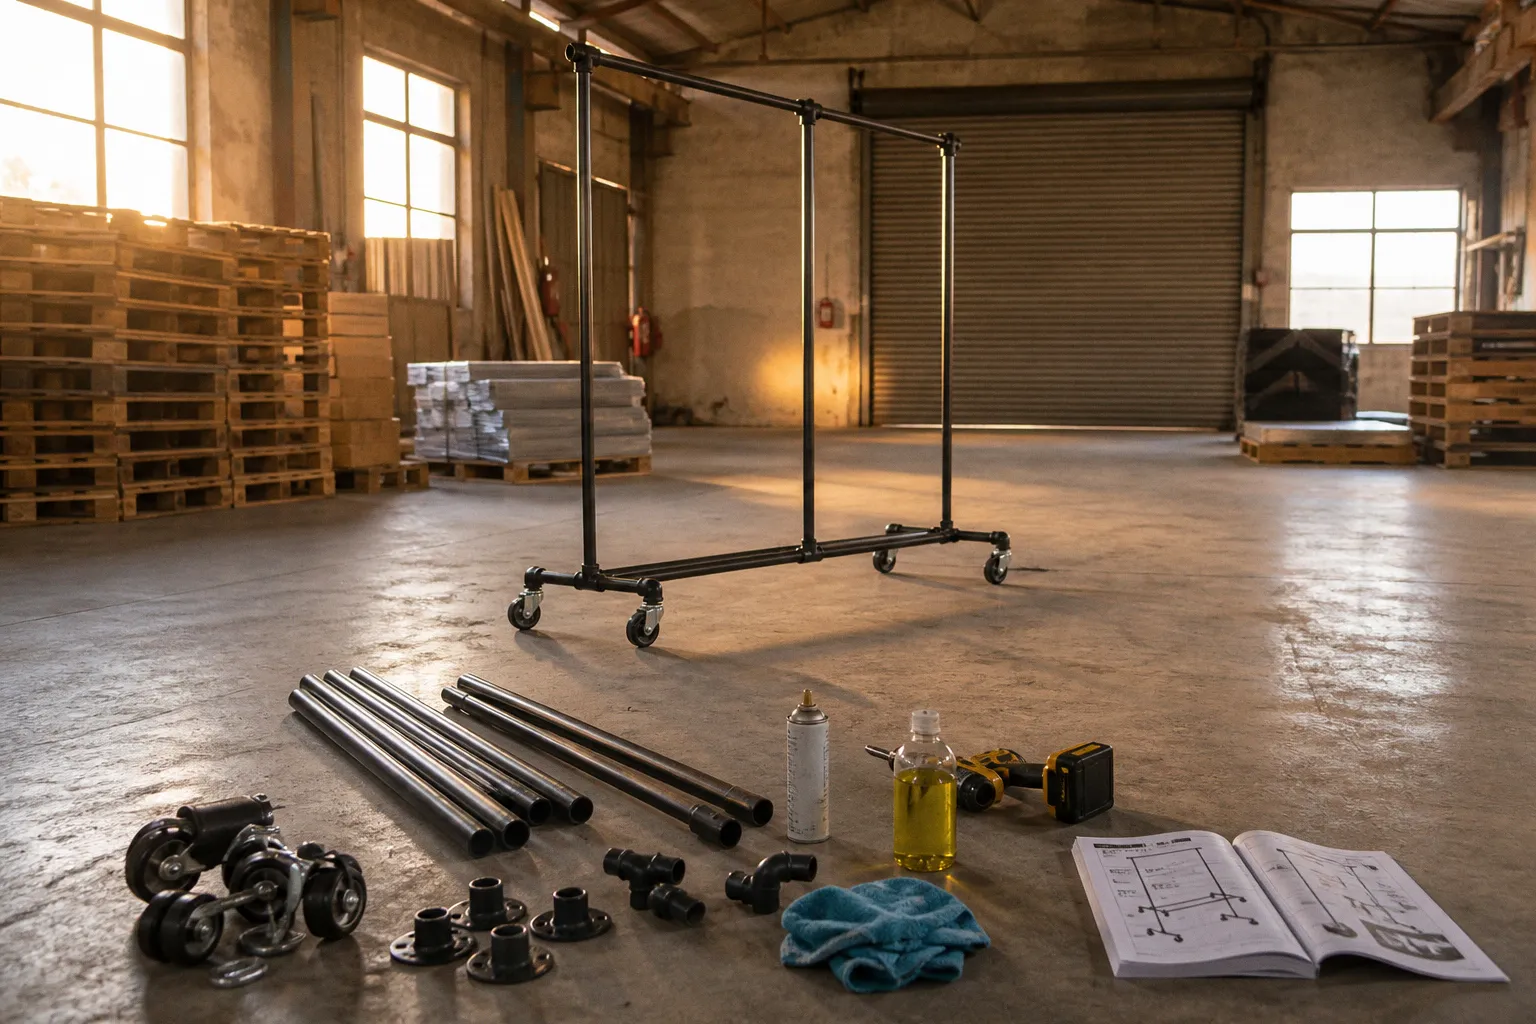
The failure starts in the ninety minutes before you touch an Allen key — when you're still standing in the hardware aisle convinced the box contains a finished product. It doesn't. What it contains is raw steel, a light film of factory oil, and a set of instructions that assumes you already know what you don't know. I've pinched my fingers on enough cheap brackets to be specific about what that gap actually looks like, and it's almost always the same handful of oversights.
So before you start swinging a wrench around in a retail backroom or a studio apartment, here's the checklist I walk through every time. No lifestyle fluff. No “transform your space into an oasis.” Just the friction points, in the order they actually bite you. The same preparation applies whether you're assembling a wall-mounted display, a double-tier rolling rack, or a pipe-and-shelf system for stock that has to survive daily use.
You need a clear floor, a tape measure, the right drill and bits, a level, a pencil, a rag that can be thrown away, and enough space to lay out every pipe and fitting before you start tightening anything. That last part sounds excessive until you discover that two fittings look identical but have slightly different threads, or that the “rear” base tube is sitting in the wrong pile because the packaging diagram was read upside down. Industrial clothing rack assembly is mostly about preventing small errors from becoming structural errors.
Degreasing and Sealing Raw Steel Pipes
The first lie the marketing copy tells you is that the rack arrives “ready to hang.” It doesn't. Authentic steel industrial pipes and fittings ship with a thin coat of protective oil or grease — the manufacturer's way of preventing rust during transit and warehousing. That oil is not a finish. It's a stain waiting to happen, and it can transfer onto garments when the metal warms up or when fabric is pressed against it during loading. I've seen linen shirts come out of a brand-new rack with long, ghostly smears down the back. Nobody on the product page mentions this.
The fix is unglamorous. Before any bracket, flange, or pipe touches a wall, you wipe everything down with a degreasing dish soap and warm water, or an alcohol-based cleaner for the tighter fittings where a rag can't reach. Don't shortcut this. One pass won't do it. Two passes won't do it if the rag is already saturated with grease. Keep changing to a clean section of cloth until the surface stops leaving a dark residue.
You also need to clean the inside edges of fittings. A threaded elbow can hold more oil than the outside of the pipe, and that residue may work its way out after assembly. A narrow brush, cotton swab, or folded corner of a rag can reach the first threads. You don't need to make the steel sterile. You do need to remove the film that would otherwise sit under your finish or end up on clothing.
Let the parts dry completely before sealing. Water trapped around a threaded joint is not an improvement, and spraying over a damp or greasy surface gives you a coating that looks acceptable at first but remains soft, uneven, or easy to scrape off. Lay the pieces on cardboard or a drop cloth rather than directly on a concrete floor. Turn them once so the underside of each pipe gets the same treatment.
Then you seal it.
Bare steel is not a finished surface. In humid conditions, the risk of surface rust increases, especially where the coating is thin, scratched, or missing. Sealing is what keeps a clothing rack from becoming a source of orange marks on light garments.
Raw steel needs a polyurethane matte or satin spray, a clear coat, or — if you're going for the waxed look — a coat of finishing wax that needs roughly 20 minutes of drying time before you buff it. Pick one based on the environment. Sprays are faster and more forgiving in a dusty stockroom. Wax looks better in a boutique and smells like a cabin, which is either a feature or a problem depending on your clientele. Either way, do not skip this step and do not substitute cooking oil.
I have been asked about “olive oil as a rust preventer” more times than I care to remember. The answer is no. It goes rancid, it smells, and it stains worse than the factory grease did. A proper clear finish also gives you a surface you can wipe down after installation. That matters in a retail setting where dust, lint, and hand oils accumulate on the same crossbar people touch all day.
Pay special attention to the places that will be hidden after assembly. The visible face of a pipe gets all the attention because that's what you see in the box. The backs of flanges, the underside of a shelf support, and the first few inches inside a fitting are where moisture and residue tend to linger. Once the rack is fixed to the wall or loaded with clothing, reaching those areas becomes difficult without disassembling the frame.
There is one practical compromise: do not coat the threads so heavily that the parts can no longer seat properly. A thin, even finish is enough. If you are using a product that adds noticeable thickness, keep it away from surfaces that must tighten fully against a flange or connector. The goal is protection, not a decorative layer that prevents the assembly from closing.
Structural Integrity: Wall Studs and Concrete Anchoring
Once the steel is clean and sealed, you hit the second lie: that a wall-mounted rack can hang off any flat surface. The drywall anchor included in the box is there for one reason — to get the unit out of the packaging without the manufacturer getting sued. It is not there to hold 30 kilograms of wool overcoats. I've pulled these anchors out of commercial walls with two fingers and a sideways glance. The rating on the box means nothing if it's threaded into gypsum.
If your wall has studs, you anchor into the studs. Period. A flange screwed into solid wood or a steel stud is the only wall-mounted configuration I trust with anything heavier than a single row of tees. Use a proper stud finder, mark both edges, and center the flange on the stud — not “near” it, not “between” it. The tolerance for sloppy centering is about zero once you load the rack.
The first measurement should not be the height of the rack. It should be the location of the structure behind the wall. Find the stud, mark its center, then hold the flange in position and check whether the remaining layout still works for the garments, shelves, doors, lighting, and people who need to walk past it. A rack can be perfectly level and still be badly placed. If the end of a crossbar sits too close to a doorway, or if a shelf blocks an electrical outlet, you will be tempted to move the assembly after it is already carrying weight. That is when corners get cut.
Mark the screw holes through the actual flange. Do not rely on a drawing that shows a generic plate. Hardware changes from one kit to another, and the hole pattern may not be symmetrical. Drill a small pilot hole first where appropriate, then drive the specified fastener into the structural material. If the screw stops unusually early, spins without biting, or pulls the flange tight on one side while leaving a gap on the other, stop and investigate. More force is not a substitute for a solid fixing point.
Concrete is a different animal, and the standard drill in your toolkit is the wrong tool for it. Mounting a flange to a poured concrete or cinder block wall requires concrete anchors and a hammer drill, because a regular drill bit will laugh itself dull against masonry. You can rent a hammer drill for a day. You can also ruin three bits and a Saturday trying to muscle through it the wrong way. I have done both. The rental is cheaper.
Block walls deserve their own caution. The material may be strong, but the hollow sections and mortar joints do not all behave the same way. A hole that lands in a weak joint will not give an anchor the same purchase as one placed in sound masonry. If you are not certain what is behind the surface, identify the wall construction before you choose the anchor. This is not the place to use a fastener simply because it is already in the toolbox.
A small but important note on the gap between the flange and the wall: the pipe needs to sit perpendicular to the mounting surface, which means the flange has to sit flush. If your wall has texture — old plaster, exposed block, half-painted drywall with a raised ridge — shim the flange so it doesn't rock. A flange that rocks is a flange that's already loose. Under repeated loading, vibration, and ordinary handling, a poorly seated threaded connection may loosen over time.
That last point is easy to miss because the rack can feel solid during installation. The first few garments do not reveal much. The problem appears after the crossbar has been loaded and unloaded repeatedly, or after customers and staff use it as a convenient handhold. Check that the flange remains tight and that the pipe has not rotated out of alignment during the first period of use. If a connection moves, unload it before tightening it again. Do not try to correct a shifting joint with the rack full of clothing.
For commercial garment rack installation, the wall is part of the rack. Treating the steel frame as the only structural component is how people end up with a beautifully assembled unit attached to a weak surface. The correct anchor, the condition of the wall, and the way the load is distributed across the mounting points matter as much as the pipe itself.
Preventing Tipping in Rolling Garment Racks
Rolling racks look simple. They aren't. They look like a rectangle on wheels, and the people who designed them leaned into that simplicity in a way that punishes anyone who doesn't read the manual — or, more often, anyone who assembles them from a diagram on the side of the box.
Before tightening the base, identify every tube by length and every caster by type. Put the parts on the floor in the order they appear in the instructions. If the rack includes locking and non-locking casters, do not install them by instinct. The brakes need to be accessible from the side where staff can reach them without stepping into the rack or pulling against the garments.
The single most common mistake is installing the front and rear base tubes in the wrong positions. There are two tubes. They are not the same length. The longer base tube belongs at the rear; the shorter one belongs at the front. Get this backwards and the entire geometry of the rack shifts forward. The center of gravity moves toward the casters instead of over them, and the first time you load the front bar with a row of suits and give it a casual nudge, the whole thing face-plants onto the floor. I've watched this happen in a trade show booth. It is loud and it is not covered by warranty.
Do not assume the front is the side closest to you while the rack is upside down on the floor. Choose a reference point, identify the front before attaching the base tubes, and keep that orientation until the rack is standing. A strip of masking tape marked “front” is not overkill. It is cheaper than rebuilding the base after the uprights are already attached.
The second mistake is even quieter and arguably worse: angling the wheels during installation. The caster stems need to slide straight into the base tubes, square and firm. If you tilt them, even slightly, you can damage the internal connector before you've even noticed it. The problem may not show up at the bench. It may appear later when the rack starts to list to one side under load and you realize a caster is no longer fully seated. Insert them straight. Push them home. Wiggle-test each one before the rack stands up.
A rolling rack that tips over isn't a “freak accident.” It is usually a geometry problem made worse by an assembly shortcut. The fix is balance, correct orientation, and properly seated casters.
While you're at it, lock the casters before you load the rack. Two of the four wheels should have brakes. Use them. A rolling rack on an uneven stockroom floor can drift toward the lowest point in the building given enough time, and the lowest point is rarely where you wanted the rack parked.
The floor itself also matters. A rack can be assembled correctly and still behave badly on a sloped loading area, a damaged concrete floor, or a thick carpet that lets one caster sit higher than the others. Roll the empty rack a short distance, apply the brakes, and check whether the frame remains upright. Then add a partial load and repeat the test. If the rack only feels stable when it is fully loaded, something is wrong with the base, the casters, or the floor.
Load from the bottom and center outward. Do not hang every heavy coat on one end because that is where the empty space happens to be. Uneven loading creates a sideways pull that a light rolling frame must resist every time it turns. Keep dense garments — denim, leather, wool, and packed stock bags — distributed between the supports. If the rack is intended for customer use, leave enough clearance that a person can remove one garment without dragging several others into the aisle.
A rolling rack is also not a ladder, a cart for boxes, or a substitute for a moving dolly. Those uses introduce forces the frame was not assembled to handle. In a backroom, someone will eventually lean on it while reaching for a shelf. Give the rack enough clearance from walls and corners that this ordinary behavior does not turn into a sideways impact.
Precision Drilling for Integrated Shelving
The moment you add a wooden shelf to a pipe rack, you stop building furniture and start machining. The shelf has to pass over the vertical pipes, which means it has to have holes in it — and those holes have to be the right size, in the right place, or the whole assembly becomes a wobbly tribute to optimism.
The pipe diameter dictates the drill bit. For 1/2-inch pipe, you want a 21–22 mm bit. For 3/4-inch pipe, 27–28 mm. For full 1-inch pipe, 34–35 mm. Confirm the actual outside diameter of the pipe you received before drilling. Nominal pipe sizes and measured outside dimensions are not always the same thing, and the shelf only cares about the measurement in front of you.
Going undersize is the worse error here, because a tight hole will force the shelf to seat at an angle, which will transfer lateral force into the vertical pipe every time you load the shelf. Over time, that repeated force can contribute to loose joints. Going oversize by a millimetre is mostly cosmetic — the shelf sits a little proud of the pipe but it does not automatically compromise the structure. If the gap is visible, use a suitable collar, washer, or trim solution rather than forcing the wood into place.
Mark the hole centers from the actual pipes, not from the drawing. Wood varies. The drawing assumes the lumber was cut perfectly square at the mill, which it wasn't. Measure twice on the assembled frame, then transfer those marks to the shelf. Check the distance between the holes as well as their distance from each edge. A shelf can have individually accurate holes and still fail to fit if the spacing is wrong.
Drill from the top face with a backing board underneath so the exit side doesn't blow out — a clean hole matters more on a visible shelf than on a structural one. Clamp the board if you can. A loose shelf moving under the bit is how a neat layout becomes an oval hole. For a large hole saw or Forstner bit, let the tool do the work. Pressing harder often creates heat, tear-out, and a hole that is no longer round.
If you're drilling into MDF or particleboard, step the bit up in stages. A 34 mm hole in one pass through MDF will give you a fuzzy cone on the underside and a chipped lip on top. Pilot at 10 mm, then 20, then finish. It's an extra two minutes and it turns a salvageable shelf into a finished one. On plywood, pay attention to the top veneer and use a sharp bit; a dull cutter can lift the outer layer even when the core remains intact.
The shelf should slide into position without being hammered down. If it stops halfway, remove it and find the obstruction. Do not use the rack's threaded fittings as a press. That can twist an upright, damage the shelf edge, or pull a flange away from the wall. Once the shelf is seated, check that it is level in both directions. A small tilt may be acceptable for a decorative display, but it becomes annoying when folded garments migrate toward one corner every time the rack is touched.
Shelves also change how the rack is used. A top shelf invites boxes, handbags, and folded stock, which adds weight above the clothing bar and raises the center of gravity. Keep the heaviest items low unless the design specifically supports a high shelf load. If the shelf is only decorative, say so in the operating notes. Staff will otherwise treat any flat surface as storage.
Maximizing Load Capacity Through Proper Assembly
Here's the number that should govern every decision above: a properly constructed, solidly mounted DIY steel pipe clothing rack can carry up to 100 kg — roughly 220 lbs — when it's threaded into studs and the joints are torqued correctly. A standard wall-mounted kit, the kind you buy off the shelf with included drywall anchors, is weight-tested for about 50 lbs. Those figures belong to their specific configurations; they should not be treated as a universal promise for every pipe rack that happens to look similar.
The difference is not a small one. It is the difference between a rack you trust with inventory and a rack you trust with three cardigans. The wall, fasteners, pipe size, span, number of supports, and condition of the components all change the result. A load rating from a manufacturer is useful only when the rack is installed in the way that rating assumes.
The 100 kg figure is not a substitute for checking the assembly. It is a function of the steel, the mounting, and the way the load is distributed. Miss any one of those three and you're at the weakest link — usually the anchor, usually the wall, sometimes the threaded fitting where the crossbar meets the flange. A crossbar that wasn't fully threaded home can twist under load and pop the fitting apart. The threads on industrial pipe fittings need to be snugged past hand-tight. If you can still turn the crossbar with your fingers after assembly, you haven't finished the job.
Do not confuse “tight” with “maximum force.” Over-tightening can strip threads, crush a softer connector, or twist a flange out of alignment. Bring the joint fully home, keep the pipe square, and use the appropriate tool without treating the fitting like a stuck lug nut. If the parts do not align, back off and diagnose the layout. A crooked frame is not corrected by adding torque.
If you're building a multi-tier rack, run the calculations the way a shelving installer would: total loaded weight, divided across the number of vertical supports, with a safety margin you actually keep rather than spend. Heavy garments — denim, wool, leather — are denser than they look. A densely packed double-tier rack of jeans will reach the upper range of any 1/2-inch system faster than you'd expect. If you're going heavy, go 3/4-inch or 1-inch on the verticals when the design and fittings support it. The pipe costs more. The regret of buying cheap costs more.
The load is not just the weight of the garments. Add the shelf, brackets, hangers, bags, signage, and anything staff may place on top during a busy shift. Then consider the motion. A wall-mounted rack carries a mostly static load. A rolling rack experiences pushing, stopping, turning, and occasional impact. The same total weight can behave very differently when it is moving across a floor.
Use the garment bar as the main load path. Do not hang heavy stock from a decorative side pipe, a shelf edge, or a connector that was intended only to hold the frame together. Keep the load within the supported span rather than concentrating it in the middle of a long crossbar. If the bar visibly bows, the answer is not to add one more garment and hope the steel remembers its shape. Reduce the load or add support.
A useful way to think about heavy duty garment rack setup is to separate three questions:
- Can the wall or floor support the rack?
- Can the rack's frame support the intended load without excessive movement?
- Can the connections remain tight after repeated use?
A “yes” to the first question does not answer the other two. A concrete wall can hold a flange while an undersized crossbar bends. A heavy pipe can handle the clothes while a weak caster pulls out of the base. The system is only as reliable as the part that fails first.
After assembly, inspect every connection before loading it fully. Check that flanges sit flat, uprights are vertical, base tubes are oriented correctly, and casters are seated at the same depth. Load gradually rather than placing the entire stock shipment on the rack in one move. Watch for twisting, wall movement, unusual sounds, or a joint that shifts as weight is added. These are not cosmetic details. They are early warnings.
The Reality Check Before You Spend a Dollar
Before I close a sale — on my own shelving or anyone else's — I run the same short list. Not because I'm cautious, but because I've installed enough racks to know which questions get asked in week one and which ones get asked in month six when something's already gone wrong.
- Have I accounted for the factory oil on every pipe and fitting, and sealed the steel against rust before a single garment goes near it?
- Are the wall-mounted flanges going into studs or proper concrete anchors, not the included drywall hardware?
- Is the wall surface flat enough for the flange, or does it need a stable shim to prevent rocking?
- On a rolling rack, is the longer base tube at the rear and the shorter tube at the front, with the casters seated straight and locked?
- Does the rack remain stable on the actual floor where it will be used, not just on the clean assembly area?
- If there's a wooden shelf, are the drilled holes actually sized to the measured pipe diameter and laid out from the assembled frame, not only from the drawing?
- Have I counted the shelf, hangers, boxes, and accessories as part of the total load?
- Is the load I'm planning realistic for the pipe size, the mount type, and the number of vertical supports — or am I hoping the marketing claim holds?
- Can the people using the rack reach the brakes, remove garments, and restock it without leaning against the frame?
If you can answer yes to all of those, you have done the part of industrial clothes rack assembly that most people try to skip. The wrench work comes after the decisions that make the wrench work safe.
A rack assembled with clean steel, sound anchors, correct geometry, and a realistic load plan will usually feel unremarkable once it is finished. That is the point. It should stand square, roll when you want it to roll, stop when you lock it, and hold clothing without asking for attention. If it sways, stains, lists, or slowly pulls away from the wall, the warning was present before the first garment went on. Steel always tells you where the preparation was missing.