Wall-Mounted Clothes Rack Installation: Prep Checklist
Most "how to install a clothes rack" guides skip the only part that actually matters: the prep. They hand you a finished photo of a reclaimed-wood beauty mounted above a shoe shelf and call it a tutorial.
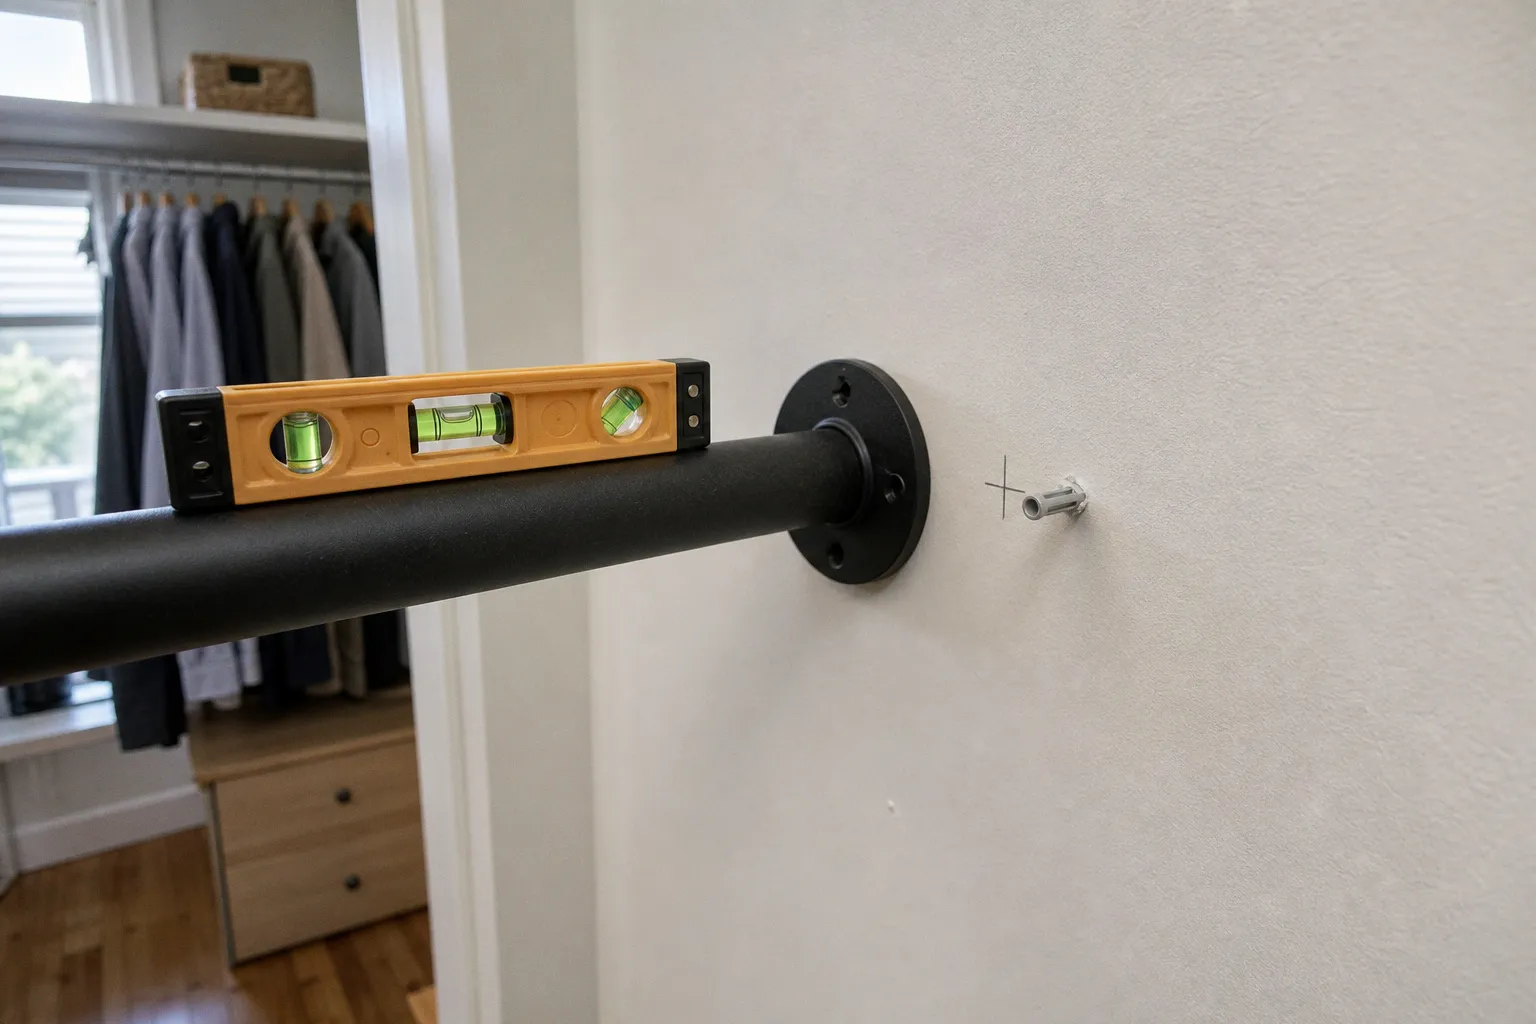
They never tell you that the guy in the photo drywalled over a junction box, or that the bracket pulled out six months later because he anchored into nothing. I've installed enough wall-mounted garment racks — in rentals, in basements, in walk-ins that someone else had butchered — to know that the hour you spend before the drill comes out is the hour that decides whether the thing stays on the wall or ends up in a landfill.
This checklist is that hour. Use it.
Optimal Rack Height and Rod Placement
Let's start with the number every installer fights with: the height of the rod. I've watched three different "universal" rack kits ship with three different recommended heights, and none of them matched what actually works in a real closet.
For a single-tier installation, the center of the rod wants to sit between 60 and 66 inches from the floor. That's the sweet spot where an average adult can reach the rod without stooping and where the longest hanging garment (think floor-length wool coat, bridesmaid dress you swear you'll wear again) still clears the floor with an inch or two to spare. Go higher than 66 inches and you'll be standing on tiptoes every morning. Go below 60 and your coats become puddles on the floorboards.
For double-tier systems, the geometry changes. The upper rod goes up to 70 to 80 inches, the lower rod drops to 35 to 40 inches. That lower rod isn't for shirts — it's for pants, skirts, and folded-over jackets. If you're hanging dress shirts on the lower tier, you've installed the rack wrong.
> A clothes rack isn't a shelf. The rod has to clear the floor for the longest thing you'll ever hang on it, and that thing is always longer than you think.
One more thing the lifestyle photos never show: the distance between the two rods. If the upper rod sits at 76 inches and the lower at 40 inches, you've got 36 inches of vertical clearance — enough for a normal shirt. Drop the lower to 35 and you're now hemming your button-downs against the rod. Measure the longest garment you actually own before you commit to the dimensions, not the garment you wish you owned.
Weight Capacity and the Hardware That Holds It
This is where I lose my patience with the industry. Every rack on the market gets marketed as "heavy-duty," and almost none of them will tell you what that means in pounds. So here's the honest breakdown, in numbers you can verify with a stud finder and a kitchen scale.
| Anchor type | Working load (drywall, no stud) | When to use it |
|---|---|---|
| Standard plastic drywall anchor | ~25 lb | Never, for a clothes rack |
| Metal expansion anchor (molly bolt) | ~75 lb | Light single-rod, ≤3 garments at a time |
| Toggle bolt / strap toggle | 100–200 lb | Heavy coats, double-tier, no available stud |
| Direct into wall stud | 50–75 lb per anchor | The gold standard, full stop |
Read that table twice. The reason plastic anchors are still in the box when you open a cheap rack kit is that they cost the manufacturer about a tenth of a cent per unit and they fail in exactly the way that makes you buy another kit. Twenty-five pounds is a rack, an empty rack, with maybe a single linen shirt. The moment your partner adds three wool sweaters, you're past spec.
If you can't hit a stud — and we cover that next — a 3/4-inch black steel pipe is what I'd reach for. Half-inch pipe bends visibly under any meaningful load; one-inch pipe looks like a fire hydrant in a bedroom. Three-quarter is the right compromise. It's rigid enough not to deflect under a winter coat, slim enough to disappear visually.
> "Heavy-duty" on the box means the bracket is heavy. It doesn't mean your wall can hold it.
Structural Requirements: Stud Spacing and Plywood Backing
Studs are the spine of this operation. In North American residential construction, wall studs are spaced 16 inches center-to-center. Older homes sometimes run 24 inches, and some retrofits are weird — but 16 is the working assumption.
Find them. Don't guess. Don't trust the "knock test." A stud finder with a deep-scan mode will tell you in ten seconds, and it'll save you the half-hour of patching the wrong hole. Mark both edges of each stud with painter's tape, not a pencil line — pencil smudges into a gray ghost that misleads the next person (or you, six months later).
Here's the rule that separates a long-lasting install from a future ceiling fan: never trust a single anchor into drywall for a loaded rack. If your rod span exceeds the distance between two studs and you can't hit both ends with solid wood, the move is to install a continuous plywood backing strip first — half-inch plywood, screwed into at least two studs, then the rack mounts to the plywood. This is the difference between a rack that holds your clothes and a rack that holds your clothes while it slowly pulls the drywall off the wall.
That plywood strip is ugly. Paint it the wall color before you mount the rack, or accept that you'll see a 6-inch horizontal band behind the rod. Either way, it's there because drywall alone, even with toggle bolts, is a friction fit. Wood-on-wood is a structural connection.
Precision Layout: Depth, Clearance, and Hanger Geometry
Now the math most people skip: how far the rod sticks out from the wall, and how much clearance sits above the rod if there's a shelf.
For hangers to swing freely and for air to actually move around damp coats in summer, the center of the rod should sit 12 to 16 inches out from the back wall. Twelve is tight — it works for a narrow reach-in closet where the door doesn't open all the way. Sixteen is generous and gives you the room to slide hangers sideways without binding on the wall.
Below 12 inches, your garments will press flat against the drywall and never dry properly after a rain. Above 16 inches, you're eating floor space for no reason.
If you're mounting under a shelf, the minimum clearance between the bottom of the shelf and the top of the rod is 2 inches. That's the gap that lets you lift a hanger off the rod without the hook catching on the shelf above. Two inches is the floor. I've installed at 2.5 inches for a closet where the shelf was already locked in, and even that half-inch felt like the difference between frustration and ease.
> The rod's job is to hold clothes. The clearances around it are what decide whether you ever actually hang a coat on it, or just drape it over a chair.
One more measurement that bites people: the rod length. A standard closet rod can span about 5 feet without a center support bracket. Beyond that, even a heavy-gauge steel rod will sag under the weight of a full row of winter coats. If your run is longer than 60 inches, plan a center bracket in the middle, mounted into a stud or into the plywood backing. The bracket costs less than replacing a sagging rod and the wall anchors it pulled loose.
Tooling, Pilot Holes, and the Actual Install Sequence
The last step is the one most YouTube videos get right, but in the wrong order. The sequence matters because each step depends on the one before it being clean.
Here's the order I'd run:
- Outline the rack footprint on the wall with a pencil and a level. Long racks drift — a 4-foot level is not optional, it's the only tool that keeps both bracket flanges on the same plane.
- Confirm bracket locations hit structure — stud, plywood, or toggle bolt territory. If a flange lands between studs in a non-toggled location, stop and shift the rack.
- Mark each flange hole individually with a sharp pencil, then double-check the marks against the bracket itself before drilling. The mark is always slightly off; the check fixes it.
- Pre-drill pilot holes at the marked points. For studs, drill slightly smaller than the screw shank. For toggle bolts, drill the diameter the toggle requires — usually 5/8 inch — and don't oversize, or the toggle won't bite.
- Insert anchors, then mount the brackets loosely, then snug them down in a cross pattern so the flange seats evenly against the wall. Last bracket, last screw — that's the one that always fights you.
- Hang the rod, load test, then load for real. A loaded test at half your expected weight (a stack of books in a bag hung from the rod) tells you in ten minutes whether something is going to fail in ten months.
Tools that aren't optional: a 4-foot level, a stud finder with deep scan, a drill with a bit set matched to your anchors, a tape measure, and a pencil. Tools that are nice but not required: a laser level (helpful for double-tier installs where both rods need to be parallel), a second person to hold the rod while you mark the far bracket.
The Reality Check Before You Buy
Before you click add-to-cart or hand over your card at the big-box store, walk through these. They're not a checklist from a manufacturer; they're the friction points I've seen fail in real installs.
- What's actually behind the drywall at the proposed bracket locations? Studs, wires, plumbing, duct — find out before you drill. A $40 stud finder beats a $400 electrician.
- What's the loaded weight of what you'll hang? Three linen shirts and a single wool overcoat are not the same problem. Numbers differ by a factor of five.
- Can the bracket flanges both hit structure, or do you need a plywood backer? If the answer is "I hope so," the answer is no.
- Is the rod span under 5 feet, or do you need a center support? Sag is not a question of if, only when.
- Will the clearances actually let you use the rack? Twelve inches of depth and 2 inches of shelf clearance aren't suggestions — they're the difference between a rack you use and a rack you ignore.
A wall-mounted garment rack is one of the simplest pieces of furniture you can own, which is exactly why it's also one of the easiest to install badly. The hardware is cheap, the instructions are generic, and the marketing photos never show what happens six months later when the drywall gives up. Spend the hour on prep. The other eleven months will thank you.