Retail end cap displays: a merchandising roadmap
Moving a product from a standard shelf to a retail end cap display produces an average sales lift of 27% and can increase customer exposure by as much as 93%. Those figures describe placement performance, not fixture performance.
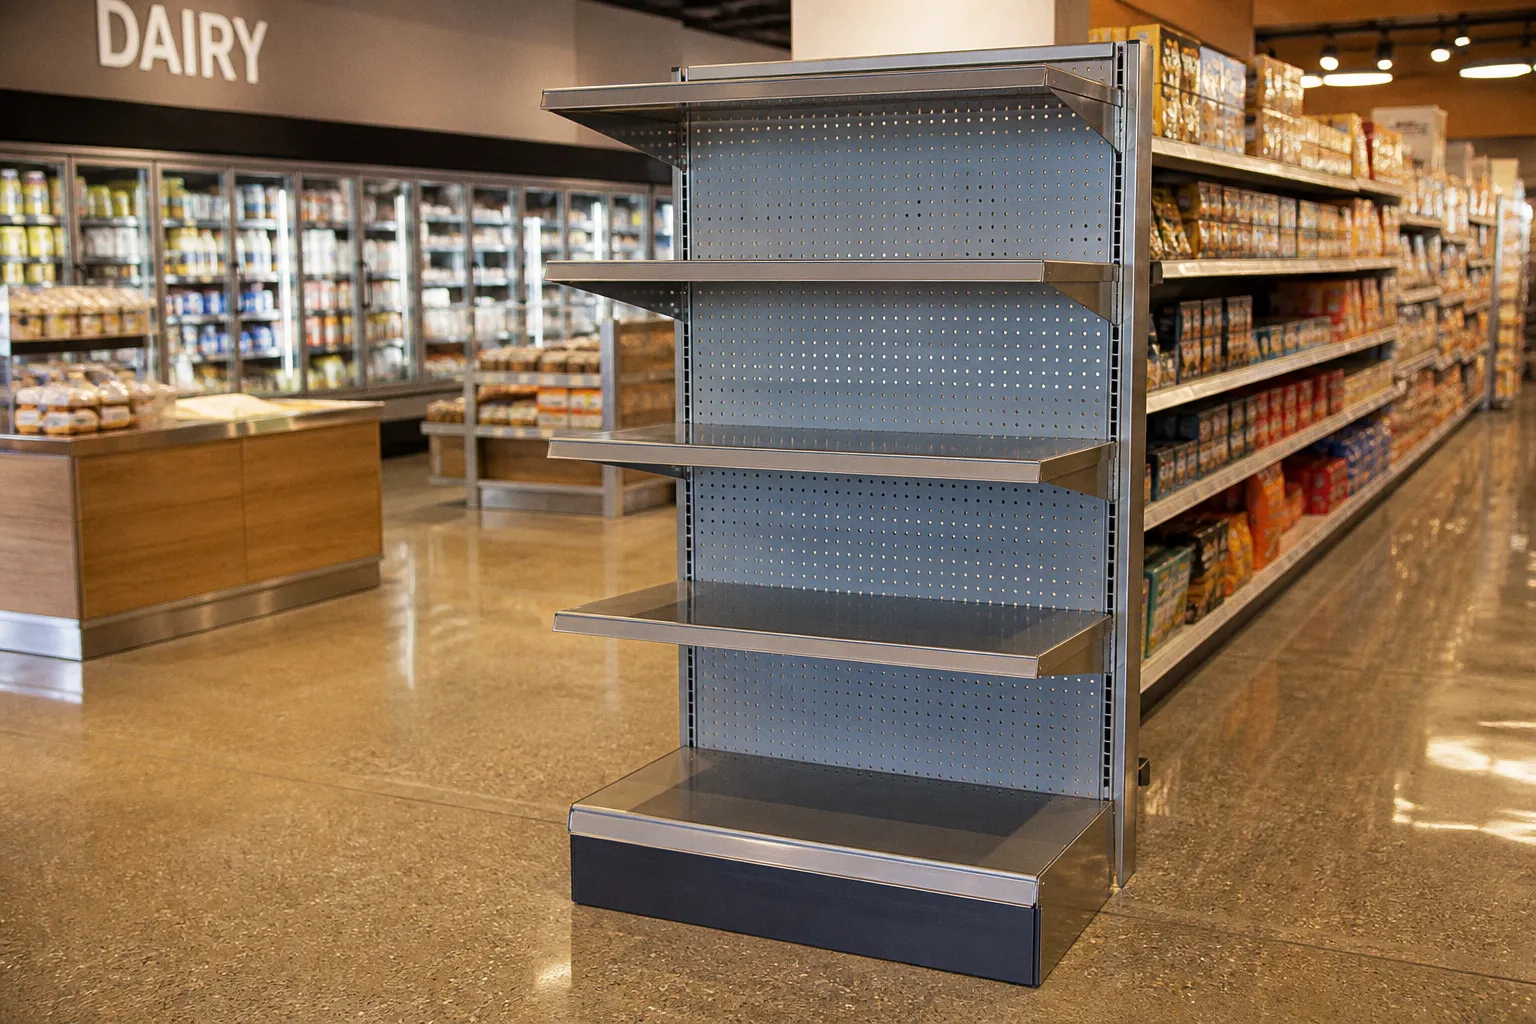
The merchandise may receive more attention, but the display still fails if its width conflicts with the gondola uprights, its center of gravity projects into the aisle, or its temporary insert buckles under load.
Retail end cap display planning is therefore a combined merchandising and engineering task. The commercial objective is visibility. The mechanical objective is controlled load transfer through the shelf, upright, base, and floor. The chemical objective is maintaining coating adhesion and corrosion resistance under cleaning agents, humidity, abrasion, and seasonal handling.
An end cap is not simply the last shelf in an aisle. It is a high-traffic load-bearing assembly installed at a dimensional boundary.
The physics of placement: front versus rear end caps
End caps operate in two different positions within the customer path.
A front end cap is encountered near the entrance or the beginning of the shopping route. It receives immediate exposure. A rear end cap is positioned farther into the store and functions as a directional visual marker. It can pull customers toward the main aisle and expose them to the entire category before they reach the promoted product.
The distinction affects the commercial result. Average total brand sales uplift has been measured at approximately 346% for front end caps and 416% for rear end caps. The rear position can generate greater total brand impact because it influences aisle entry and secondary product exposure, not only the sale of the item physically placed on the display.
This changes the way a gondola end cap setup should be evaluated. The correct question is not only whether the display sells the featured SKU. It is whether the position alters traffic flow, category penetration, and the number of products exposed during the customer journey.
Front end caps
Front end caps are appropriate when the product requires immediate recognition or when the offer is legible without category explanation. Typical applications include:
- high-margin impulse products;
- seasonal launch items;
- limited-time price reductions;
- products with strong package recognition;
- promotional display stands end caps located near entrances or checkout routes.
The limitation is traffic compression. A front end cap competes with entrance information, baskets, carts, promotional signage, and the first gondola run. A tall structure can block sightlines. A deep structure can constrict the aisle. A visually dense assortment can dilute the primary offer before the shopper reaches the shelf.
Rear end caps
Rear end caps are more effective when the objective is category movement rather than isolated product exposure. They act as signs visible from the approach path. The customer sees the offer, enters the aisle, and encounters adjacent items that may carry a higher total margin or support the promoted product.
This position is less tolerant of weak identification. The display must communicate from a greater distance. The header, price panel, and primary package face require sufficient contrast and clear geometry. The structure does not need decorative complexity. It needs a stable visual plane and a predictable product stack.
A rear end cap sells the aisle before it sells the item. Its value is measured in redirected traffic, not only in units removed from the display.
The engineering consequences are direct. A rear end cap may receive more lateral contact from carts and passing customers because it occupies a route junction. A front end cap may receive more handling during store entry, replenishment, and promotional changeover. Both positions require protection against impact at the base, but the exposure pattern differs.
Technical specifications and fixture constraints
Standard US retail fixtures measure 36 inches, or 91.4 cm, externally. That dimension includes the steel uprights and the structural envelope of the gondola. Temporary corrugated inserts must be limited to a maximum width of 34.5 inches, or 87.6 cm. The difference is not an aesthetic tolerance. It prevents the insert from pressing against the uprights, buckling during installation, and interfering with safe aisle navigation.
A corrugated panel manufactured to the full nominal width of the metal fixture can fail before it carries merchandise. Compression at the edges introduces a local fold. The fold changes the load path. Once the face panel loses its plane, shelves no longer seat consistently, price rails distort, and the assembly begins to transfer load into components not designed for it.
Typical supermarket end cap shelving uses the following dimensional range:
| Parameter | Common range or limit | Engineering consequence |
|---|---|---|
| Overall height | 48–84 in | Determines reach, sightline obstruction, and overturning moment |
| Overall depth | 12–24 in | Controls aisle intrusion and front-to-back stability |
| Structural width | 36 in external fixture width | Requires temporary inserts to remain within 34.5 in |
| Checkout end cap height | 48–60 in | Preserves sightlines in narrow, high-traffic areas |
| Product assortment | 3–5 SKUs | Limits visual density and replenishment complexity |
| Rotation cadence | 7–14 days | Reduces stale presentation and limits repeated handling cycles |
The dimensions are not interchangeable. Increasing height increases the overturning moment generated by a lateral force. Increasing depth adds usable product volume but also increases aisle intrusion and the horizontal distance from the load center to the base. Increasing the number of shelves can improve capacity while reducing access and increasing the probability of uneven loading.
Load path and center of gravity
The vertical load path is straightforward:
1. Product weight transfers into the shelf deck or wire shelf.
2. The shelf brackets transfer force into the upright slots.
3. The uprights transfer compression and bending into the base and foot structure.
4. The base transfers the resultant force into the floor.
5. Any lateral force must be resisted by the base geometry, rear connection, adjacent gondola, or approved anchoring system.
Failure occurs when the actual load path differs from the intended one. Common causes include shelf brackets not fully engaged, incompatible shelf depths, damaged slots, unsupported cantilevered cartons, and temporary panels forced between steel members.
The nominal weight of the merchandise is only one variable. The relevant condition is the combination of distributed load, point load, eccentric load, and impact load. A case of bottled product placed at the front edge of a shelf creates a different bending condition from the same case centered against the rear deck. A stack of light cartons can still become unstable if the center of gravity rises above the restraint line.
For heavy merchandise, use the manufacturer’s rated shelf capacity in lbs per shelf or lbs per square foot, then apply the actual loading pattern. Do not substitute total rack capacity for shelf capacity. Do not treat a capacity label as permission to concentrate the full rated load at one point.
A shelf rated for a distributed load can experience local deformation under a concentrated carton or a narrow display tray. The steel gauge, shelf span, return flange, weld pattern, and bracket geometry determine resistance. Two shelves with identical external dimensions can have materially different deflection limits.
Materials and surface degradation
Retail display fixtures commonly use cold-formed steel with a zinc-plated or painted finish. The surface system controls corrosion resistance. The substrate controls structural strength. These functions should not be confused.
Zinc plating provides sacrificial corrosion protection at exposed steel areas. It is useful where the fixture experiences handling abrasion, intermittent humidity, or light cleaning. It does not make the assembly immune to chemical attack. Chloride-rich cleaners, standing water, damaged edges, and repeated abrasion can consume the protective layer.
Powder coating based on an epoxy-polyester system provides a thicker decorative and protective film. The coating can resist ordinary retail abrasion and cleaning when properly cured. It can also conceal early corrosion at a scratch or seam until the coating begins to lift. The critical inspection points are cut edges, weld zones, fastener interfaces, shelf lips, and the lower section of uprights where water and cleaning solution accumulate.
A merchandising fixture placed near refrigerated cases, produce areas, entrances, or washdown zones experiences a different corrosion environment from one installed in a dry apparel department. The correct specification follows the environment, not the product category.
For a corrosive environment, the selection sequence should be:
- establish exposure to water, condensation, salt, disinfectant, and acidic food residue;
- identify whether zinc-plated steel is sufficient for intermittent exposure;
- specify an epoxy-polyester powder system where a continuous film is required;
- protect cut edges and weld areas from coating discontinuity;
- prevent water retention at base plates and closed sections;
- inspect coating damage after each promotional changeover.
The fixture should not be selected by finish color. Color is a surface variable. Corrosion resistance depends on substrate preparation, coating thickness, cure, edge coverage, and the chemical load imposed during service.
Optimizing assortment for high-conversion merchandising
The most reliable end caps carry three to five SKUs. This is not a universal law of retail. It is a practical limit for maintaining product identification, price clarity, and replenishment control.
Below three SKUs, the display may lack volume or fail to communicate a complete offer. Above five, the end cap often becomes a compressed shelf set. The customer must process several packages, price points, sizes, and claims from one approach angle. The fixture remains structurally stable, but the merchandising system loses directional clarity.
SKU count should be calculated against physical face width, shelf depth, package stability, and expected replenishment frequency. A five-SKU assortment is not efficient if each SKU requires a separate price rail, divider, safety gap, and promotional message. The usable width is less than the nominal 36-inch fixture width once uprights, side panels, dividers, and product overhang restrictions are included.
A practical assortment should assign each position a defined function:
1. Primary traffic item. The product that establishes the reason for stopping. It should occupy the strongest visual and access position.
2. Margin item. A higher-margin SKU that benefits from the same traffic but does not require the primary product’s volume.
3. Attachment item. A product used with or consumed alongside the primary item.
4. Price-entry item. A lower-cost unit that reduces the barrier to trial.
5. Variant or premium item. Used only when the distinction is obvious at the approach distance.
This is not a request to fill every shelf. Empty space can preserve access, protect packaging, and maintain a lower center of gravity. Overfilling creates several physical problems. Product fronts are pushed into the aisle. Cartons lean against signage. Replenishment workers place stock on top of existing stock because the shelf appears full. The resulting load becomes eccentric and unstable.
The display should also be tested in the condition in which it will remain on the floor. A planogram that works with sealed cartons may fail after several units are removed. Partially depleted cases move the center of gravity forward. Loose packages can slide when the shelf has a smooth powder-coated surface. Wire shelves reduce contact area and can require shelf lips, dividers, or anti-slip components.
Checkout dimensions are a separate constraint
Checkout end caps should generally remain within the 48–60 inch height range. The restriction protects sightlines and keeps impulse items within reach in narrow, high-traffic lanes. A taller display may increase vertical capacity while obstructing cashier visibility, queue monitoring, and customer approach.
The shallow depth range of 12–24 inches is also significant. A checkout display that projects into the path can create a collision point even when the aisle technically remains open. The relevant measurement is the clear movement envelope after carts, queue rails, baskets, and customer turning radius are included.
For small impulse products, a lower fixture with controlled facings is usually more reliable than a tall rack carrying mixed cartons. The load is lower, the center of gravity is easier to control, and the product can be replenished without reaching over the customer interface.
Strategic seasonal calendars and rotation cadence
Seasonal end caps require lead time because the fixture is only the final component. Assortment decisions, packaging, price communication, inventory allocation, store instructions, and installation labor must be synchronized before the display reaches the floor.
Planning should begin two to three months before the target season. The launch window is not the first day of the holiday period. It is the date by which the display must be fully stocked, signed, stable, and repeatable across stores.
The following calendar provides a practical deployment sequence:
| Promotion or category | Floor timing | Reported sales effect | Primary planning risk |
|---|---|---|---|
| Christmas and holiday | First week of November | 35–50% lift | Late installation and damaged seasonal inserts |
| Valentine’s Day | Mid-January | 25–40% lift | Short selling window and excess residual stock |
| Spring and gardening | March | Category-dependent | Moisture exposure and heavy bagged products |
| Outdoor entertaining | May | Category-dependent | Increased carton depth and unstable mixed loads |
| Travel and beach | June | Category-dependent | Bulky packaging and low shelf density |
| Back to school | Third week of July | Category-dependent | High SKU count and rapid replenishment |
| Super Bowl-related promotion | Timed before the event | 20–30% lift | Compressed changeover period |
The reported Christmas sales lift of 35–50% and the 20–30% range associated with Super Bowl displays describe promotional performance, not a guaranteed result for every store or category. Inventory availability, price position, location, execution quality, and store traffic remain controlling variables.
Rotation every 7–14 days helps maintain conversion by preventing the display from becoming background equipment. The cadence also creates an engineering inspection point. Each changeover should expose damage that may be hidden by product:
- bent shelf lips;
- cracked corrugated inserts;
- loosened brackets;
- missing shelf clips;
- coating loss at contact points;
- base deformation;
- leaning uprights;
- torn or overloaded sign headers.
A display that is moved frequently accumulates handling damage faster than a permanent gondola run. Promotional speed does not justify reduced inspection. It increases the requirement for a repeatable inspection process.
Mitigating execution failures at store level
Average retailer execution rates for correctly setting up end cap displays without third-party merchandising assistance are approximately 40%. The remaining installations are not necessarily catastrophic. Many are dimensionally incorrect, incompletely stocked, poorly signed, or assembled with the wrong product orientation. Each defect reduces the commercial return. Some defects also create a structural hazard.
Execution failure usually begins with a plan that describes the intended display but not the installation tolerances. Store-level personnel then improvise around the fixture. A cardboard insert is trimmed at the wrong edge. A shelf is installed one slot too high. A header is attached without checking the rear clearance. Product is loaded beyond the shelf lip because the specified facing count does not fit the actual package dimensions.
A reliable implementation package should define:
- external fixture width and the maximum insert width;
- shelf elevations measured from the finished floor;
- maximum product depth and allowed front overhang;
- rated capacity for every loaded shelf;
- the location of dividers, shelf lips, and anti-slip components;
- the permitted height of the header;
- the aisle clearance after installation;
- the sequence for loading heavy products;
- the rejection criteria for damaged or deformed parts;
- photographic standards for the completed display.
The 34.5-inch limit for temporary corrugated inserts must appear as a dimensional requirement, not as a general instruction to “fit the insert inside the rack.” The difference is operational. A general instruction is interpreted locally. A measured limit can be checked with a tape measure before the insert reaches the sales floor.
Correct loading sequence
Load the heaviest product at the lowest practical shelf position. Keep dense cases toward the rear of the shelf unless the shelf design and product access requirement specify otherwise. Maintain the manufacturer’s shelf capacity and do not transfer unused capacity from an upper shelf to a lower shelf without a documented rating.
Install dividers before loading narrow packages. Dividers prevent lateral migration and reduce the probability that a customer pulls one unit and causes the remaining units to topple. For unstable cylindrical or flexible packaging, use a shelf lip or containment component. Do not rely on the friction of powder coating to hold a tall package stack.
The header and temporary graphic elements should be installed after the structural components have been checked. A graphic can hide a leaning upright or cover a damaged connection. It must not be treated as a structural brace unless it has been specifically engineered and rated for that purpose.
Inspection after installation
The first inspection occurs before loading. The second occurs after loading. The third occurs after the first customer interaction or replenishment cycle. These inspections identify different failure modes.
Before loading, check:
- upright plumb and base contact;
- bracket engagement in the upright slots;
- shelf seating and level;
- width of the insert against the 34.5-inch maximum;
- clear aisle dimension;
- absence of sharp edges and exposed damaged steel.
After loading, check:
- shelf deflection under the actual distributed load;
- forward projection of cartons and packages;
- stability of the top tier;
- condition of dividers and shelf lips;
- visibility of the price and product identification;
- whether replenishment can occur without removing the structural elements.
After customer and staff use, check:
- shifted products;
- impact marks at the base;
- loose brackets;
- bent sign hardware;
- coating damage;
- increased lean or floor movement.
A fixture that passes an empty inspection can fail under product load. A fixture that passes a loaded inspection can fail after repeated impact. The inspection sequence must reflect the load history.
End cap execution is a controlled installation problem. If the dimensions, loading sequence, and rejection criteria are not written down, the store will supply its own engineering standard.
Selecting the correct end cap system
The correct retail merchandising fixture depends on mass, geometry, environment, and changeover frequency. Permanent supermarket end cap shelving is suitable for repeated use, standard gondola integration, and predictable product dimensions. Temporary corrugated systems are suitable where campaign duration, graphic replacement, and low structural demand justify a lighter assembly. Wire components are useful for ventilated or irregular products but require control of small-package stability and point loading.
The selection should follow a rule-based sequence:
- Use a steel gondola end cap when the display will carry repeated loads, dense cartons, or products with high replenishment frequency.
- Use a temporary insert only when its width remains below the structural fixture envelope and its shelves are independently capable of carrying the specified product load.
- Use a checkout-height unit at 48–60 inches where sightlines and customer approach are constrained.
- Use a depth of 12–24 inches only after confirming the remaining clear aisle and cart path.
- Limit the assortment to three to five SKUs unless a documented planogram proves that additional facings remain legible and stable.
- Place heavy merchandise low and toward the rear of the shelf.
- Specify zinc-plated steel for moderate exposure and an epoxy-polyester coating system where abrasion and moisture require a continuous protective film.
- Reject any component with bent uprights, damaged slots, incomplete welds, compromised coating, or uncontrolled movement at the base.
Retail end cap display planning should finish with a measurable acceptance standard. Sales lift cannot compensate for a fixture that obstructs the aisle, exceeds its shelf rating, or requires store personnel to modify structural components during installation.
The definitive recommendation is simple. For light, short-duration campaigns in a dry environment, use a dimensionally controlled temporary insert inside a rated gondola frame. For dense products, repeated rotations, impact-prone locations, or humid and chemically active environments, specify a steel end cap with verified shelf ratings, protected edges, and a coating system matched to exposure. Treat the display as a load-bearing structure first and a merchandising surface second. That order prevents most failures before they reach the sales floor.