Supermarket Shelving: Pre-Installation Checklist
Most supermarket shelving failures begin before the first upright is unpacked. Not because somebody forgot a bolt, but because the layout was treated like a sketch instead of a physical system: an…
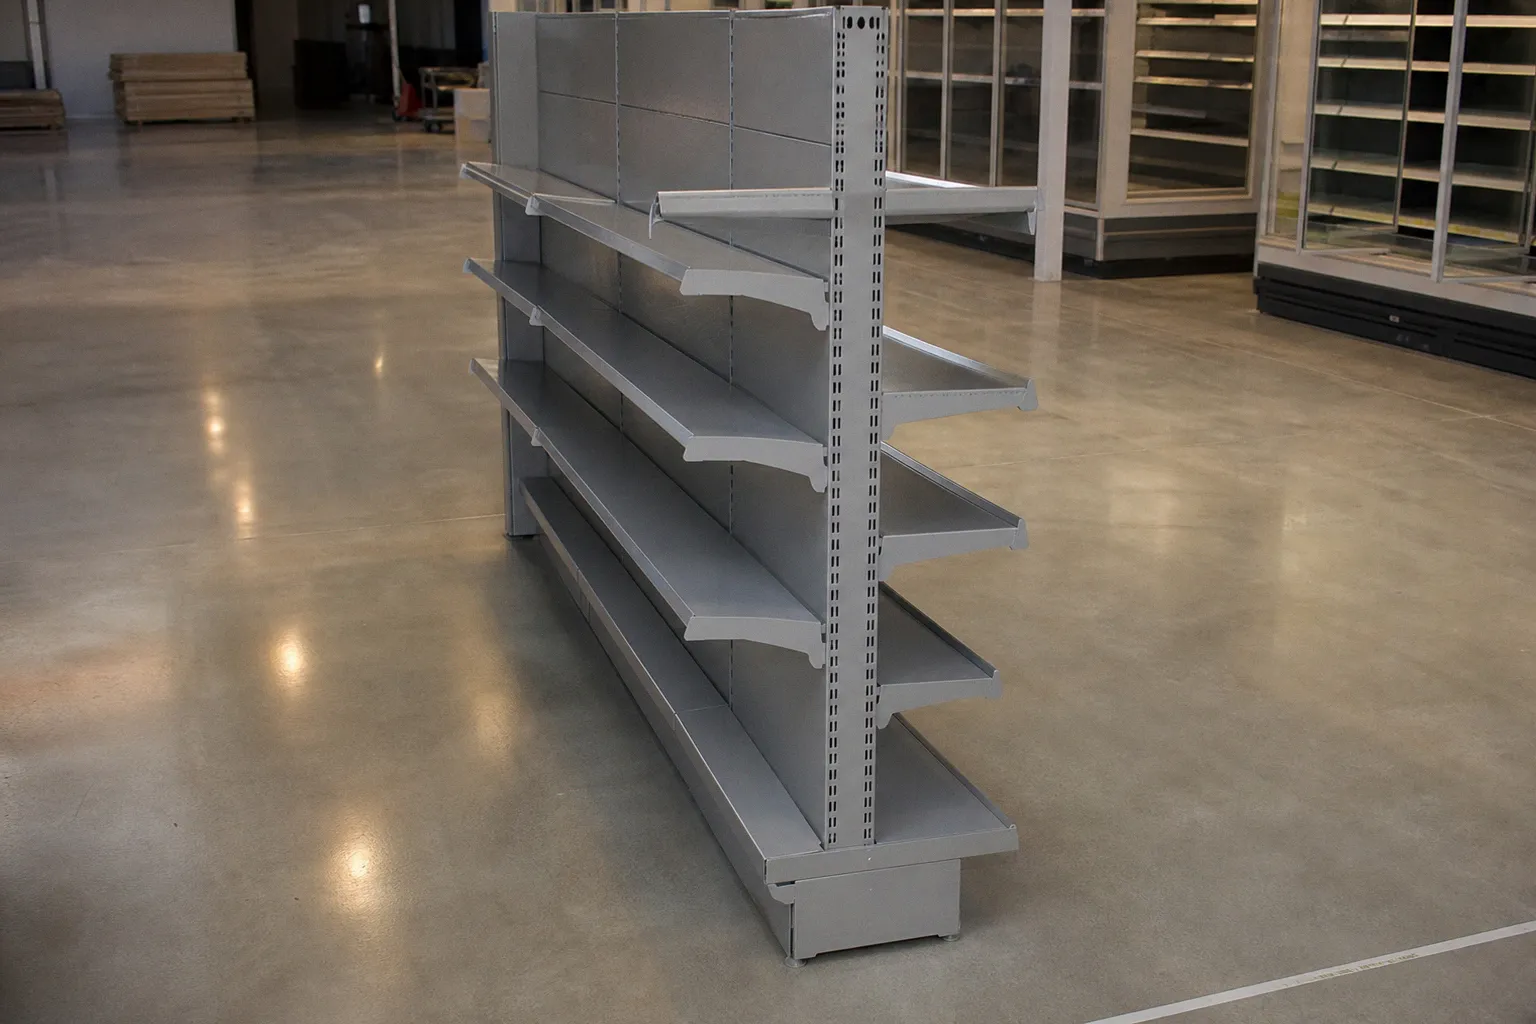
Most supermarket shelving failures begin before the first upright is unpacked. Not because somebody forgot a bolt, but because the layout was treated like a sketch instead of a physical system: an aisle narrows around a column, a kickplate lands proud of the line, a wall run is left freestanding, or a shelf gets loaded from the front because that is where the fast-moving stock happens to fit.
Then comes the familiar retail magic trick: the fixture is technically installed, but the store is harder to shop, harder to clean, and one accidental bump away from an expensive argument.
I have installed enough gondola runs to know that “modular” does not mean “forgiving.” Supermarket shelving is modular after the floor, clearance, loading pattern, access routes, and anchoring plan have been made to cooperate. Until then, it is a pile of steel parts with ambition.
This supermarket shelving pre-installation checklist is the route I use before assembly starts—not a glossy vendor handout, but the practical work that prevents rework once the shelves are full of product.
Map the Floor Before You Map the Merchandise
Retail store shelving planning usually starts with a fixture count. That is backwards. Start with the floor: its usable dimensions, its level changes, its columns, cooler doors, electrical points, emergency paths, and places where people actually need to turn.
A gondola line that looks excellent in a plan view can become a nuisance once shopping trolleys, restocking carts, baskets, and actual human shoulders enter the equation. Every row consumes more than its own footprint. It needs approach space, passing space, cleaning access, and clearance for stock handling.
For supermarket aisles, I work from the operating condition rather than the theoretical minimum:
| Store condition | Practical aisle dimension | What it realistically supports |
|---|---|---|
| Small quick mart, light traffic | 900 mm minimum | One shopper browsing with limited passing room |
| Standard supermarket aisle | 1,200 mm | Two trolleys can pass, though not elegantly during peak traffic |
| High-traffic supermarket aisle | 1,500 mm | Better trolley passing, restocking tolerance, and less shoulder-checking |
| Promotional endcap zone | More than the adjacent aisle where possible | Customers stopping to browse without blocking through traffic |
That 900 mm figure is a minimum for quick marts, not an invitation to make every aisle 900 mm. In a full supermarket, 1,200 to 1,500 mm gives the floor a chance to function during the hours when it actually matters. The difference is not cosmetic. It determines whether customers can pause at a shelf without creating a minor traffic jam behind them.
Put lines on the floor, not just dimensions on paper
Before gondola shelving assembly prep, snap chalk lines for every run. I mean every run: wall sections, center gondolas, promo islands, and endcaps. A tape measure alone is too easy to drift with. By the time the third bay is standing, a small error becomes a crooked aisle with no polite way to fix it.
Use chalk lines to establish:
- The front face of each gondola run, so aisles remain consistent from one end to the other.
- The centerline of long double-sided runs, especially where uprights must align across multiple bays.
- Endcap positions, which are often installed by eye and therefore end up wandering into circulation space.
- Reference points around fixed obstructions: columns, refrigeration cases, electrical panels, fire equipment, and doors.
- The recess for base trim and kickplates. A 1 5/8-inch recess needs to be allowed for kickplates; ignore it and the fixture will intrude into the aisle after you thought the line was final.
Do not measure only wall-to-wall. Measure wall-to-fixture, fixture-to-fixture, and fixture-to-obstruction. A wall may be straight while the floor is not square. Buildings enjoy this joke far more than installers do.
A gondola does not occupy only its footprint. It occupies the clearance people need to shop, stock, clean, and escape the aisle without apologizing.
Check floor level where the uprights will actually stand
“Level floor” is one of those phrases that gets used casually right up until the base legs start compensating for it. Check the floor along the full length of each proposed shelving run, not at one optimistic point near the entrance.
A small variation can be corrected with leveling legs. A persistent slope, a dip at one bay, or a damaged slab needs to be identified before installation. If you assemble first and diagnose later, you end up shimming around a problem that should have changed the layout or triggered floor work.
I look for three things:
1. Local dips under individual bases. These can leave one upright carrying load differently from the next, creating a run that appears straight but behaves badly under weight.
2. Long slopes across an aisle. They affect fixture leveling, trolley behavior, and the apparent alignment of shelf fronts.
3. Transitions at repaired concrete, tile edges, or drain areas. These are where base brackets get unsupported, kickplates fit poorly, and wheel traffic starts finding weaknesses.
Keep floor cleaning and material-handling routes in mind as well. Closed base fronts are not decoration. They protect base brackets from impacts by cleaning equipment and stock-handling gear. An exposed bracket at floor level is a beautifully engineered invitation for a mop machine or cart wheel to do damage.
Treat Anchoring as Structure, Not Optional Hardware
The most misleading phrase in commercial shelving installation requirements is “freestanding.” People hear it and assume the fixture does not need attachment. What it actually means is that the fixture has to manage its own stability—and that raises the stakes.
Wall shelving sections need anchoring when the height-to-depth ratio exceeds 6:1. That ratio is a better guide than a casual height rule because depth changes the stability equation. A tall, shallow section has less forgiveness than a deeper one, even if both happen to be called “wall shelving.”
The other rule is simpler: a free-standing wall section—not backed against a building wall or another supporting structure—must have its base brackets anchored regardless of the height-to-leveler spacing ratio. There is no clever workaround involving hope, a heavier-looking base, or the claim that “nothing heavy will go on it.” Stores change assortment. Staff rearrange shelves. Somebody eventually places bulk detergent on the wrong level.
Verify the conditions before choosing anchors
The anchor plan has to match the actual floor and the local code environment. Exact seismic and building requirements vary by municipality and jurisdiction, so this is not a place for generic internet certainty. Confirm the applicable local requirements and make sure the installer understands the fixture system being used.
Before hardware is ordered, identify:
- Substrate type: concrete slab, structural wood, raised floor, tile over concrete, or another assembly. Anchors are not universal just because the hole diameter happens to match.
- Slab condition: cracks, patches, voids, expansion joints, and deteriorated areas all affect where an anchor can be placed.
- Fixture configuration: wall run, double-sided gondola, endcap, back-to-back installation, or a freestanding section.
- Height and depth: required for the 6:1 stability assessment and for a sober discussion about loading.
- Nearby services: embedded electrical conduit, plumbing, radiant heating, and floor boxes are all worth locating before drilling. Surprise infrastructure is rarely a productive use of an afternoon.
- Impact exposure: areas near receiving doors, janitorial routes, pallet movement, and trolley storage need more protection from collisions.
Do not assume that a shelving system’s name tells you its anchoring needs. “Gondola,” “wall unit,” and “island” describe a retail format, not a universal structural condition. Upright gauge, base geometry, bay width, shelf depth, and loading all change the conversation.
Plan the sequence, not merely the final picture
Anchoring works best when it is part of the installation sequence. Level and align the run first according to the fixture instructions, verify the overall geometry, then anchor where the system and site conditions require it. Drilling into a run that has not been properly aligned is how you lock a crooked mistake into the slab.
This is also the point to decide whether the store needs protection hardware. End-of-run guards, base protection, and sensible cart routes are cheaper than repairing bent base brackets after opening week. Retail fixtures live in a world of wheels. Pretending otherwise is a charming but expensive fantasy.
Assemble the Right Tools Before the Crew Arrives
A supermarket rack setup checklist should include tools because installation delays usually come from missing mundane things, not missing spectacular ones. Nobody loses half a day because they forgot a crane. They lose it because the crew has no proper wrench for leveling legs, no chalk line, or one carpenter’s level being passed around like a ceremonial object.
For a standard gondola shelving installation, prepare:
- A leveling-leg wrench or a 7/8-inch open-end wrench.
- Rubber mallet for seating components without making every surface look like it lost a fight.
- Hammer, used sparingly and only where the system calls for it.
- Carpenter’s level.
- Measuring tape.
- Standard screwdriver.
- Chalk line.
- Dry line or string for checking long-run alignment.
- Marking tools, spare chalk, and a cleaning method for layout marks that are no longer needed.
- Appropriate drill, bits, anchors, and dust-control equipment if anchoring is part of the job.
That is the base kit. The actual scope may call for more: a laser level for long layouts, torque-control equipment where specified, floor scanning, lift access for tall wall runs, or protection for finished flooring. But the listed basics should be on site before delivery day—not somewhere in a technician’s van that is “ten minutes away.”
Stage components by run, not by carton label
Factory packaging is organized for shipping. Your floor needs to be organized for assembly. Those are different priorities.
Stage bases, uprights, backs, brackets, shelves, shelf clips, base fronts, and end components by the run where they will be installed. Keep left- and right-hand pieces identified. Separate special parts for endcaps and wall returns. Count hardware before the team starts distributing it across the store.
I have watched crews open every carton in a delivery, scatter parts across the sales floor, and then spend the afternoon looking for six brackets that were sitting under a stack of back panels. This is not a supply-chain mystery. It is bad staging.
A practical sequence looks like this:
1. Confirm the delivered bill of materials against the layout and fixture schedule.
2. Inspect uprights, bases, brackets, and shelves for bends, damaged welds, missing tabs, or shipping deformation.
3. Mark each run on the floor and stage only the components needed nearby.
4. Install and level the base-and-upright structure before introducing shelves.
5. Use string or a long reference line to verify that the complete run stays true.
6. Add backs, brackets, shelves, base fronts, and end components in the system’s intended order.
7. Recheck level and alignment before loading merchandise.
The temptation is to install one complete bay as a “test,” then move on. That can be useful, but do not let it become the entire method. Long shelving runs must be checked as runs. A row can have individually level bays and still look like it was planned by a distracted accordion player.
If the fixture needs persuasion with a hammer at every joint, stop calling it assembly. You are diagnosing a mismatch, a bent part, or a layout error.
Configure Shelves for the Load Pattern You Will Actually Create
Shelf capacity is not a single number printed on a catalog page and then forgotten. It depends on the specific shelving system, including upright gauge, bracket pairing, shelf depth, width, and how product is distributed across the deck.
The most common real-world mistake is loading a shelf as though product weight were uniform when the merchandise is concentrated at the front. This happens constantly with deep shelves: staff pull product forward to improve the face, backstock gets thin, and the shelf becomes front-loaded.
For the relevant uniform-load rating, capacity must be reduced by 30% when only the front half of the shelf or deck is loaded. If the shelf or deck is less than 36 inches wide, the reduction is 50%. That is not a minor adjustment; it can change which products belong on a shelf and which belong lower down in the bay.
| Loading condition | Planning adjustment | What it means on the sales floor |
|---|---|---|
| Product spread across the full shelf | Use the system’s applicable uniform-load rating | Suitable only when loading is genuinely distributed |
| Product concentrated on the front half | Reduce applicable capacity by 30% | Forward-faced bulky items need a more conservative shelf plan |
| Shelf or deck under 36 inches wide | Reduce applicable capacity by 50% | Narrow shelves are not simply smaller versions of wide shelves |
| Unknown product mix or frequent resets | Plan below the maximum and verify system documentation | Flexibility needs margin, not wishful thinking |
Do not turn these reductions into a fake universal capacity chart. Actual load limits vary from one shelving configuration to another. The right move is to obtain the applicable capacity data for the exact upright, bracket, shelf, and depth combination in the installation—not borrow numbers from an unrelated bay because it looks broadly similar.
Use 25 mm adjustment increments intelligently
Many supermarket shelving systems allow tool-free shelf-height adjustment in 25 mm increments. That is one of the useful features of commercial shelving, provided it is used as a planning tool rather than an excuse to endlessly fiddle with displays.
For high-margin products, the commonly referenced “Golden Zone” runs roughly from 1.2 m to 1.6 m from the floor. That range can be productive visual territory, but I would not treat it as a commandment carved into a gondola upright. Product size, shopper profile, category behavior, pack weight, and replenishment rhythm all matter.
Use the 25 mm increments to solve real conflicts:
- Raise a shelf enough that larger packs can be fronted without being forced sideways.
- Lower a shelf when products are being pushed to the front and leaving an awkward, inaccessible void behind.
- Create a stable base level for dense or bulky goods rather than suspending weight at a convenient-looking height.
- Maintain a readable sightline across gondolas where low-profile categories belong in a more open layout.
- Reserve prime eye-level space for products that benefit from it, rather than allowing packaging dimensions to make the decision by accident.
Verticality is valuable in supermarket shelving. But there is a point where extracting one more shelf from a bay makes the whole fixture harder to shop and harder to replenish. A shelf that requires staff to tilt products, reach behind a front row, or drag cartons through a tiny opening is not using vertical space efficiently. It is converting floor savings into labor.
Build Maintenance Access Into the Fixture Plan
The fixture is not finished when it looks good from the customer side. It is finished when staff can clean it, replenish it, alter it, and service whatever has been mounted to it.
This matters especially when retrofitting LED shelf lighting. Lighting is often treated as an add-on because the bars themselves are small. Small components can still create large friction when cable routing, shelf clearance, power access, and material compatibility were never planned.
Before fitting magnetic LED shelf-light bars, verify three basic conditions:
- The shelving is steel and magnetic. Aluminum and plastic shelving will not accept a standard magnetic bar without an adhesive or track-based mounting solution.
- There is at least 12 mm of clearance between shelves for the slim light bars and their practical placement.
- The nearest power outlet has been identified before anything is mounted. “We’ll run something later” tends to produce visible cabling, unsafe routing, or a lighting plan that quietly dies after the fixtures are installed.
Lighting should not compromise shelf adjustability. If a shelf height change means dismantling a tangle of wiring, the system has stopped being modular in the only sense that matters: it is no longer easy to adapt.
Do not block the parts that absorb daily abuse
Base fronts, kickplates, uprights, and end panels are where a shelving system meets the physical reality of the store. Carts hit them. Cleaning machines pass them. Staff lean against them while opening cartons. None of this is unusual behavior; it is the environment the fixture was bought to survive.
Make sure base fronts are installed as specified. Closed base fronts help prevent cleaning equipment and material-handling equipment from striking exposed base brackets. That protection is structural in purpose, not merely decorative.
Also inspect the layout from the stocker’s side. Can a replenishment cart enter the aisle without scraping endcaps? Can staff reach the rear of deep shelves? Is there room to change a shelf position without dismantling an adjacent promotional display? These questions are not glamorous, which is exactly why they are often missed.
The Reality Check Before You Place the Order
I do not trust a shelving plan until it survives a little pessimism. The render can look orderly; the floor may still be telling a different story. Before approving the fixture order or scheduling the install, run through this final reality check:
- The aisle dimensions are marked at their finished fixture faces, including kickplates and endcap projections—not guessed from a drawing.
- The floor has been checked across every planned run, especially near columns, repaired areas, drains, and transitions.
- A chalk-line layout exists before assembly begins, with a 1 5/8-inch kickplate recess accounted for.
- Wall sections have been assessed using the 6:1 height-to-depth rule, and every free-standing wall section has an anchoring plan.
- Anchors match the actual floor substrate and local requirements, rather than the installer’s favorite all-purpose box of hardware.
- Load planning reflects how staff will really stock the shelf, including the 30% front-half loading reduction and the 50% reduction for shelves under 36 inches wide.
- The component count is confirmed by run, so the crew is not improvising with mismatched brackets halfway through the job.
- Closed base fronts and impact-prone areas are addressed, because exposed brackets do not remain exposed and pristine for long.
- Any LED retrofit has steel, 12 mm clearance, and a power route, not just a mood board and an optimistic extension lead.
- Someone has walked the layout with a trolley, stocking cart, and cleaning route in mind. A fixture that works only when the store is empty has not been properly planned.
The best supermarket shelving installation is not the one with the most bays, the tallest wall, or the shiniest endcap. It is the one that holds its load, keeps its aisle clear, lets people work around it, and can be reconfigured without turning a routine reset into a construction project.
That is the unglamorous standard. It is also the one that keeps a retail floor from fighting you every day after opening.