Modular closet storage systems: planning checklist
A “modular” closet system, sold as a four-pack of chrome towers with “universal fit,” arrives in a box that does not care about your particular wall. I have watched — and, frankly, inflicted — more botched installations than I care to admit.
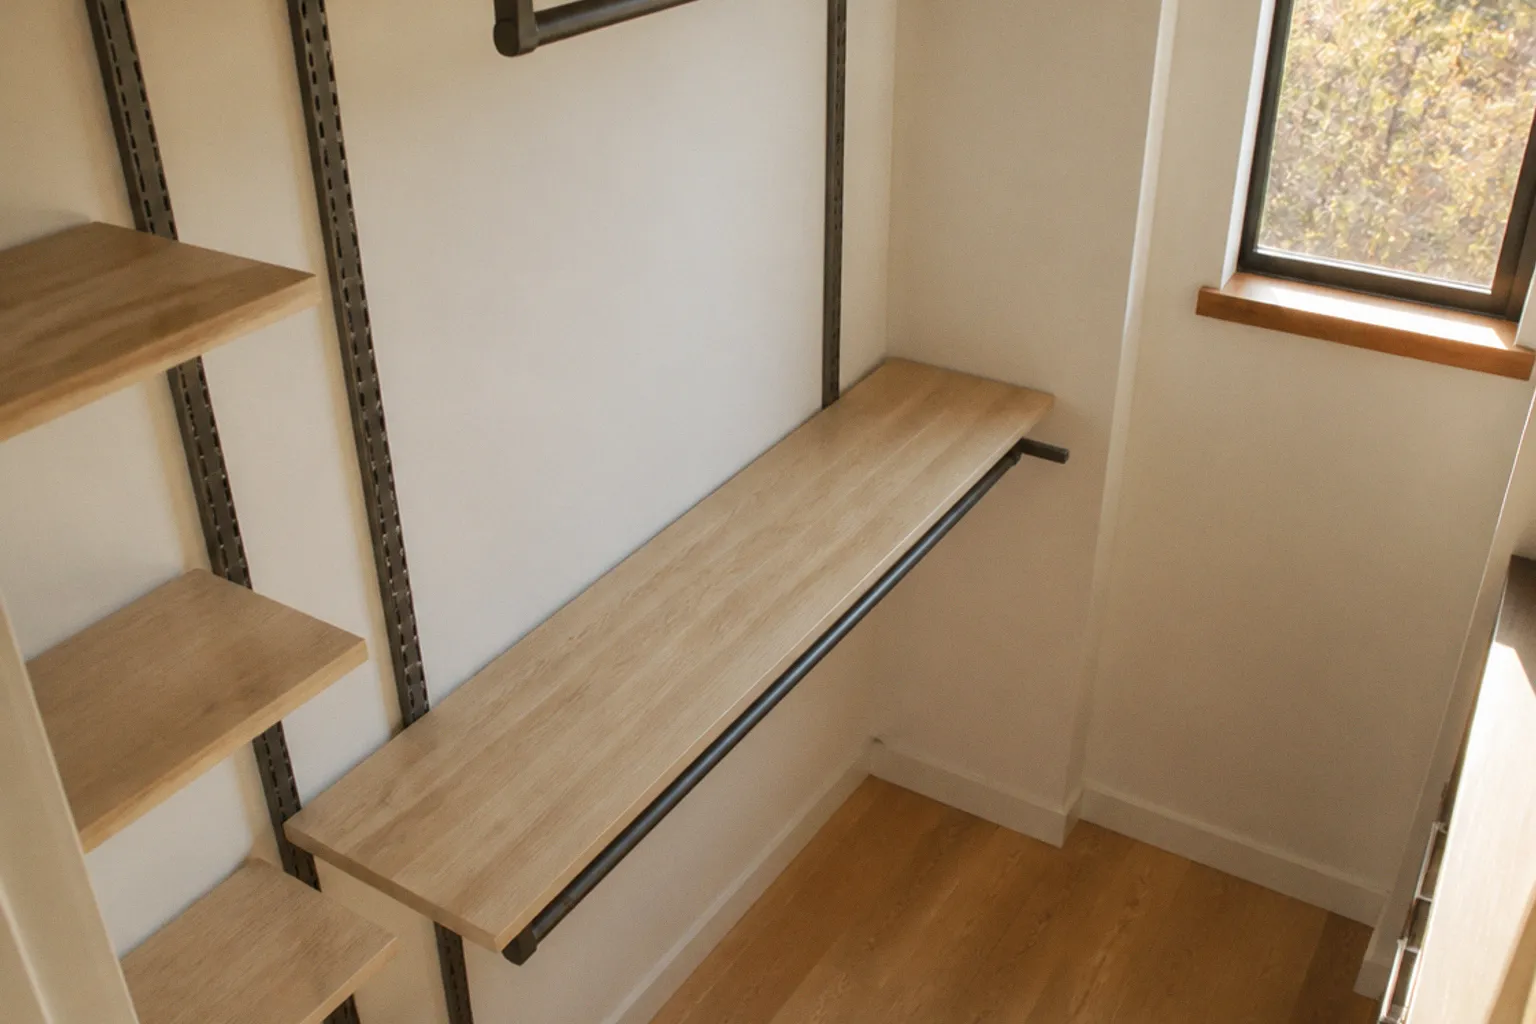
The pattern is identical every time: somebody trusts the thumbnail render, measures the room with their eyes, and discovers the hanging rod is six inches past the door swing. The fix is not a bigger kit. The fix is the planning pass you should have run before the kit shipped.
This is the checklist I run before I touch a screwdriver. It is not glamorous, it is not aspirational, and it will not turn your bedroom into an oasis. What it will do is prevent the three most common failures in residential closet retrofits: rods that crush hangers, drawers that will not clear the door, and shelving placed where only a contortionist can reach it.
A good modular closet storage system planning checklist starts with the room, not the product page. The system has to fit the wall, the garments, the door, and the person using it. The towers and shelves come after that.
1. Anchor everything to your actual depth
Depth is the first number modular closet catalogs fudge. The “fits 24-inch walls” line in the product description is not the same thing as 24 inches of usable hanging depth. It usually refers to the outer frame of the unit. By the time a standard hanger hooks onto the rod and pivots toward you, you have already lost space to the front rail of the shelf above, the rod’s own mount, and any trim or obstruction at the back of the closet. Plan for that, or plan to fight it later.
For a reach-in closet, the working depth I treat as non-negotiable is 24 inches (61 cm) from the wall to the front rail. Anything shallower starts to fight you. The industry floor for tight spaces is 20 inches (50.8 cm), and it can work — but only if every hanger is a standard adult shirt hanger and you never rotate to a bulky wooden suit hanger. Push past 20 inches and you are back to crushed sleeves, crooked shoulders, and garments that refuse to slide along the rod.
The measurement also needs to be taken in the right place. A closet can be 24 inches deep at the top and noticeably less useful at the floor because of baseboards, door casing, uneven drywall, or a heater enclosure. A modular tower that technically fits at one height may still prevent the rod from sitting where it needs to sit.
Measure wall depth at three points: top, middle, bottom. Walls bow. If the variance is more than half an inch, your “24-inch” unit is now a 23.5-inch unit, and that half inch is where the rod goes.
Do not measure only from the back wall to the opposite wall. Measure to the point that will actually limit the installation: the front edge of the tower, the front rail of the shelf, or the face of a drawer. If the unit includes vertical uprights, account for their thickness. If the closet has a sliding door, measure to the door track and to the usable opening, not merely to the finished side wall.
A quick way to think about the depth tiers:
| Closet type | Recommended depth | Absolute minimum | What you give up below the minimum |
|---|---|---|---|
| Reach-in, single hanging wall | 24 in (61 cm) | 20 in (50.8 cm) | Hanger swing, bulkier garments, dresser-style drawers |
| Reach-in, double hang | 24 in (61 cm) | 22 in (55.9 cm) | Upper-rod clearance to lower rod and easier hanger rotation |
| Walk-in, one hanging wall | 24 in (61 cm) plus 90 cm walkway | 60 cm hanging wall | Hanger rotation and comfortable access |
The 22-inch minimum for a double-hang arrangement is not 50.8 cm; it is approximately 55.9 cm. That distinction matters when you are working with a narrow cavity, because a few centimeters can decide whether the lower rod remains usable or turns into a compressed line of clothing.
If your reach-in cannot hit 20 inches of clear depth, do not pretend it can. Either widen the cavity, switch to a wall-mounted hook or shallow-shelf system, or accept that the rod will live at the front of the closet and nothing will swing cleanly. A shallow system can still be useful for accessories, folded items, or light garments. It simply should not be sold to yourself as a full-depth hanging closet.
Before ordering, mark the proposed front edge of the system with painter’s tape. That gives you a physical boundary for the rod, drawers, and doors. It is a less exciting exercise than opening the box, but it exposes the problem while the return label is still an option.
2. Vertical allocation: where the rods actually go
The second thing catalogs fudge is height. They will sell you a “double-hang system” and never mention that your ceiling needs to cooperate. A double-hang rod configuration needs at least 85 inches — about 7 feet — of total vertical clearance, and that is before you subtract the thickness of the top shelf and the cam-lock hardware on the vertical uprights.
Within that 85 inches, the upper rod typically lands 70 to 84 inches off the floor, while the lower rod sits at 40 to 42 inches. That 40-inch lower rod is the number that decides whether your shirts will clear the floor when they hang. Set it lower — say 36 inches — and long-line shirts puddle on the deck. Push it higher than 42 inches and the lower rod starts eating into the upper rod’s hanging zone.
The exact height is not a universal rule. It depends on what the section is intended to hold and who has to reach it. A child’s closet, an adult wardrobe, and a shared system with a mobility constraint should not be laid out from the same template. The useful question is not “Where does the catalog put the rod?” It is “What garment belongs here, and how much empty space does it need to be removed without dragging?”
Single-rod hanging heights are where you do most of your daily thinking:
- 42 inches (106 cm) of clearance for adult shirts, blouses, and folded-over pants on hangers.
- 50 inches (128 cm) for men’s suit jackets and structured blazers.
- 70 inches (178 cm) for full-length dresses, overcoats, and anything that needs to fall below the knee.
Those numbers describe hanging clearance, not necessarily the distance from the floor to the underside of a shelf. The hanger hook, rod diameter, shelf thickness, and the shape of the garment all take up part of the installation. If the product’s adjustment holes are widely spaced, the nearest available setting may force you to work with a little more height than the nominal target.
The 70-inch section is the line most homeowners skip. They put a long-hang section at the end of the rod, set the rod height at “whatever felt right,” and end up with floor-sweeping hems. Pick the tallest garment you actually own, measure it, and add the hanger hook. That sum is your single-rod minimum. For mixed wardrobes, budget the tallest section first. A 70-inch dress section uses about 1.67 times the vertical hanging clearance of a 42-inch shirt section — not four times. The arithmetic is simple, but the planning consequence is important: long garments deserve a deliberate pocket, while short garments can often be stacked vertically through double hanging.
A useful allocation sequence is:
1. List the garments that need full-length hanging without folding or draping.
2. Reserve that long-hang zone before dividing the remaining wall into shelves and rods.
3. Group shirts, blouses, and folded-over trousers into a shorter section that can support double hanging.
4. Put the least frequently used upper rod where it is reachable with a stable step stool, not where it merely fills empty wall.
5. Leave enough space above each rod for the garment to be lifted onto the bar without scraping the shelf or ceiling.
The last point is easy to miss in a modular shelving installation checklist. A rod can have technically sufficient hanging height and still be annoying to use if there is no room to lift a hanger onto it. The user should be able to approach the rod, raise the hanger, and slide it into place without twisting around a tower.
If the system is shared, do not divide the vertical space equally just to make the elevation look symmetrical. One person may need more long-hang space; another may need more drawers or shelf access. Symmetry is pleasant in a product photograph. Efficient allocation is better in a working closet.
3. Shelf and drawer depths you can actually reach
Shelves sound easy. They are not, mostly because “shelf depth” on a spec sheet is rarely the depth your folded sweater ends up occupying. A 12-inch (30.5 cm) shelf is the working standard for shoes, folded T-shirts, and the small-clothing kingdom. Go shallower and your folded stack topples at the edge. Go deeper and you have built a black hole — the back third of the shelf becomes a place where orphaned socks go to die.
The correct depth depends on the object, but also on the way you retrieve it. A shoe shelf can be deeper than necessary if it has a rear stop and the shoes are arranged in a single row. A folded-clothing shelf becomes frustrating when two layers of garments hide each other. The problem is not that the shelf is large. The problem is that the usable surface extends farther back than your hand can comfortably search.
Drawer depth is its own genre of disappointment. The minimum drawer depth for adult clothing is 18 inches (45.7 cm). Anything less and the drawer is, functionally, a wide shelf with a handle. Deep drawers for sweaters and bulky knitwear run up to 24 inches (61 cm), which is also where you start needing full-extension slides so you can actually see what landed in the back.
A deep drawer without full extension is not automatically better storage. It can hold more, but the rear section becomes invisible, and invisible storage is where duplicates accumulate. If the system uses partial-extension slides, reserve deeper drawers for items that can be removed as a group, such as spare bedding or bulky seasonal layers. Daily clothing belongs where the entire drawer can be inspected without kneeling and reaching into a dark cavity.
A few rules of thumb I apply every time:
- Footwear shelves: 12 inches deep. Anything deeper is wasted footprint for most shoes.
- Folded tops: 12 to 14 inches deep, with a front lip or retaining edge to stop the pile from migrating.
- Jeans and bulky knitwear: use more depth only when the shelf or drawer can be accessed all the way to the back.
- Drawers: 18 inches minimum, 22 to 24 inches if you are storing jeans or chunky knits.
- Top “display” shelf above the rod: not a daily-use storage shelf. Use it for out-of-season bins, spare linens, or luggage accessories.
The first symptom of a mis-sized shelf is that you cannot see what is in it. If you have to unload three things to reach the thing behind them, the shelf is too deep for what you are storing on it. If a stack has to be pushed backward to stop it from falling, the shelf may be too shallow or missing a retaining edge.
Match the hardware to the load
Modular systems often make the towers look interchangeable, but the load path is not interchangeable. A shelf holding folded shirts behaves differently from a drawer full of denim. A rod holding light blouses behaves differently from one carrying coats. Check where the weight is transferred: into the wall, into vertical uprights, or into a freestanding base.
This matters especially when a system is marketed as freestanding but is installed in a narrow closet where people will pull against it. A drawer that opens smoothly can still shift the tower if the base is not level or the unit is not secured as directed. Leveling is not cosmetic. A small tilt changes how drawers travel, how doors meet, and how garments sit on the rod.
For daily access, keep the most frequently used shelves between roughly waist and shoulder height. That is not because higher or lower storage is unusable; it is because every item has a retrieval cost. Reserve the top shelves for low-frequency items and the lowest shelves for shoes, hampers, or containers that can be pulled forward. Do not spend the easiest reach zone on a decorative row of empty baskets.
A shelf is not well planned because it holds the maximum volume. It is well planned when the thing you need is visible and removable on the first try.
4. Walk-in flow: the clearance number nobody publishes
Walk-in closets live or die on central walkway clearance, and the number — 90 cm, about 35.4 inches — is the bare minimum for one adult to turn, reach, and back out without bumping a hip on a hanging rod. That is not comfort. That is not a “boutique experience.” That is the floor for not having to walk sideways past your own wardrobe.
Pair that 90 cm walkway with a hanging-wall depth of 60 cm on each side and you have the smallest functional walk-in. Anything narrower and you are essentially in a reach-in with extra steps. Anything significantly wider and you can start thinking about an island or a bench — but only after the walkway is verified, not before.
An island is often the first feature added to a walk-in design and the last feature measured properly. It consumes clearance on every side, changes how drawers open, and creates another obstacle for laundry baskets and garment bags. If the room only works when the island is treated as a line on a floor plan, it does not work. Mark the island’s full footprint, including drawer fronts and handles, before committing to it.
If you are retrofitting a converted bedroom or bonus room into a walk-in, measure the doorway too. A 90 cm walkway inside a 70 cm doorway is a contradiction. The doorway becomes the bottleneck, and no amount of interior clearance will save you from angling a laundry basket diagonally to get it out. The entrance should be treated as part of the storage path, not as a separate architectural detail.
The walkway number is not aesthetic. It is the same practical logic as a hallway clearance: a person carrying an armful of clothes has to pass another person occasionally, and a drawer may need to open into the path. Plan for two people where the closet will actually be shared, not only for one person standing in the middle with their arms at their sides.
A practical ordering for a single-side walk-in:
1. Hanging wall: 60 cm depth, mounted 90 cm in from the opposite wall.
2. Opposite wall: shallow shelving under 30 cm deep to keep the walkway unobstructed.
3. End wall: full-length mirror hung so you can stand 90 cm away from it and still see head to hem.
4. Drawer zone: positioned where an open drawer does not block the doorway or the primary turning point.
5. Laundry zone: placed near the exit if possible, so worn clothing does not have to cross the entire closet.
That order is less about style than traffic. The hanging wall establishes the largest fixed depth. Shallow storage can then fill the opposite side without turning the center into a tunnel. The mirror needs a standing position, and the drawer and laundry locations need to respect the route people already take through the room.
If you cannot get to 90 cm, stop calling it a walk-in. It is a deep reach-in, and it should be priced and planned like one. That is not a downgrade. A well-designed deep reach-in is often more useful than a cramped walk-in with narrow aisles, inaccessible corner shelves, and drawers that cannot open fully.
Test the doors before the system arrives
Door conflicts are usually discovered too late because the closet plan is drawn with rectangles, while the door operates in an arc. Mark the door swing on the floor. Then mark the proposed front edge of the towers and drawers. Open every drawer to its intended extension and check whether the door, drawer, or user occupies the same space.
For sliding doors, mark the overlap between panels. A drawer placed behind the wrong panel may be technically present but practically inaccessible. For bifold doors, check the folded panels as well as the swing. The clearance that works with the door fully open may fail at the intermediate position where most people reach into the closet.
This is a particularly common failure in home garment rack setup checklist planning. A rack or tower is positioned for maximum hanging capacity, but the door opening narrows the usable section. The result is a rack that stores clothes on paper and blocks them in practice.
5. Vertical spacing for folded goods and bins
The last set of numbers most people guess at is the spacing between shelves that hold folded clothing and bins. The default is “looks about right.” The result is folded sweaters compressed into cubes or bins that do not actually fit.
For folded clothing — the kind you stack and pull from — keep shelf-to-shelf spacing at 12 inches (30.5 cm) minimum. That is enough vertical room for a stack of three to five folded shirts without compression, and enough room for a hand to slide in and grab the bottom layer. Push the spacing below 12 inches and the stack gets crushed; the clothes at the bottom lose shape.
That 12-inch figure is a working minimum for relatively compact folded clothing, not a universal answer for every shelf. Jeans, sweatshirts, thick sweaters, and towels need more room because the stack expands when it is not compressed under the shelf above. If the shelf is intended for mixed contents, plan around the bulkiest item that will remain there rather than the thinnest shirt in the wardrobe.
For storage boxes and bins, jump that spacing to at least 24 inches (61 cm). Bins are rigid; you cannot compress them the way you compress a sweater. If you set the shelf spacing to 12 inches and then add a 10-inch fabric bin, you have only 2 inches of usable clearance — enough to wedge your fingers in, not enough to grab the bin cleanly. The bin may fit on paper and still fail as storage because the hand needs room to reach the grip and pull the container forward.
A quick comparison of the spacing tiers:
| Storage type | Minimum vertical spacing | Why |
|---|---|---|
| Folded shirts and tops | 12 in (30.5 cm) | Stack height plus hand clearance |
| Folded jeans and sweaters | 14–16 in (35–40 cm) | Bulkier fold and deeper stack |
| Fabric bins | At least 24 in (61 cm) | Bin wall plus enough clearance to grip and remove it |
| Rigid plastic bins | 24 in (61 cm) | Hard walls and no compression |
Fabric bins should not be assigned an 18-inch minimum in a planning table if the supported recommendation is at least 24 inches. The smaller number creates exactly the kind of catalog illusion that causes installation problems: the container technically occupies the opening, but the opening does not allow clean access. Give bins the same 24-inch planning allowance unless the specific container and its removal path have been tested in advance.
The bins are where modular closet systems quietly lose. The spec sheet says “12-inch adjustable shelving.” The reality is that a rigid or fabric bin needs a much taller opening than a folded shirt stack. If you design around the shelf, you will design around the wrong product.
Plan the removal path, not just the opening
A container needs more than vertical clearance to be useful. It also needs enough depth to be pulled out without catching on the shelf above, and enough space in front of the unit for someone to stand and lower it safely. A high bin in a narrow reach-in may be impossible to remove without first stepping into the bedroom. That can be acceptable for seasonal storage, but it is a poor arrangement for everyday accessories.
Labeling helps, but it does not repair bad geometry. A clearly labeled bin that requires two hands and a sideways twist to remove will still be avoided. Put low-frequency containers higher, keep daily-use items in open shelves or drawers, and leave enough air above bins that the first pull does not scrape the container against the shelf.
Reality check before you buy
A modular closet system is a kit. The kit does not know your wall. Before I sign off on any installation — my own or a client’s — I run this list:
- Depth measured at three points along the back wall and matched against the unit’s clear hanging depth, not its outer frame.
- Baseboards, trim, outlets, vents, and door tracks included in the depth measurement.
- Total closet height measured, with upper-rod and lower-rod targets calculated from the tallest and shortest garments, not from a generic template.
- Long-hang garments identified before the wall is divided into double-hang sections.
- Walkway clearance verified at 90 cm or wider if the closet is sold as a walk-in, including the doorway threshold and any open drawer.
- Shelf spacing chosen for the bin or stack type that will actually live on it, not for the nominal “12-inch shelf” printed in the catalog.
- Fabric and rigid bins allowed at least 24 inches of vertical spacing where they need to be removed by hand.
- Drawer depth matched to the slide extension and the clothing load.
- Door swing arc tested against the front of every new drawer, shoe shelf, and garment rack.
- The proposed footprint marked on the floor before purchase, so the room can reject the plan before the product does.
The five-minute tape-measure pass is worth more than the five-hundred-dollar upgrade package. Every time.
The useful sequence is simple: measure the fixed conditions, assign the long garments, reserve the walkway, then fill the remaining space with shelves, drawers, and bins. Reversing that order is how a closet ends up with impressive capacity and poor access.
If a number on the spec sheet does not match a number on your wall, the wall wins. Every closet I have ever regretted started with the spec sheet. A modular system is flexible only after the room’s constraints have been made explicit. Before that, it is just a collection of parts waiting to become someone else’s return.