Modular closet organizer: pre-purchase checklist
Every closet organizer brand on the internet promises a “perfect fit.” What they do not tell you upfront is that your walls are rarely square, your floor is rarely perfectly level, and a “standard…
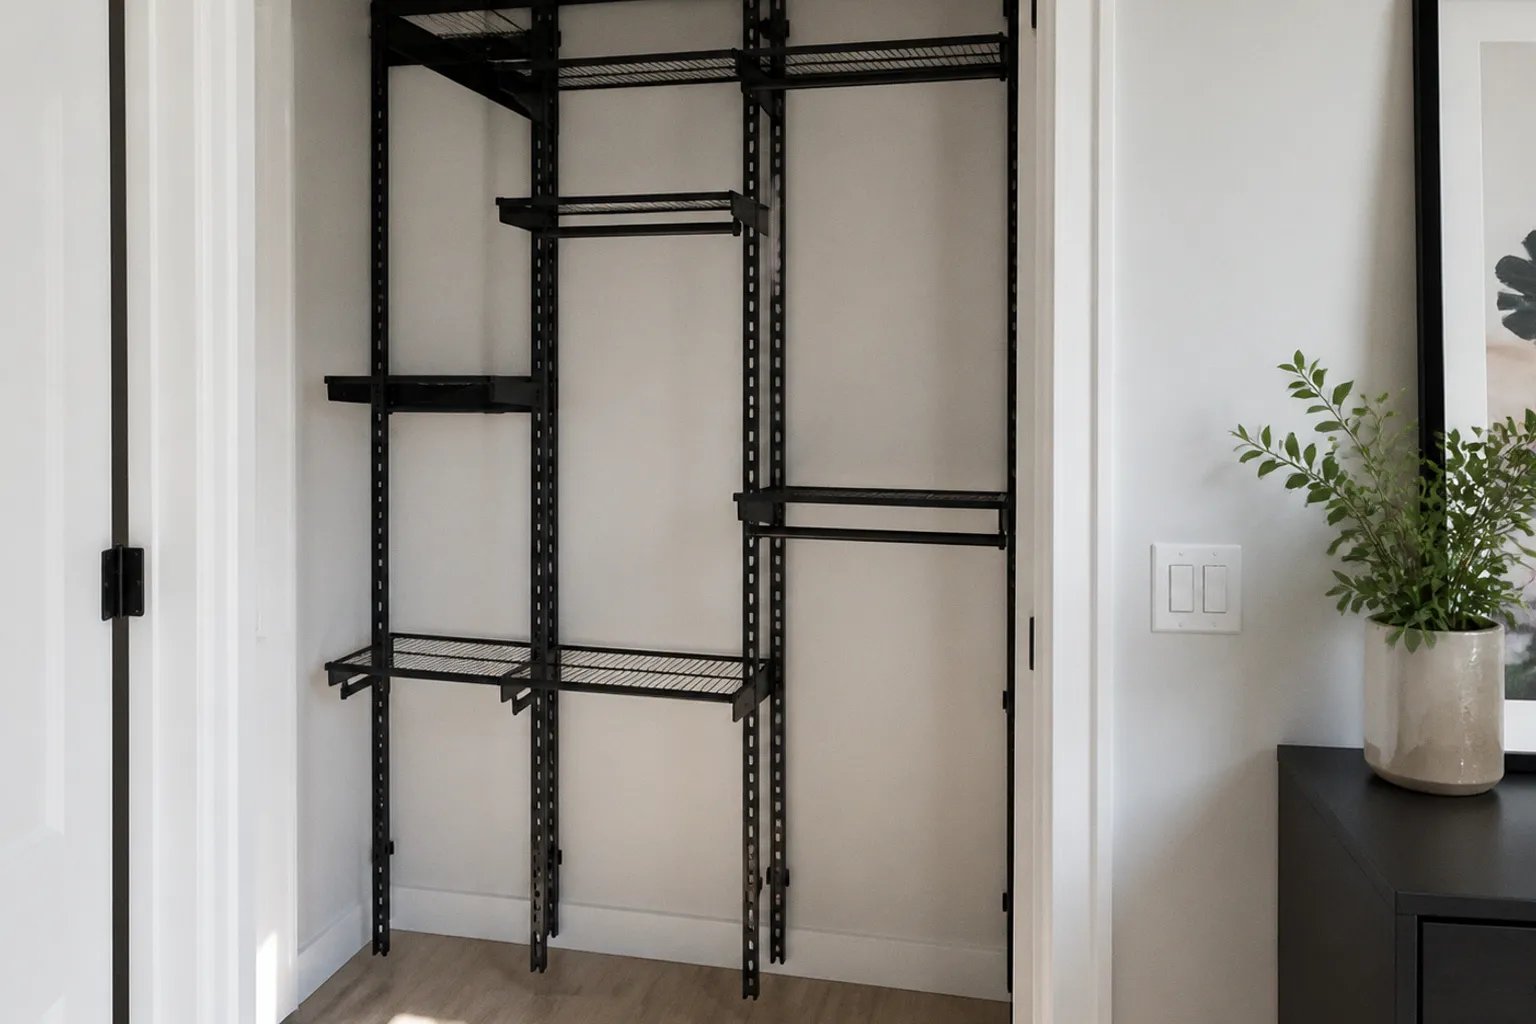
Every closet organizer brand on the internet promises a “perfect fit.” What they do not tell you upfront is that your walls are rarely square, your floor is rarely perfectly level, and a “standard 24-inch depth” means very little if half the closet is meant for winter coats that need more room to hang without crushing the shoulders.
The gap between a glossy product page and a closet that works runs straight through one thing: measurements taken seriously before a single bracket leaves the warehouse. A modular closet organizer is flexible, but it is not magic. It still has to negotiate with door casings, baseboards, bowed walls, uneven floors, drawer fronts, hanging garments, and the person who has to reach the back corner every morning.
So before you click “add to cart,” walk the space with a tape measure, a notepad, and the uncomfortable understanding that no single standard applies to every closet. This is the modular closet system prep I use as a starting point: not a promise that every unit will fit, but a way to expose the problems while they are still inexpensive to solve.
Precision Measuring: Accounting for Wall Irregularities
Here is the first thing that kills most “fits-any-closet” claims: walls are rarely even. Studs bow. Drywall seams swell. Old houses settle into shapes that would make a civil engineer wince. Baseboards create their own setbacks, and a wall that looks straight from the doorway can change by enough over its length to affect a row of uprights or shelving panels.
If you measure once, in the middle of the wall, and call it good, you have already lost.
For each wall, take width measurements at the top, middle, and bottom. Record the numbers rather than relying on memory or rounding everything to the nearest inch. If the readings differ, the difference is not a nuisance to ignore; it is part of the installation conditions. For length, the shortest usable reading controls the fit. For clearance, the same rule applies: design around the tightest point, not the most convenient one.
Depth needs the same treatment. Measure from the finished wall to the nearest obstruction at several points, including the baseboard, door trim, and any pipe or duct chase. Modular closet organizer pieces are often around 14 inches deep, while hanging sections may be deeper. That figure only matters if the wall behind them is straight enough to let the piece sit properly and if the remaining room in front is still usable.
Measure three times, order once — and never trust a wall that is “close enough” to square.
A long wall can also have a subtle taper. You may have enough room for a unit at the left end and the right end but not across the full run. This is where a modular system can help, because smaller sections can be combined with a filler strip or a planned gap. It can also hurt, because a configuration tool may treat the entire wall as one clean rectangle and leave the real-world irregularity for the installer to discover.
Use a level to check whether the floor and wall are behaving as expected. A laser level is helpful for marking a consistent reference line, but it does not correct an uneven floor. If the system uses floor-standing components, identify where shims may be required and confirm that the manufacturer allows them. If it uses a wall-mounted rail, establish the rail height from a reliable datum rather than from a baseboard that may not be level.
The ceiling deserves more attention than it usually gets. Measure the height at the front, middle, and back of the closet, and check both ends of the room. Vaulted ceilings, soffits, dropped sections, light fixtures, and duct chases all reduce the usable vertical envelope. An 84-inch top rod does not exist if a soffit drops to 78 inches at one end. That section may need a lower configuration, a shelf-only treatment, or a transition between modules.
The floor surface is another quiet source of error. Carpet padding compresses. Hardwood may have slight variation from one room to the next. Tile can sit proud of the baseboard or change the apparent depth of the opening. Measure from the actual finished floor, not from the subfloor shown in a plan or from a guess based on the adjacent room. If the organizer will sit over carpet, decide whether it is being installed over the carpet or on a solid surface beneath it. That choice changes both stability and the final height of every rod and shelf.
Before ordering, write down four separate numbers for each wall:
- The full wall width.
- The shortest usable width.
- The maximum depth at the obstruction.
- The clear height below the lowest ceiling or soffit.
That simple separation prevents a common mistake: using the widest, deepest, and tallest measurements together as if they all occur in the same place.
What to measure before buying a closet organizer
A useful closet organizer measurements checklist is less about collecting a large pile of numbers than about labeling each one correctly. Note where the measurement was taken and what it includes.
Measure:
- Finished wall to finished wall, not trim to trim unless the unit is specifically designed to fit inside the trim.
- Door opening width and the depth of the casing.
- Side returns, meaning the distance from the edge of the opening to each side wall.
- Ceiling height at multiple points.
- Baseboard height and depth.
- Electrical outlets, switches, vents, access panels, and sprinkler heads.
- Existing shelves, rods, or cleats that will be removed or retained.
- The path from the delivery entrance to the closet if large panels are involved.
The last point sounds excessive until a tall side panel cannot make the turn through a narrow hallway. Modular pieces reduce that risk, but they do not eliminate it. A configuration that works on paper can still be difficult to carry, rotate, or assemble inside a small room.
Vertical Zoning: Standard Heights for Short and Long Hanging
Verticality is where many closets quietly fail. People order a system, install every component at one comfortable height, and discover later that dresses pool on the floor while the upper shelf holds nothing but dust. Zoning the closet by garment type solves this before the first screw goes in.
The dimensions below are planning ranges, not laws. They should be adjusted for the people using the closet, the type of garments being stored, and the manufacturer’s actual component dimensions.
| Zone | Typical planning range | Purpose |
|---|---|---|
| Long-hang section | About 65–72 inches of clear vertical space | Dresses, suits, coats, robes |
| Upper rod in a double-hang layout | Around 80–84 inches from the floor | Shirts, blouses, jackets, shorter garments |
| Lower rod in a double-hang layout | Around 40–42 inches from the floor | Shirts, skirts, blouses, shorter jackets |
| Top shelf | Above the upper hanging zone | Seasonal storage, bins, luggage |
The lower rod at 40–42 inches is not an eye-level position for an average adult. It generally falls around the waist or hip area, depending on the person’s height and the exact installation. That is the point: it keeps shorter garments high enough to use the space efficiently while allowing most adults to browse and remove items without excessive bending. If the rod is lowered substantially, the clothing may be easier for children to reach but harder for many adults to access without crouching. If it is raised, the gap between the two rods becomes less useful and the lower garments may interfere with the upper section.
Ergonomics also depend on what sits below the rod. A lower hanging section above a drawer bank has a different access pattern from one above an open floor area. If a drawer is directly beneath it, leave enough room for the drawer front, the user’s hand, and the garment hem. If shoes or baskets occupy the floor, account for their actual height rather than treating the area as empty.
The upper rod should not be placed so high that it becomes a daily reach test. An upper rod near the top of the room can be efficient for an adult who can comfortably reach it, but it may be a poor choice for a shared closet, a child’s room, or anyone who needs step-free access. A top shelf that is technically available but difficult to reach is seasonal storage by default. That is fine if it is planned. It is frustrating if it is where everyday clothing ends up because the lower zones were undersized.
Long-hang items are where most systems collapse. A dress may need less space than a winter coat, while a robe or formal garment can be longer than both. Measure the longest garments you actually intend to store and leave room for the hanger and the way the item hangs. Do not measure a dress folded over a chair and then assume the same number applies once it is hanging freely.
Depth matters just as much. Bulky coats can require more room than a shallow hanging compartment provides. If the shoulders press against the back wall or the door, the garment will not hang properly, no matter how much vertical space is available. In a reach-in closet, check the relationship between rod depth and door type. Bifold and sliding doors can intrude into the usable hanging zone in ways that are not obvious when the doors are open.
A practical layout usually gives long-hang items their own uninterrupted section rather than trying to make one mixed zone do everything. The compromise of “mostly long, mostly short” often leaves wasted space above shorter garments and insufficient space below longer ones. Modular components make it easier to reserve one section for coats and dresses while using the remaining width for double-hang storage.
Plan for the garment, not just the module
Product dimensions describe the furniture. They do not describe the wardrobe.
Before choosing the layout, group the garments into broad categories:
1. Long items that need uninterrupted hanging space.
2. Short hanging items that can be doubled vertically.
3. Folded clothing that needs shelves or drawers.
4. Bulky seasonal pieces that need depth and headroom.
5. Accessories that are difficult to stack, such as belts, bags, or scarves.
6. Shoes and bins that consume floor-level space.
This exercise changes the plan. A closet with many shirts may benefit from double-hang sections, while a closet with coats and dresses needs more open height. A wardrobe dominated by folded clothing may need fewer rods and more shelves, even if a product package promotes hanging storage as the default.
Clearance and Accessibility: Planning for Doors and Drawers
A modular closet organizer that fits inside the closet but blocks the door is a very expensive shelf. Clearance is the silent killer in pre-purchase planning, and it is where many returns begin.
Start with the door in every position it can occupy. Sliding doors need room in front of the opening for a person to stand and reach into the closet. Swing-open doors need enough space for the door leaf and the person using the organizer. Bifold doors can fold into the closet opening and interfere with side returns or the front edge of a rod. Measure the actual door, hinges, tracks, and casing rather than working from the nominal closet width.
The following are useful planning targets, not universal guarantees:
- Allow roughly 24 inches of clear space in front of a sliding-door opening.
- Allow roughly 36 inches where a swing-open door and a user need to share the same space.
- Keep at least about 10 inches in front of an organizer if a person must crouch and reach the back of a shelf.
- Treat 24 inches as a tight starting point for a walk-in passage aisle; increase it when two people use the closet or when drawers open into the route.
- Measure reach-in side returns carefully. A return that looks generous from the doorway may become unreachable once a panel, drawer, or rod is installed.
If you are squeezing a 14-inch-deep modular system into a 24-inch-deep reach-in closet, the remaining front space may be only about 10 inches before the door hardware and trim are considered. That can work for shallow shelves or carefully selected storage, but it is not generous. Go below that and the back of the unit becomes a graveyard for things you technically own but never retrieve.
The front edge of the organizer also matters. A rod may be within the closet’s overall depth but still sit too close to a sliding door, making hangers difficult to remove. A drawer may clear the door when the door is fully open but collide with it when the door is partly closed. Test the worst position, not the most convenient photograph.
Drawers need their full operating depth plus a usable standing position. Measure the drawer box or the manufacturer’s listed extension, then add room for fingers and the user’s body. A drawer that opens into a wall, door swing, or opposing drawer is not storage; it is a piece of furniture that has been denied its main function.
The same principle applies to pull-out hampers, shoe trays, valet rods, and ironing boards. These accessories are often shown in a clean product image with every neighboring component removed. In a real closet, each one claims a rectangular area while open. Mark those areas on the floor with painter’s tape before ordering. If two rectangles overlap, the configuration is not ready.
Accessibility is also a question of frequency. Everyday clothing belongs in the easiest reach zones. Seasonal bins can occupy the highest shelf. A pull-out accessory that requires the user to move three baskets before it can open is poorly placed even if the measurements technically work.
Clearance is not leftover space. It is the space the closet needs in order to function.
Structural Integrity: Load Capacities and Wall Anchoring Methods
This is where the romantic idea of a “lightweight modular closet” meets the physics of a drywall anchor pulling out at 2 a.m. with an entire wardrobe on the floor. Product photos show the finished arrangement. They rarely show the wall substrate, the fastener pattern, or what happens when a top shelf is loaded with dense bins instead of neatly folded linens.
Do not treat one universal load number as a reliable description of a closet system. The real capacity depends on the material, span, bracket design, fastener, wall condition, installation method, and how the load is distributed. A shelf filled with empty fabric boxes is not carrying the same load as one filled with books, shoes, or tightly packed winter clothing. A rod loaded evenly across its length behaves differently from one where most of the garments collect near the center.
Start with the manufacturer’s rating for the exact component and installation method. Check whether the rating applies per shelf, per bracket, per rod, per upright, or to the complete assembled section. Those terms are not interchangeable. Also check whether the published capacity assumes attachment to a stud, a solid backing board, masonry, or a specific type and thickness of drywall.
A wall stud is usually the simplest dependable attachment point for a heavily loaded upright or rail, provided the fastener is appropriate and the installation actually reaches the structural member. But a stud at every upright is not mandatory in every layout. When studs do not align with the planned positions, properly rated heavy-duty toggles or strap toggles can be suitable alternatives for hollow-wall installation. The qualification matters: they must be rated for the expected load, installed in sound wall material, and used according to the organizer and fastener manufacturer’s instructions.
| Attachment condition | What it offers | What to verify |
|---|---|---|
| Fastened directly to suitable studs | A strong, predictable structural connection | Stud location, fastener length, and whether the rail or upright is centered properly |
| Heavy-duty toggle or strap toggle in sound hollow wall | A useful alternative where studs do not align | Rated capacity, wall thickness, hole placement, spacing, and the system’s approval for this method |
| Masonry or other solid substrate | Potentially strong support with the correct hardware | Masonry type, drill method, anchor compatibility, and edge distances |
| Standard plastic drywall anchor | Limited support for light accessories | Whether the load is truly light and separate from the structural organizer |
A plastic anchor designed for a small picture is not a substitute for a structural attachment. Nor is a toggle automatically appropriate simply because its package lists a large number. The rating may depend on ideal installation conditions, and the wall may fail before the fastener reaches its advertised capacity. Keep fasteners away from damaged drywall, unsupported edges, electrical wiring, plumbing, and areas weakened by previous holes.
The load path matters. A shelf load transfers into the shelf, then into brackets or panels, then into uprights or rails, and finally into the wall or floor. If any connection in that chain is weak, increasing the strength of one fastener does not solve the system. A tall freestanding unit may carry its weight on the floor but still need an anti-tip connection. A wall-mounted system may need a continuous rail or multiple attachment points to prevent rotation. A drawer bank creates leverage when fully extended, so its support cannot be judged only by the weight of the drawer contents.
Dynamic forces deserve attention too. Pulling a hanger from a crowded rod, opening a drawer with one hand, or leaning against a shelf can create momentary forces that exceed the quiet, evenly distributed load shown in a product diagram. This is one reason to avoid designing right at the published maximum. Leave a practical margin, distribute dense items, and treat the installation hardware as part of the system rather than an afterthought.
If the plan uses studs, mark their locations before finalizing the layout. If it uses toggles, determine the exact locations, confirm that the wall is suitable, and select hardware with a rating appropriate to the actual configuration. If neither option is possible, reconsider the unit, add a properly secured backing member where appropriate, or choose a freestanding closet organizer designed for floor support and anti-tip restraint.
Freestanding does not mean unanchored in every situation. A tall unit can tip when a drawer is extended or when someone pulls hard on a rod. Rental-friendly installation often means minimizing wall damage, not pretending the wall has no safety role. Follow the manufacturer’s anti-tip guidance, especially in homes with children.
Optimizing Reach-in and Walk-in Spatial Constraints
Reach-in and walk-in closets are different animals, and what works in one can waste the other.
A reach-in closet typically runs around 24 inches deep, though older homes often include shallower spaces that were never designed for full-depth clothing storage. A walk-in needs enough depth for the organizer and a clear passage. A room can be large enough to enter but still too narrow for opposing drawers, open doors, and a person to use the system comfortably.
Reach-in planning
Reach-in planning is about vertical stacking, front clearance, and corner access. Since you cannot step inside, every zone must be reachable from the opening. Side returns — the spaces between the door casing and the side walls — become especially important. They are often the first places to receive a shelf and the first places to become unusable.
Measure the returns from the edge of the clear opening, not from the outside edge of the casing. Then account for the thickness of the organizer side panel and the angle at which a person approaches the shelf. A shelf can technically extend into a return while still being difficult to use because the door opening blocks the hand.
A 14-inch-deep unit in a 24-inch-deep closet may leave only about 10 inches at the front before trim, doors, and hardware reduce it further. That is workable in some reach-ins, particularly with open shelving, but tight for deep drawers or bulky hanging garments. In a space shallower than roughly 22 inches, consider shelf-focused storage or a slimmer freestanding closet organizer rather than forcing a full-depth wall-mounted system into the room.
Door style changes the answer:
- Sliding doors preserve some floor area but can limit access to one section of the closet at a time.
- Swing doors provide a wider opening when fully open but consume room in front of the closet.
- Bifold doors may offer a broad opening while folding into the side returns.
- No door gives the best access but makes visual clutter and dust control part of the design.
Do not plan every inch of a reach-in wall as if the opening were equally accessible from edge to edge. A central section may be easy to reach while the corners are not. Put frequently used clothing in the most accessible area and use the difficult edges for seasonal or occasional items.
Walk-in planning
Walk-in strategy is about zone separation and traffic flow. With a clear aisle in the mid-20-inch range as a tight starting point, you need to decide whether the room is a single-sided passage, a two-sided arrangement, or a more open dressing area. Increase the aisle when two people use the space, when drawers face each other, or when doors must open into the path.
Do not carpet every wall with hanging space simply because the room allows it. Break the closet into functions:
- Long-hang storage for dresses, coats, and robes.
- Double-hang storage for shirts, blouses, and shorter garments.
- Shelving or drawers for folded clothing and accessories.
- Shoe storage where it can be reached without blocking the main route.
- A high zone for seasonal bins and luggage.
This division gives each zone its own clearance budget. A drawer bank should not compete with a door swing. A long-hang section should not be placed where a coat hem blocks the aisle. A shelf for bags should not be so deep that it reduces the passage to a sideways shuffle.
Corners require restraint. Two deep units meeting at a corner can create a dead zone that looks substantial on the plan but holds almost nothing usefully. A shallow corner shelf, a return panel, or a deliberately open section may perform better than trying to fill the corner with full-depth components. The best layout is not the one with the most material. It is the one where the storage remains reachable after the neighboring doors and drawers are open.
Freestanding closet organizer planning
Freestanding organizers fit awkwardly into the conversation because “modular” can mean several different things. A freestanding unit may be modular in its shelves, drawers, and add-on sections, but it is not structurally equivalent to a wall-mounted system. The floor carries much of the weight, yet the tall frame can still rack, shift, or tip if it is not braced.
They make sense when walls cannot be drilled, when the layout may change, or when portability matters. They also make sense when the closet has uncertain wall construction and the floor is more reliable than the drywall. But portability comes with trade-offs. A freestanding unit may need more floor depth, may leave gaps behind it, and may not tolerate a heavily loaded top shelf as well as a properly anchored built-in arrangement.
Check:
- The footprint, including feet, trim, and any required clearance from the wall.
- Whether the unit can be leveled on the existing floor.
- How the manufacturer handles anti-tip restraint.
- Whether the shelves are fixed or adjustable under load.
- Whether drawers can open fully without striking the door or another unit.
- How the unit will be moved through the home and assembled in the room.
A freestanding organizer is not automatically the safer option. It is simply a different load path. The question is whether that load path suits the wall, floor, and users in the room.
Before the Order Leaves the Cart
At this point, the numbers should tell a coherent story. The wall width should match the modules without relying on optimistic rounding. The depth should leave enough space to stand, reach, open drawers, and move through the room. The vertical zones should match the garments rather than the marketing photograph. And the anchoring method should be decided before the boxes arrive.
I would make one final pass through the space and mark the proposed components with painter’s tape. Mark the outside edges of uprights, the front edge of shelves, the swing of doors, and the full extension of drawers. This takes less time than returning a system, and it exposes problems a floor plan can hide. Stand where the user will stand. Reach to the upper rod. Crouch in front of the lower shelf. Open the door halfway, then fully. Pull out the drawer while another person stands in the aisle.
Record the following in the final plan:
- Wall measurements at the top, middle, and bottom.
- The shortest usable width and the tightest depth.
- Ceiling height at the lowest point, including soffits and duct chases.
- Finished-floor conditions, including carpet, tile, or uneven transitions.
- Long-hang height and the depth required by the bulkiest garments.
- Lower and upper rod positions, adjusted for the actual users.
- Door, drawer, and passage clearances in their worst operating positions.
- Side-return dimensions in a reach-in closet.
- Stud locations or the exact heavy-duty toggle solution where studs are unavailable.
- Anti-tip treatment for tall freestanding components.
- The location of dense items so the load is distributed instead of concentrated.
A modular closet organizer rewards careful planning because its flexibility gives you more ways to be wrong. You can add another shelf, shift a rod, or combine sections, but you cannot make a shallow closet deeper after the system is installed. You cannot make a door swing through a drawer. You cannot turn an unsuitable anchor into a structural connection by tightening it harder.
The brands will sell you the configuration tool and let you discover the geometry yourself. The better approach is to solve the geometry first, then choose the modules that fit it. Ten serious minutes with a tape measure now can save hours of reinstalling later — and, more importantly, leave you with a closet that still works after the novelty wears off.