Walk-In Closet Systems: Pre-Planning Checklist
I've measured closets for clients who walked in with a Pinterest board and walked out with a system that scraped the door every time they pulled out a shirt. The screenshot looked elegant.
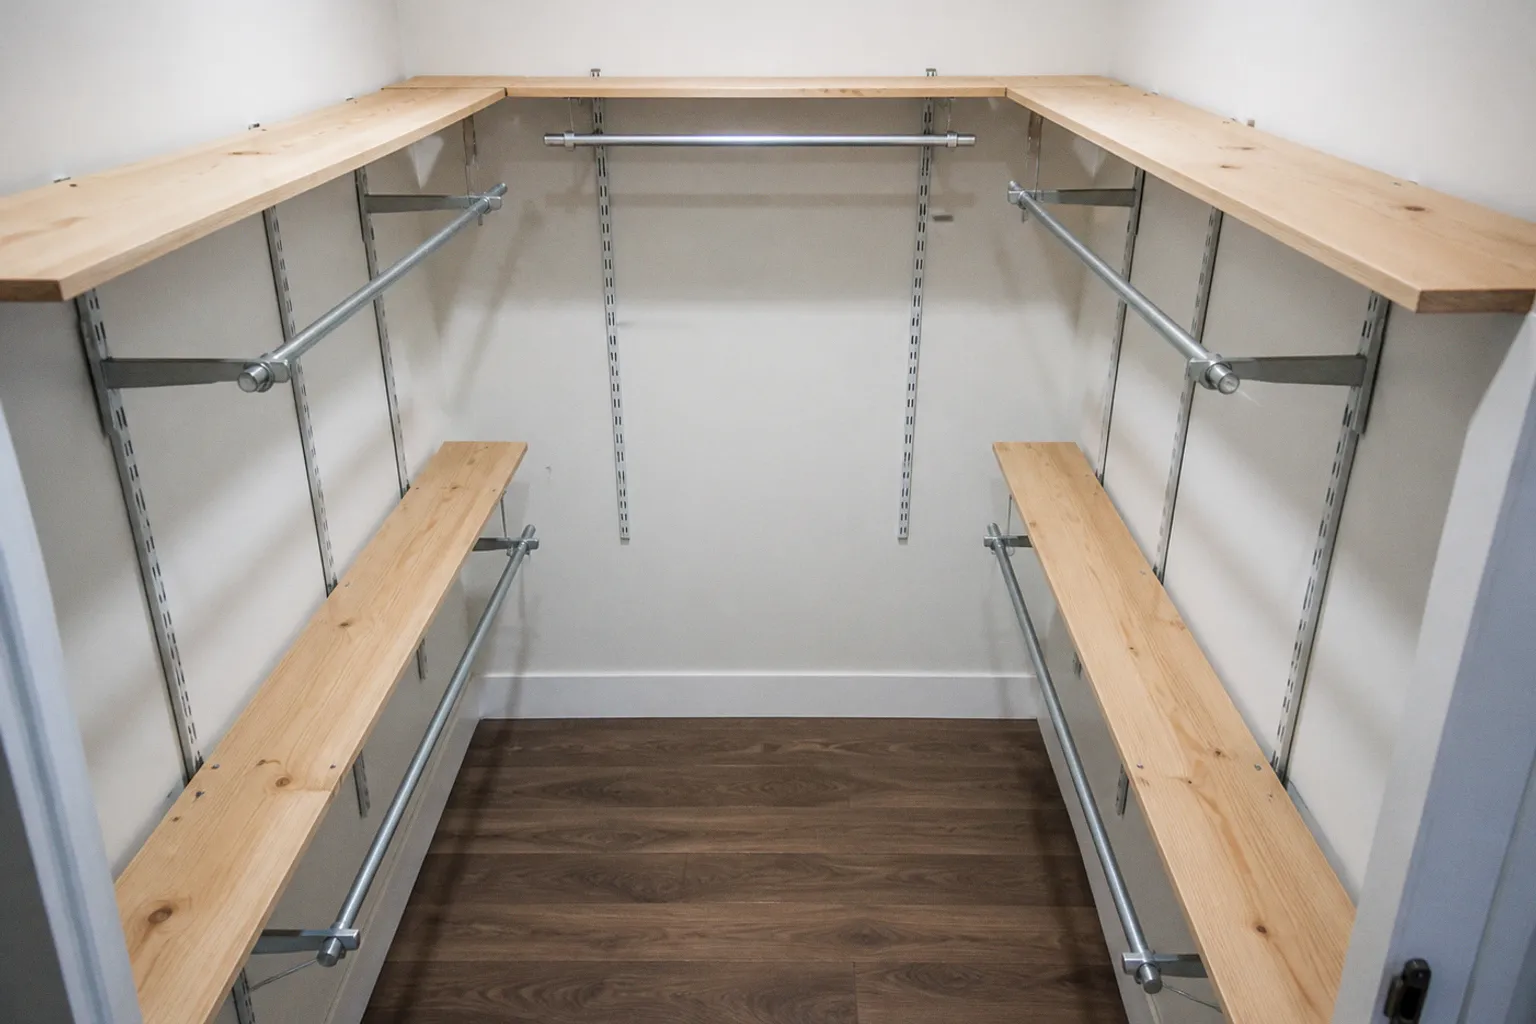
The reality was a bracket mounted two inches too low and a tower of drawers that jammed against the sidewall. None of that is a taste problem. It's a planning problem, and almost every closet misadventure I've debugged over the years comes from skipping the same handful of measurements before a single piece of hardware hits the wall.
Here's the part the glossy showroom videos skip: a walk-in closet isn't furniture. It's a small piece of architecture with a fixed footprint, a fixed ceiling, a fixed door swing, and a fixed pattern of how you actually get dressed in the morning. Treat the room like a blank canvas and the wardrobe system you bolt into it will fight you every day. Treat it like a constrained volume with hard rules — depth, clearance, verticality — and you can spec a modular closet system that fits the way you live, not the way a catalog staged it.
The useful planning happens before you choose finish colors, drawer fronts, or whether the system looks better in white oak or matte black. First determine what the room can physically accommodate. Then decide which categories of clothing deserve the space. A walk in closet system planning checklist is really a record of those two decisions: the fixed geometry of the room, followed by the flexible geometry of your wardrobe.
Defining Your Spatial Constraints: From Minimum Footprints to Luxury Layouts
The first number anyone pulls out of their pocket is square footage, and it's almost always the wrong number to start with. What matters is the usable envelope: length, width, ceiling height, and the swing arc of the door or doors feeding the space. Walk-in closet square footage is a downstream calculation, and it's only useful once you know whether the room can actually hold the storage you're planning around.
Measure finished wall to finished wall, not stud to stud and not baseboard to baseboard. Record the dimensions at several points along each wall. Older houses, converted bedrooms, and rooms built under rooflines rarely stay perfectly square, and a difference of an inch or two can determine whether a drawer bank clears the opposite run. Note where the walls bow, where a corner rounds off, and where trim projects farther than the drywall. Those details are uninteresting until they stop a drawer from opening.
The generally accepted floor for a walk-in is 5 x 5 feet, which gives you about 25 square feet of floor area. That's tight but functional for a single user who doesn't own a parade of long coats. A "step-in" closet — the marketing term for a closet you can enter but barely turn around in — can squeeze down to 4 x 4 feet, though I'd argue the moment you add a single drawer tower to a 4 x 4, you've lost most of your turning radius.
That smaller footprint may still work if the goal is a single-sided hanging run with shallow shelving opposite it. It becomes much less forgiving once you add opposing rods, deep drawers, or a door that swings inward. A plan that technically fits on paper can still fail as a room if the person using it has to turn sideways to close a drawer.
For two people sharing the space, you're looking at 6 x 10 feet or 7 x 10 feet to get both hanging sections, a shared central walkway, and any reasonable island or bench without one of you backing into the other while getting dressed. Those dimensions are not a promise that every layout will work; they are a starting point for testing the storage runs against the aisle. A couple with mostly folded clothing needs a different plan from a couple with formalwear, full-length coats, and two large shoe collections.
Measure the room twice: once for raw floor dimensions, and once after you've drawn the door swing on the plan. The footprint that survives both passes is the one you can actually build into.
Before you sketch a tower or shelf, mark the elements that cannot move:
- The finished dimensions of every wall, including jogs and alcoves.
- The location and projection of baseboards, casing, crown molding, and wall panels.
- Door leaf width, hinge side, opening direction, and the full swing arc.
- Windows, sill height, trim, and any section of wall that cannot accept a cabinet.
- Ceiling height at the center and at the edges if the ceiling slopes or drops.
- Attic access panels, bulkheads, sprinkler heads, vents, and other service points.
- The position of electrical outlets, switches, and planned lighting controls.
Ceiling height affects the entire layout because it determines how much vertical storage can be stacked before the upper shelf becomes decorative rather than useful. Standard residential ceilings of 8 feet give you room for a top shelf, a practical hanging arrangement, and some separation between the clothing zones. A lower ceiling can force a choice between long hanging and stacked short hanging; a taller ceiling may allow additional upper storage, but only if the items stored there can be reached safely.
Do not let a tall ceiling seduce you into filling every inch. The highest shelf in the room is only storage if someone can retrieve a suitcase or sweater without balancing on the edge of a drawer. If the upper zone requires a step stool, leave enough floor space to position it without blocking the doorway or trapping another person inside the closet.
The Geometry of Hanging Storage: Vertical Clearance and Depth Requirements
Hanging storage is the part of the closet where "close enough" punishes you immediately. Get the depth wrong by two inches and every shirt on the back of the rod touches the wall behind it. Get the vertical clearance wrong and your dresses turn into wrinkled skirts.
The standard depth for a hanging section is 24 inches (60 cm), measured from the back wall or back panel out to the tip of the rod. This is the working depth for a standard hanger carrying a normal-width garment. Anywhere clothes hang, you need that depth behind the rod because the rod itself sits in front of that surface. Drop to 22 inches and your longer coats may brush the back wall. Drop to 20 and you've basically built a slow-folding machine that creases everything you store.
Measure to the finished face of the system, not just to the wall. A panel, drawer front, door, or pull can add several inches to the part of the closet that your shoulder actually occupies. That distinction matters when two storage runs face each other. A plan can show 36 inches between cabinet boxes and leave considerably less once the hardware is installed.
Vertical clearance splits into two numbers, and the difference matters:
- Short-hanging garments — shirts, blouses, jackets, and folded trousers on hangers — need roughly 36 to 47 inches (90 to 120 cm) of vertical clearance below the rod.
- Medium-hang garments — such as two-piece suits, mid-length skirts, and shorter dresses — often fit comfortably in a zone around 42 to 48 inches (107 to 122 cm).
- Long-hanging garments — full-length coats, dresses, and gowns — need roughly 51 to 63 inches (130 to 160 cm), depending on the garments and whether they hang from a lower rod or shelf.
| Hanging section | Typical clearance | Best for |
|---|---|---|
| Short hang | 36–47 in (90–120 cm) | Shirts, jackets, blouses, folded trousers |
| Medium hang | 42–48 in (107–122 cm) | Suits, mid-length skirts, shorter dresses |
| Long hang | 51–63 in (130–160 cm) | Dresses, full-length coats, gowns |
These are planning ranges, not a substitute for measuring the clothing you actually own. A person whose longest garment is a blazer can reclaim vertical space that another person needs for formal dresses. Hang representative items on a rod before finalizing the system: the longest coat, the widest jacket, the dress with the fullest skirt, and anything that needs extra room at the hem. Measure from the rod to the lowest point of the garment, then leave enough breathing room that fabric does not drag on the floor or shelf below.
If you've got 8-foot ceilings, you can stack a short-hang section above a long-hang section and still leave a usable top shelf, depending on the shelf thickness and the mounting system. If you've got 7-foot ceilings, the math becomes more restrictive. You may need to choose between a genuinely useful long-hang bay and a second hanging level. Under a lower ceiling, a beautiful elevation drawing can hide the fact that the upper rod is reachable only with a stool and the lower rod leaves no room for the clothing beneath it.
Double-hang storage is efficient because it gives one wall more usable rod length, but it is not automatically the best choice. It works well for shirts, jackets, skirts, and trousers. It works badly when half the wardrobe consists of garments that need the full height of a long-hang bay. Divide the wall according to the wardrobe rather than forcing every section into the same configuration.
The rod itself also needs support. Long uninterrupted runs can sag, particularly when loaded with dense clothing, so a modular closet system may require intermediate brackets or vertical dividers. Those supports take up usable width and can affect where you place wide garments. Account for them before ordering; don't treat them as installation details that will somehow disappear into the drawing.
Navigating Walkway Clearance and Island Integration
The walkway inside a walk-in closet is where most amateur layouts quietly fall apart. People will spec an elegant L-shaped storage run on two walls, install a bench, throw in an island, and only then realize the central aisle has become a hallway you'd hesitate to walk down in a budget hotel.
The minimum walkway clearance between opposing walls of storage — rod to rod, or rod to shelf — is 24 inches (60 cm). That's the bare floor for one person to walk in, reach out to one side, and turn around without scraping their elbows. It is not generous enough for comfortable dressing, opening deep drawers, or having another person stand in the same aisle. The recommended clearance is 36 inches (90 cm), and that's the number I push clients toward whenever the room has anything to give.
The difference between 24 and 36 inches is the difference between a closet you use efficiently and a closet you use grudgingly. It also changes as soon as the storage is active. A drawer pulled open can occupy much of the aisle. A hinged cabinet door can create a temporary pinch point. A person kneeling to reach the bottom shelf needs more room than an empty floor plan suggests.
When testing the layout, draw the storage to its finished depth and draw the doors, drawers, and pulls in their open positions. If the only clear path exists when every drawer is closed and every person is standing perfectly still, the plan is too tight. Mark the narrowest point, not the average aisle width. One pinch point at a corner can make the whole room feel badly designed.
The island question is where clearance goes from "tight" to structural. If you're adding a central island — and on a 7 x 10 or larger layout, an island can be the line between a closet and a dressing room — you need about 36 inches of clearance on every side for a workable arrangement. That clearance should be measured from the island's finished face and hardware, not from the cabinet carcass.
An island with 30 inches of clearance around it looks fine in a render and becomes a bruising obstacle the day you reach across it for a sweater on the bottom shelf. If the island contains drawers on more than one side, think about which drawers will be open at the same time. A drawer bank that faces the main walkway may need more clearance than a fixed shelf or a shallow tray.
If your clearance around the island drops below 36 inches, the island isn't a feature — it's a hazard with a doorknob.
The island also changes circulation. It can force you to walk around one end to reach a particular wall, and it can block a sightline to the mirror or hamper access to a laundry hamper. Before committing to one, tape its outline on the floor with painter's tape. Open the closet door, walk the perimeter, kneel to reach a low shelf, and simulate carrying a laundry basket through the room. A taped rectangle is less glamorous than a rendering, but it tells the truth sooner.
For the closet to actually behave like a dressing space, the walkway also needs to be uninterrupted by drawer pulls, bench overhangs, or the swing of any door inside the closet. Door swings are the silent killer here. A standard interior door needs a broad clear floor arc to open past 90 degrees, and that arc should not be eating into the central walkway. If it is, every time someone opens that door the aisle narrows and you've effectively halved your clearance for as long as the door is open.
A pocket door or outward-swinging door can recover valuable floor area, but changing the door is a construction decision, not a free correction to the closet plan. Check the wall for plumbing, wiring, and structural limitations before assuming a pocket door is available. Sometimes the best solution is simply to rotate the storage layout so the existing swing opens into a clear section of wall.
Optimizing Shelf Depth and Reachability for Daily Organization
Hanging storage gets the marketing photos. Folded storage is where you actually touch your clothes every day, and it has its own depth rules that nobody on Pinterest ever cites.
Shelves designed for folded garments need a minimum depth of 14 to 16 inches (350 to 400 mm). At 14 inches you can stack T-shirts and sweaters folded to a normal width and pull one off without toppling the rest. Below 14, every retrieval becomes a Tetris move. Above 16 inches, you're wasting shelf depth unless you're stacking bulky items like denim, towels, or sweaters you don't unwrap often.
Shelf depth should follow the object, not the cabinet category. A shoe shelf may need less depth than a folded-sweater shelf. A handbag shelf may need more height than depth, while a linen shelf can tolerate a deeper stack if it is accessed less often. Deep shelves are not automatically more efficient: they encourage a second row of items that disappears from view and turns organization into archaeology.
For frequently folded clothing, a single visible stack is usually easier to maintain than two rows packed front to back. If the system gives you more depth than you need, use dividers, pull-out shelves, or bins rather than treating the unused rear space as free capacity. The extra capacity is only real if you can see and reach it.
Beyond depth, the vertical position of every shelf matters because most people don't bend to the floor or reach to the ceiling for daily-use items. A practical reach zone for comfortable access is roughly 15 to 48 inches from the floor (about 38 to 122 cm), though the right range depends on the user's height, mobility, and the weight of the items being stored. Anything you reach for daily should fall inside the easiest part of that band. Anything outside it is better reserved for seasonal or occasional storage.
A practical rule of thumb for vertical zoning in a residential closet system:
- 15 to 48 inches: daily-use shelves, primary hanging rod, frequently pulled drawers, and heavier items that should not be lifted overhead.
- 48 to 72 inches: secondary hanging, folded-but-frequent items, shoe racks, and lighter accessories.
- 72 inches to ceiling: seasonal items, luggage, spare bedding, and anything accessed once or twice a year.
The top zone is also where ceiling height reasserts itself. If your ceiling is below 8 feet, that zone is smaller than you'd like, and it's worth trimming some of it off the plan rather than letting it eat into your long-hang section. If the ceiling is taller, upper storage can be useful, but provide a safe way to reach it. A fixed ladder is rarely appropriate in a compact residential closet; a stable step stool stored outside the main aisle is usually more practical.
Drawer height deserves the same scrutiny as shelf depth. Shallow drawers are useful for jewelry, belts, and small accessories, while deeper drawers are better for sweaters or casual clothing that does not need to hang. A drawer that is too deep becomes a mixed pile. A drawer that is too shallow forces you to fold items more tightly than you will maintain in real life. Plan the contents first, then assign the drawer dimensions.
Do not forget the floor. Shoes, hampers, garment steamers, and laundry baskets all compete for the lowest zone. If every inch of floor is enclosed by cabinetry, you may have excellent storage on paper and nowhere to put the basket while you sort clothes. A narrow open bay can be more useful than another low drawer tower, especially near the entrance.
Accounting for Structural Obstructions and Accessibility Standards
Closets feel like empty rooms until you start measuring, and then you find every wart the rest of the house hid behind the drywall. A complete pre-planning pass means identifying every obstruction before you commit to a layout, not after you've ordered the system and the installer is on site with a drill in hand.
Electrical planning belongs in this measurement pass. Do not assume an outlet exists in the closet, and do not assume a nearby outlet can remain accessible after the storage is installed. Identify every outlet and switch during measurement, along with the planned location of lighting, charging points, and any appliance such as a steamer or dehumidifier. If an outlet is behind a drawer tower, it may technically remain in the room while becoming useless in practice. If a switch sits behind a cabinet or opens into a pull, the system has been installed around a problem rather than around the room.
The standard obstruction checklist for any walk-in closet layout prep:
- HVAC supply and return vents: A closet is often a convenient spot for ducting, and a supply vent blowing directly into a hanging section can push dust and lint toward the clothing. Keep fabrics clear of the airflow where possible, and never block a return vent with a cabinet.
- Electrical outlets and switch plates: Map their exact position and projection. A drawer front can collide with a switch plate, and a cabinet can make an outlet inaccessible for the equipment you intended to plug in.
- Light fixtures and lighting zones: Ceiling fixtures and recessed cans cast shadows that turn dark corners into dead zones. Plan shelf and rod depths so the lighting reaches the back of the shelf, not just the front lip. A vertical LED strip or under-shelf light may solve a shadow that a brighter ceiling fixture will not.
- Baseboards and crown molding: These eat usable wall depth and bulge outward at corners. Run your tape measure against the actual wall and record the molding profile, or you'll miscount your rod-to-wall clearances by a margin that adds up fast.
- Door and window trim: Casings can reduce the width available for a cabinet and may prevent a drawer from clearing the opening. Measure the trim as part of the obstruction, not as decoration.
- Sloped ceilings and attic hatches: A sloped section may be perfect for low shoe storage and completely wrong for a full-height tower. Mark the point where headroom changes and the full opening path of any hatch.
- Plumbing, radiators, and access panels: Do not permanently cover a service point because it occupies an inconvenient section of wall. A removable panel or a revised storage run is cheaper than dismantling the closet later.
- Floor transitions and uneven surfaces: A modular system needs a stable, reasonably level base. Record changes in flooring and any slope that could affect plumb vertical panels or sliding doors.
Take photographs with a tape measure visible in each frame. A photo of an outlet beside a wall dimension is more useful during ordering than a memory of where the electrician placed it. Mark obstructions on the plan using their actual outer edges, including handles and covers.
For accessibility — and even if you don't need it today, you may appreciate planning for it as your knees and back age — the Americans with Disabilities Act offers useful benchmarks for clear floor space and reach ranges. A clear area around 30 inches wide by 48 inches deep is commonly used for an individual approach or transfer position, while reachable rods, shelves, and drawers are generally kept within a lower and upper reach range rather than requiring overhead lifting. These requirements are mandatory in particular public and housing contexts, not automatically in every private residential closet. They are still a smart reference point for a homeowner who wants the room to remain usable through injury, reduced mobility, or a change in household needs.
Accessibility is not only about wheelchair dimensions. It is also about force, visibility, and sequence. Heavy drawers should not require a hard pull. A mirror should be visible from a stable standing position. Frequently used clothing should not be stored behind a door that must be held open while you reach. If two people use the closet, leave enough room for one person to stand at a drawer while the other passes without a negotiation that happens every morning.
One of the most useful decisions is to make at least one section adaptable. Adjustable shelving, movable rods, and removable drawers allow the system to change when the wardrobe changes. A nursery, a career change, a knee injury, or a move toward more folded clothing can make a fixed elevation feel obsolete surprisingly quickly.
Turning Measurements Into a Modular Closet System Plan
Once the room has been measured, translate the information into a drawing that records both dimensions and behavior. The plan should show where clothing goes, how doors and drawers open, and how a person moves through the room. A row of rectangles labeled "storage" is not enough.
Start by assigning the largest garments. Give full-length coats and dresses a long-hang bay. Group shirts, jackets, and trousers into short-hang sections. Place folded clothing in the reach zone and reserve the upper shelves for items that can tolerate occasional access. Then add shoes, laundry, accessories, luggage, and a mirror. If the plan runs out of space at this stage, it is better to find out before choosing drawer finishes.
A simple allocation pass can expose problems quickly:
1. List the wardrobe by behavior, not just by category. Separate daily clothing from seasonal clothing, items that must hang from items that can fold, and heavy items from light ones.
2. Estimate the width each group needs. Count the hanging sections and allow for dividers, corner hardware, and the thickness of system components.
3. Place fixed obstructions on the drawing. Include outlets, vents, trim, door arcs, and any area where a cabinet cannot be anchored.
4. Test the narrowest passage. Measure from finished face to finished face, then repeat with drawers, doors, and pulls shown open.
5. Check vertical stacking. Confirm that each rod has enough clearance below it and that upper shelves do not turn into unreachable filler.
6. Leave installation tolerance. Walls are rarely perfectly plumb, and installers need room to level and scribe panels without forcing a system into a corner.
7. Confirm the mounting surface. Know where studs, blocking, or other suitable attachment points are located before finalizing a tower or rail system.
Modular systems are forgiving when the plan respects their limits. They are not magic boxes that make a wrong room dimension disappear. Most lines have fixed component depths and widths, limited adjustment ranges, and specific requirements for anchoring. Download or request the manufacturer's installation dimensions before ordering, especially if the design combines components from more than one line.
Corners deserve special attention. A corner rod can create useful hanging length, but it can also produce a dead zone where garments overlap and become hard to retrieve. A corner tower may improve folded storage while stealing width from both adjacent hanging runs. Draw the actual clearance around the corner rather than assuming two 24-inch runs will behave like one uninterrupted wall.
The same applies to commercial-style display racks used in a residential setting. They can provide excellent visibility for shoes, bags, or frequently worn pieces, but open racks need enough clearance for the items they display and enough stability that they cannot tip when loaded unevenly. A display-oriented solution should support the way the wardrobe is used, not turn the closet into a retail floor that requires constant visual maintenance.
Pre-Purchase Reality Check
Before you sign the install contract, walk the plan one more time with the following list. These are the questions I wish every client had asked before they handed over a deposit on a system they'll be staring at every morning for the next decade.
- Do you have exact measurements for length, width, ceiling height, and door swing arc — taken with a real tape, not eyeballed? Eyeball measurements cost thousands in reorders and a week of rescheduled install dates.
- Have you measured more than one point on each wall? A room that narrows toward the back can make a standard cabinet run impossible even when the front-wall dimension looks generous.
- Have you confirmed every hanging section is set to about 24-inch depth and falls inside the rod-to-wall clearance? Subtract space for drawer fronts and pulls, because the hardware eats clearance nobody thinks to budget for.
- Is every long-hang section allocated roughly 51 to 63 inches of vertical clearance, and is the ceiling actually tall enough to deliver it? If not, you've planned for storage that won't exist.
- Is the central walkway at least 36 inches wide and free of door arcs and bench overhangs? 24 inches is technically passable; 36 inches is actually usable, and the gap is what you'll feel every morning for the next ten years.
- Does the island have about 36 inches of clearance on every side, measured to the drawer pulls, not to the cabinet face? Otherwise it doesn't have clearance, it has a bruise waiting to happen the first time you round the corner.
- Is every primary shelf in the easiest reach zone, with daily-use items out of the dead spaces above and below it? Anything you reach for once a year belongs in upper storage, not at eye level where it pushes daily items out of position.
- Have you identified every HVAC vent, outlet, switch, baseboard, light fixture, and service panel during measurement? These are the things installers build around, usually to your detriment if they were missing from the plan.
- Can you reach the outlet after the drawers and doors are installed? A mapped outlet is not enough if the finished system blocks its face or makes it unsafe to access.
- Have you checked the plan with the drawers open and the doors at their full swing? The room has to work in motion, not only as a clean elevation.
- Is the upper storage reachable without standing on a drawer or an unstable chair? If the answer is no, reduce the storage or plan a proper access method.
- Is the closet reachable from bed also the closet reachable from a wheelchair, a walker, or a bad back in twenty years? If not, adjust the reach zones now while the walls are open and the hardware is still in its boxes.
A modular closet system is one of the few home upgrades where the design phase is harder than the install. The install takes a day. The misplanning takes years to live with. Get the measurements right first, hand the installer a plan with the hard numbers already baked in, and the system itself almost doesn't matter — any decent modular line will fill in the gaps you left for it.
The ceiling height will shape how much you can stack. The door swing will shape how you enter. The walkway will determine whether the room feels generous or hostile, and the outlet and obstruction map will decide whether the finished system works with the house instead of covering up its problems. Those are not glamorous decisions, but they are the ones that make a closet last.
Get them right and the rods, shelves, drawers, and racks become a coordinated system rather than a collection of attractive parts. Get them wrong and no finish, accessory, or showroom rendering will save you.