Clothing rack configurations: which layout fits your wardrobe?
Walk into any wardrobe that's bursting at the seams and you're staring at a merchandising problem wearing a doorknob.
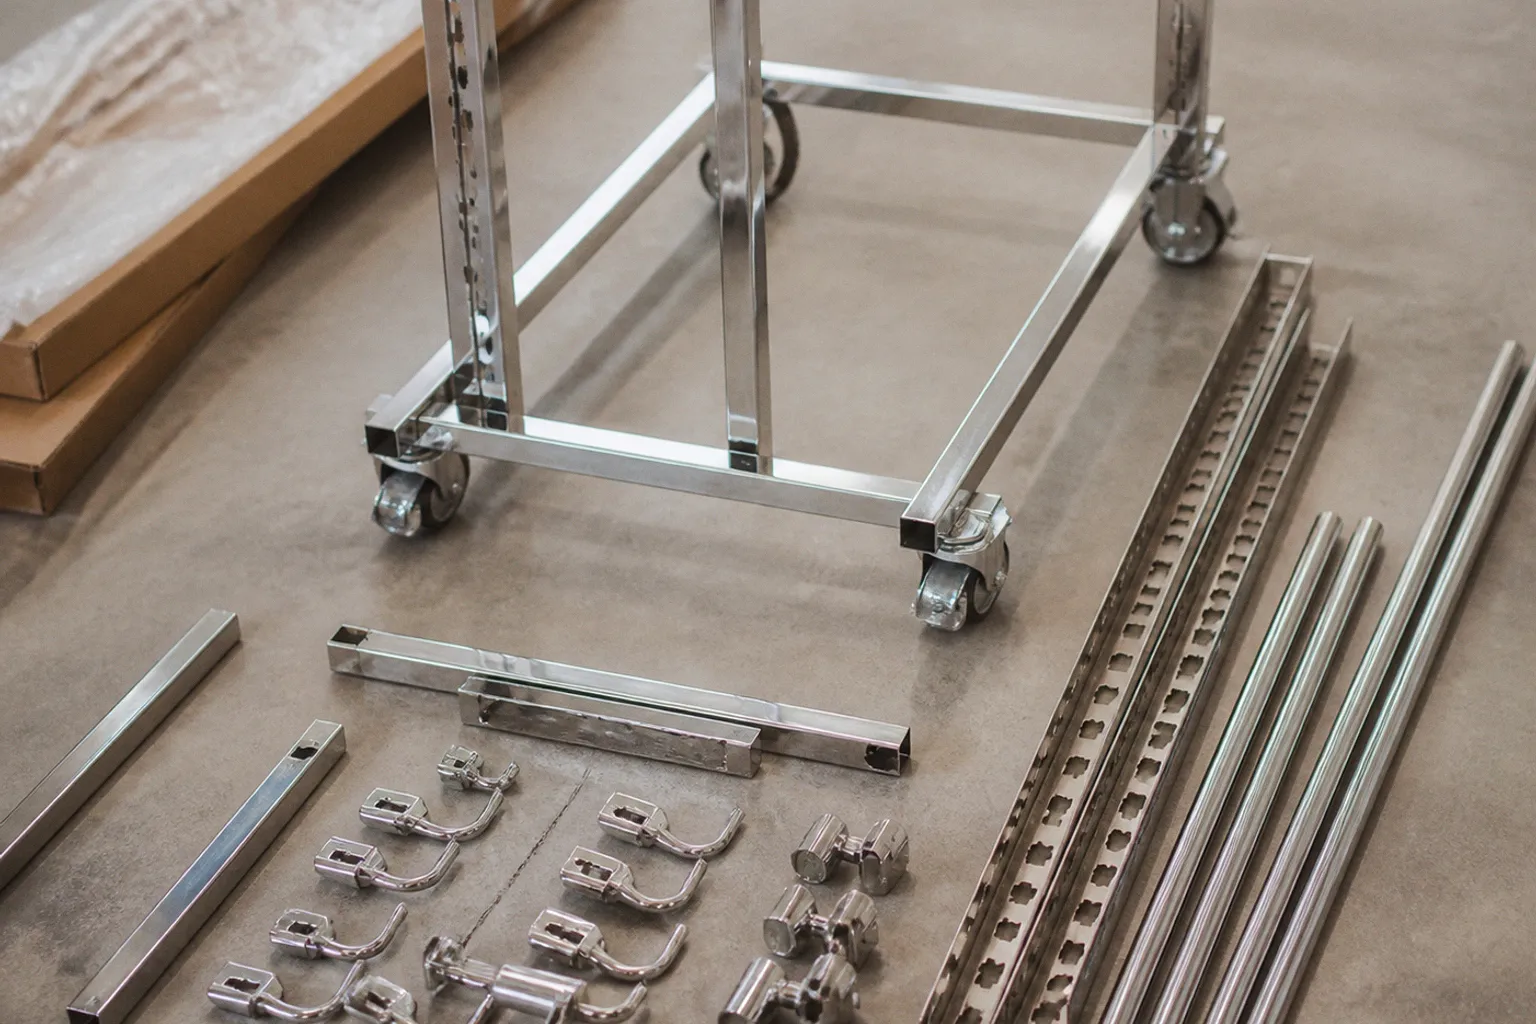
The clothes are there — forty shirts, fifteen pairs of trousers, three winter coats — but the owner can't find the navy one without excavating half the rail. We've watched this exact pattern on shop floors for two decades: too much SKU, not enough vertical choreography, zero useful sightlines. The fix on a sales floor is often the same fix behind a hinged door. It starts with one decision — single rail or double rail — and it ripples through every other choice you'll make about height, depth, width, and weight capacity.
Compare car rental deals in United Kingdom
See available offersPartner link — DiscoverCars comparisonThis is the comparison guide we wish more retailers — and the rest of us, when we're home — had on hand. We'll walk through the layout logic the way we'd walk a new store manager through their first stockroom: by the numbers, by the eye, and by what the person using the wardrobe actually needs to reach. The useful question is not whether a double rail sounds more efficient. It is whether your garments are short enough, light enough, and orderly enough to benefit from one.
A single rail protects long garments. A double rail protects floor footprint. Choose the one that protects your inventory.
Clothing rack classification and core dimensions
Before choosing a layout, classify the rack by how it is supported, how it moves, and how its rails are arranged. A freestanding clothing rack relies on its own base and is useful when you cannot drill into a wall or wardrobe panel. A wall-mounted rack saves floor space, but its load rating depends heavily on the wall, fixings, and mounting plate. A rolling rack adds mobility for rooms, studios, and stockrooms, while a traveller's rack is usually a lighter, portable single-rail design intended for transport, temporary storage, or changing locations.
The rail arrangement is the next classification:
- Single rail: one continuous hanging zone, usually the simplest option for long garments.
- Double bar garment rack: two rails share the same frame, increasing hanging density for shorter clothing.
- Stacked double rail: both rails sit in one vertical plane.
- Staggered double rail: the rails are offset by depth or frame position to reduce direct interference.
- Adjustable rail system: one or more bars can be repositioned as the garment mix changes.
Dimensions should be checked in four directions rather than reduced to one advertised width. Measure the rack's overall width, usable rail length, overall height, and front-to-back depth. Usable rail length may be less than the outside width because uprights and end fittings occupy space. Overall height must include feet, castors, top fittings, and the hanger drop. Depth must allow the clothing and hanger shoulders to clear the back panel and the closed door.
For a fitted wardrobe, an internal depth of roughly 550mm to 600mm is a useful planning range for conventional front-to-back hanging. A front-to-back wardrobe rail is usually the wrong choice when the cabinet is shallow or when the rail would force the hangers to sit edge-on to the user. In a shallow cupboard, a pull-out or side-facing solution may be more practical, but the exact choice depends on the cabinet construction and door clearance.
Black wire clothing rack levels are not standard across every product. Some wire systems use fixed shelves or fixed hanging positions, while others have adjustable levels that can be moved to suit shoes, folded garments, or shorter hanging sections. Check the actual number of adjustment positions, the spacing between them, and whether moving a shelf reduces the available hanging height. The same principle applies to a double gold clothes rail system: the gold finish is a style choice, not evidence of a particular height, capacity, or rail spacing.
The most useful dimension is the one left after the garments are loaded. A rack can fit an empty room perfectly and still fail when the doors close, the hangers turn, or long hems reach the lower shelf. Measure the space in its operating condition, then compare that measurement with the rack's assembled dimensions rather than the carton size.
Vertical optimization: how double-rail systems double your capacity
The retail case for vertical space is older than the endcap. You don't grow a store by widening the aisle — you grow it by stacking, zoning, and making the same footprint work harder. Double-rail garment racks do exactly that: two horizontal bars arranged within the height of one wardrobe section, giving you considerably more hanging capacity than a single rail of the same width.
That is the headline, and it is real — but only if you respect the clearance rules. A double rail is not a magic multiplier. It creates a second hanging zone, but it also divides the available height. If the garments on the upper rail are too long, or if the two bars are set too close together, the extra capacity turns into extra friction. You gain hangers and lose access.
Think of the upper rail as your hero tier — the merchandise you see first when you swing the door open. In a wardrobe, that does not necessarily mean the most expensive clothing. It usually means the pieces you want at eye level: shirts, jackets, blouses, or the current season's regular rotation. The lower rail behaves more like a lower shelf. It is perfectly useful, but it needs a deliberate role. Trousers, folded-hang items, children's clothing, and everyday basics often work well there because they do not require the same vertical drop as a dress or a long coat.
If you're running a wardrobe as if it were a boutique, the double-rail layout gives you a built-in merchandising hierarchy:
- Upper tier: shirts, blouses, short jackets, and pieces that need to be scanned quickly.
- Lower tier: trousers, skirts, shorter garments, and items grouped by use or season.
- Single tall zone elsewhere: coats, full-length dresses, robes, and any garment whose hem needs uninterrupted space.
We've seen stores waste double-tier fixtures by treating both rails as equal bins — which is the fastest way to recreate the same chaos you started with, just stacked twice as high. The wardrobe version is a rail packed with unrelated clothing, where the lower tier is hidden by long garments above and the upper tier is too crowded to scan. Different rails need different jobs. That is the part people skip when they focus only on the number of bars.
Why the second rail is not always the better rail
A single rail gives you one continuous hanging field. That matters more than it sounds. You can group a coat beside a jacket, keep dresses in the same visual run, and move hangers along the bar without navigating around a second tier. It also gives every garment the same access height and the same clearance to the floor.
A double rail trades that simplicity for density. It makes sense when your inventory contains a high proportion of short garments and when the wardrobe height would otherwise be left unused. It is less useful when most of what you own is long, bulky, or difficult to compress. In that case, the second bar can become a physical obstruction rather than extra storage.
The choice is therefore not simply single versus double rail clothing rack. It is continuous access versus vertical density. The right answer depends on the garment mix, not on the rack's product description.
Height requirements for long-form garment storage
Here's where the choice gets specific, and where a lot of well-meaning DIY installations quietly fall apart. A single hanging rail for coats, dresses, and full-length jackets needs serious vertical room. A practical working range is roughly 1600mm to 1900mm from the floor to the rail, depending on the garment length, hanger shape, and the amount of clearance you want below the hem.
Below that, hemlines start kissing carpet tiles, shoes, or the base of the wardrobe. A garment may technically fit, but "technically" is a poor storage standard. If the hem rests against the floor, it collects dust and makes the garment harder to remove without dragging neighbouring hangers with it. If it hangs directly over a shelf, the shelf becomes a second obstacle.
For full-length dresses and long coats, use a single tall rail or an unobstructed vertical compartment. Do not try to place a second rail beneath the long-garment zone and call the arrangement a double-tier solution. The lower bar may fit physically, but the long garments above it still need the full drop. The issue is not only whether the hem reaches the lower rail; it is whether the garment can hang freely, remain visible, and be removed without disturbing everything around it.
Double-rail setups divide that vertical real estate into two zones. The upper rail commonly sits around 1600mm to 1800mm, while the lower rail sits around 900mm to 1000mm. Those figures are useful starting points, not laws carved into the side of the wardrobe. The final measurement has to account for the actual garments, the hanger, and the way the user reaches each tier.
The gap between the rails is the working clearance for the clothes, not merely the distance between metal bars. If the upper garments are shirts with a short drop, the lower rail can sit closer. If the upper tier carries longer jackets, blouses, or tunics, the same bar position may create crowding. Measure from the point where the garment hangs on the hanger to its lowest point, then leave enough room for it to move when the hanger is pulled forward.
A useful planning distinction is:
- Bar-to-bar distance tells you how the rack is built.
- Garment clearance tells you whether the rack is usable.
- Access clearance tells you whether the person can pull one hanger out without taking five others with it.
Those three measurements are related, but they are not interchangeable.
When we're merchandising a double-tier fixture, we offset the rail positions where the product mix requires it. The same approach works in a wardrobe. Staggered double-rod designs can give each rail its own horizontal or depth lane, reducing the chance that the lower tier sits directly beneath the most crowded part of the upper tier. A widened frame of around 15.9 inches across is one example of how a rack can create separate lanes rather than forcing both rows into one narrow plane.
That arrangement is useful for mixed-length wardrobes, but it does not turn a double rail into a full-length garment solution. Long dresses still need a single tall section. Staggering helps with interference; it does not repeal the laws of garment length.
Weight capacity thresholds: domestic vs. commercial-grade steel
Now the part of the conversation nobody loves: what the rails can actually carry. We see this go wrong in stores more than anywhere else — a fixture that looked solid in the catalogue buckles under a winter coat drop in February. Wardrobes fail the same way, and usually faster, because nobody specs them. The rack is bought for its dimensions, loaded for its ambition, and judged only after it starts to bow.
The numbers break down cleanly enough for planning. A basic domestic single rail may support around 10kg before deflection becomes a concern. A standard domestic double rail, with both bars included in the stated load, may top out near 15kg. A commercial heavy-duty steel rail can carry up to 100kg when the frame, fittings, and installation are all appropriate for that duty.
Those figures are not interchangeable. A commercial rating belongs to a complete system, not just a thicker-looking tube. The frame design, fasteners, feet, wall fixings, joints, and load distribution all matter. A heavy bar attached to a weak side panel is still a weak rack. In a freestanding unit, the base and the way the frame resists racking are just as important as the nominal rail capacity.
The other number to keep in your head is garment weight. A thick winter coat can weigh about 2kg, while a cotton shirt may be only a fraction of that. Six shirts do not create the same structural demand as six lined coats, even if the hanger count is identical. Clothing density is therefore a poor substitute for load planning.
For a 4ft rail, the working capacity in the garment-planning sense is not the same as the maximum steel load. A 4ft rail commonly holds around 40 to 60 standard garments, while the same length may hold about 25 to 30 heavy winter coats, depending on bulk and how much spacing you need between pieces. A commercial-grade frame may carry the weight safely, but it does not give the garments more physical width. Fifty bulky coats do not become a sensible 4ft wardrobe load simply because the steel is stronger.
That distinction is where many product comparisons go astray:
- Weight capacity asks whether the rail and frame can support the load without bending or pulling away from the fixings.
- Linear capacity asks how many garments fit without being crushed together.
- Access capacity asks whether you can remove one garment without dragging the rest along with it.
A rack can pass the first test and fail the other two.
When we specify racks for retailers, we ask one question first: what is the SKU weight profile? If it's cashmere, light shirts, and denim, a well-made domestic rail may be adequate. If it's outerwear, workwear, leather, or anything with structure and lining, we specify up. The same question belongs in the wardrobe brief.
Also consider where the load sits. A double rail spreads the clothing across two bars, but the frame still receives the combined force through its uprights and fixings. A wall-mounted rack needs appropriate anchors for the wall type. Plasterboard, masonry, timber, and wardrobe-chipboard panels do not offer the same holding power. If the rack is going into a fitted wardrobe, check whether the side panels are intended to carry a structural load or merely to close the cabinet.
A useful domestic rule is to leave headroom rather than design right up to the stated maximum. Clothing moves. People add garments. A winter rotation that fits neatly in October becomes a different proposition when scarves, padded jackets, and heavy trousers arrive. Commercial-grade steel buys resilience; it does not excuse poor layout.
A rack can be strong enough to hold the clothes and still be too narrow to store them properly. Structural capacity and garment capacity are different calculations.
Staggered vs. stacked: managing garment clearance and accessibility
We've covered the rail heights. Now we need to talk about how those two bars relate to each other, because “double rail” is a category, not a single product. There are two common layouts, and they behave very differently once garments go on hangers.
Stacked double rails
Stacked double rails sit one directly above the other, sharing the same vertical plane. They give you maximum hanging capacity in a compact footprint, but they create a direct clearance relationship between the two tiers. The garments on the lower rail occupy the space below the upper rail, while the upper garments hang toward the lower zone.
This works beautifully for short garments on both rails: shirts above, trousers below; blouses above, skirts below; children's clothing on both levels. It becomes less convincing when you mix lengths. A long blouse on the upper tier can crowd the lower tier even if the bars themselves are correctly positioned. A jacket with a low hem can cover the hanger hooks beneath it. The lower rail remains physically accessible, but the user may have to move the upper garments aside to reach it.
That is an important distinction. Stacked rails do not generally require the upper rail to be removed or unhooked before the lower tier can be used. The issue is practical access: upper-tier garments may obstruct the hand, the hanger, or the view of what is stored below. If the lower tier is packed tightly, reaching one item can become a small piece of wardrobe surgery.
The best use for a stacked double rail is a controlled garment mix. Keep the upper tier to shorter pieces and reserve the lower tier for garments that can be lifted or pulled forward without colliding with the upper hems. If the inventory is mixed, use categories to create order rather than relying on the rack to create it for you.
Staggered double rails
Staggered double rails solve some of the interference by offsetting the two bars. The offset may be horizontal, with each rail occupying its own depth lane, or it may be built into the frame so the garments do not hang in exactly the same vertical plane.
The widened-frame design — around 15.9 inches across in some configurations — is useful for mixed-length wardrobes because it gives each rail a separate corridor. The lower rail can hold shirts or trousers at useful width while the upper rail carries short jackets without dropping directly over the lower hangers. The result is not necessarily a larger wardrobe, but it is often a more forgiving one.
The trade-off is depth. A staggered rack may need more room inside the wardrobe, and that room has to coexist with doors, hinges, drawer fronts, and the movement of the hangers. If the internal depth is only just sufficient for clothing, adding a wider frame can create a new collision at the front. Measure the closed-door position and the operating position, not just the empty cabinet.
Adjustable two-tier rails
There is a third option worth naming: the adjustable two-tier rail. These systems let you move one rail up or down as the garment mix changes. That is useful when the wardrobe has a seasonal rhythm — linen in July, wool in December — or when the same fixture is used by people with different storage needs.
Adjustment is valuable because it postpones the need to choose one permanent compromise. You can raise the lower rail when the upper tier is carrying longer jackets, then lower it when the rack is loaded with shirts and trousers. But the range still has limits. An adjustable two-tier system is not a substitute for a single tall rail when you need to store full-length dresses or long coats. Those garments require uninterrupted vertical space, not simply a movable second bar.
The practical test for any two-tier layout is simple: can you identify the garment you want, take it out, and return it without disturbing the rest of the section? There is no universal time target worth pretending applies to every wardrobe. A shared family wardrobe, a retail stockroom, and a carefully edited personal closet have different standards. What matters is whether the layout supports the way the inventory is actually used.
Calculating rail width for your specific wardrobe volume
Last piece of the puzzle, and the one that determines whether the whole layout actually works: rail width. Because a double-rail layout that doesn't have enough horizontal length to hold your inventory is just a single rail with extra weight on it — and you'll end up cramming, which kills visibility on day one.
The capacity numbers per linear foot are useful working figures, not promises. A 2ft rail holds around 20 to 30 standard garments — or about 15 thick winter coats. A 4ft rail holds around 40 to 60 standard pieces, while heavy winter coats occupy that width much faster. A 6ft rail holds around 60 to 80 standard items, or up to 40 heavy coats when the frame and fixings are suitable for the load.
| Rail length | Standard garments | Heavy winter coats |
|---|---|---|
| 2ft | 20–30 | ~15 |
| 4ft | 40–60 | ~25–30 |
| 6ft | 60–80 | up to 40 |
Treat those figures as planning ranges because garment shape changes everything. A row of slim shirts behaves differently from padded jackets. Hangers with broad shoulders take more space than thin wire hangers. Pleated skirts, structured blazers, and layered costumes all consume more rail than their garment count suggests.
Here's the retailer habit that makes this easier: count your inventory before you specify the fixture. Not the inventory you wish you had — the inventory that's actually in the wardrobe. Lay it out, sort it by category, and measure the linear hanging length with a tape. You do not need laboratory precision. You need to know whether the rail is being asked to hold a compact run of shirts or a dense line of coats.
If you've got 50 standard hanging pieces and want them visible without compressing them into a single crowded row, you need at least a 4ft single rail or a suitable 2ft double rail, assuming the garments are divided sensibly between the two tiers. If those 50 pieces include a large proportion of heavy coats, use the heavy-garment range instead. The same count can require a much larger or stronger setup.
If you've got 80 standard pieces and a 6ft wall, a 6ft double rail may be your friend — provided the wardrobe height supports it and the upper and lower categories are compatible. It is not automatically the answer if the collection includes long dresses. Give the long garments their own single-rail section, then use the double rail for the short-garment volume.
Width is also a spacing decision
Rail width does not tell you how tightly to pack the hangers. A full rail may technically accept the required number of garments while making every item difficult to slide. In a retail fixture, that slows browsing. At home, it makes the wardrobe feel full before it is actually full.
Leave room for the hanger shoulders to move. If every hanger is touching its neighbour, the rail is being used as a compressed storage tube rather than an accessible display. Grouping by garment type helps: shirts with shirts, trousers with trousers, and long pieces in a section where their hems do not interfere with anything below.
The best layout may therefore use two different widths rather than one uniform rack. A shorter double rail can handle everyday shirts and trousers, while a narrower single rail carries dresses and coats. That division often feels less dramatic than installing one all-purpose system, but it reflects the actual geometry of the clothes.
Do not forget depth
Depth comes in at the same planning stage, and the floor manager's rule applies here too: leave room for the door to close. A minimum internal wardrobe depth of 550mm to 600mm generally gives hanging garments enough room to sit without constantly brushing the back panel or the door face. Below 550mm, you start losing hangers to friction and angled shoulders. Above 600mm, you may be spending depth on air unless the rack design or garment type genuinely uses it.
Depth becomes more important with staggered systems. A rack that shifts one rail forward or backward needs enough space for the front-most garments to clear the door and enough room behind them for the rear tier to remain usable. Check the position of handles, hinges, drawers, and shelf edges. A rail can fit inside the cabinet and still fail once a hanger is pulled toward the user.
Width buys capacity. Depth buys clearance. Height buys hierarchy. Get all three right and the wardrobe works like a well-planned shop floor.
Choosing the right rack size for your space
The right size garment rack is the largest configuration that fits with its doors, drawers, hangers, and loaded garments operating normally. Start by measuring the clear opening rather than the outside of the wardrobe: width between the side panels, height from the intended floor or shelf surface to the lowest obstruction, and depth from the back panel to the closed door. Then subtract space for uprights, brackets, castors, and any fittings that reduce usable rail length.
A simple sizing sequence works well:
1. Measure the space empty. Record clear width, height, and depth in the same units used by the product specification.
2. Measure the garments. Separate long garments from short garments and note which pieces are bulky or heavy.
3. Choose the rail type. Use a single tall rail for uninterrupted long-garment clearance and a double rail for compatible short garments.
4. Check the loaded depth. Make sure hangers can turn or pull forward without hitting the door, hinges, shelves, or drawer fronts.
5. Leave operating margin. Do not treat the maximum outside dimension or stated load as the amount of space available for everyday use.
For a freestanding rack, also allow room around the feet and castors so the frame can be moved or stabilised without striking nearby furniture. For a wall-mounted rack, confirm that the mounting surface and fixings can carry the intended load. For a single-rail traveller's rack, prioritise portability and stability over maximum garment count; a compact frame is useful only if it remains steady when loaded.
Finish and colour should come after the measurements. A black wire clothing rack can suit an open industrial-style room, while a double gold clothes rail system may be chosen for a more decorative display. Neither finish changes the required height, depth, width, or load calculation. Buy the configuration that fits the garments first, then choose the appearance that fits the room.
Putting it together: the layout decision
So which configuration wins? Honestly, neither — the right answer depends on what you're hanging, how much vertical room you have, how the wardrobe opens, and how heavy the inventory runs. But here's the decision table we walk retailers through, and it works just as well behind a wardrobe door.
| Configuration | Best for | Typical rail arrangement | Clearance to manage | Footprint |
|---|---|---|---|---|
| Single rail | Long coats, full-length dresses, long jackets | One tall rail around 1600mm–1900mm | Full-length garments need uninterrupted vertical clearance to the floor | Wider horizontally |
| Double rail, stacked | Short garments only — shirts over trousers, blouses over skirts | Upper around 1600mm–1800mm; lower around 900mm–1000mm | Upper hems must not crowd the lower tier | Narrower, greater vertical density |
| Double rail, staggered | Mixed short-garment wardrobes | Upper and lower rails offset by depth or frame position | Vertical garment clearance plus horizontal offset | Slightly deeper; some frames are around 15.9in across |
| Adjustable two-tier | Inventory that changes by season or user | Rail positions set to suit the current garment mix | Adjustment must still preserve usable garment and access clearance | Variable |
| Single tall rail plus double-rail section | Wardrobes containing both long and short garments | Dedicated long-garment zone beside a two-tier zone | Long pieces stay unobstructed; short pieces use the two-tier area | Requires more deliberate zoning |
If your inventory is dominated by long garments — coats, dresses, full-length jackets, robes — go with a single rail at roughly 1600mm to 1900mm. Don't fight the geometry. A double rail will not make those garments shorter, and placing another bar beneath them only turns the lower section into a collision zone. If the wardrobe contains many full-length pieces, give them a single tall rail or an unobstructed vertical bay.
If your inventory is mostly shirts, trousers, and mid-length jackets, the double rail is your friend. An upper tier around 1600mm to 1800mm and a lower tier around 900mm to 1000mm can make good use of otherwise empty height. Keep the categories disciplined. Put short garments on the upper rail, avoid loading long hems over the lower access zone, and leave enough space to move hangers rather than merely count them.
Go staggered if your wardrobe depth allows it, generally around 550mm to 600mm internally, and if the offset genuinely improves access. A staggered rack is not automatically superior; it earns its space when the garment mix is varied enough to benefit from separate lanes. Choose stacked when the wardrobe is shallow and the garments are short enough to share one vertical plane without constant interference.
If your wardrobe shifts between seasons, look at an adjustable two-tier rail. It can be a sensible way to reconfigure the space without replacing the frame, but treat that flexibility as a practical advantage rather than a guaranteed financial return. The value is that you can adapt the storage to the clothes you have now. That is often enough.
Weight is the silent killer. Specify commercial-grade steel when you're carrying a substantial outerwear load, and pay attention to the fixings rather than stopping at the product's headline capacity. Stay with a suitable domestic rail when the inventory is lighter and the frame is properly supported. Width follows inventory count and garment bulk. Depth follows the door-clearance rule. Height follows the longest garment in the zone.
The final test is not an invented stopwatch metric. It is whether the wardrobe remains legible after it has been filled. Can you see the categories? Can you pull one hanger forward without moving a row? Can the lower tier be reached without fighting the upper hems? Can a long dress hang freely, or is it sharing space with a bar that should never have been there? Those questions tell you more than a product label promising maximum capacity.
A wardrobe that takes constant rearranging is a stockroom with hinges. Plan the vertical, respect the clearance, count the garments, and specify the steel to the inventory you actually carry — not the inventory the catalogue assumed you would. For long garments, protect the uninterrupted drop with a single tall rail. For short garments, use the second tier to reclaim wasted height. For mixed collections, divide the zones rather than forcing every garment into one configuration.
Everything else is just hangers.