Closet storage system planning: essential pre-installation steps
Most closet system "transformations" I've walked into share one thing: gorgeous renders of a 14-inch-deep panel crammed against a wall, with a winter coat hanging off it like a wing. Looks great on a mood board.
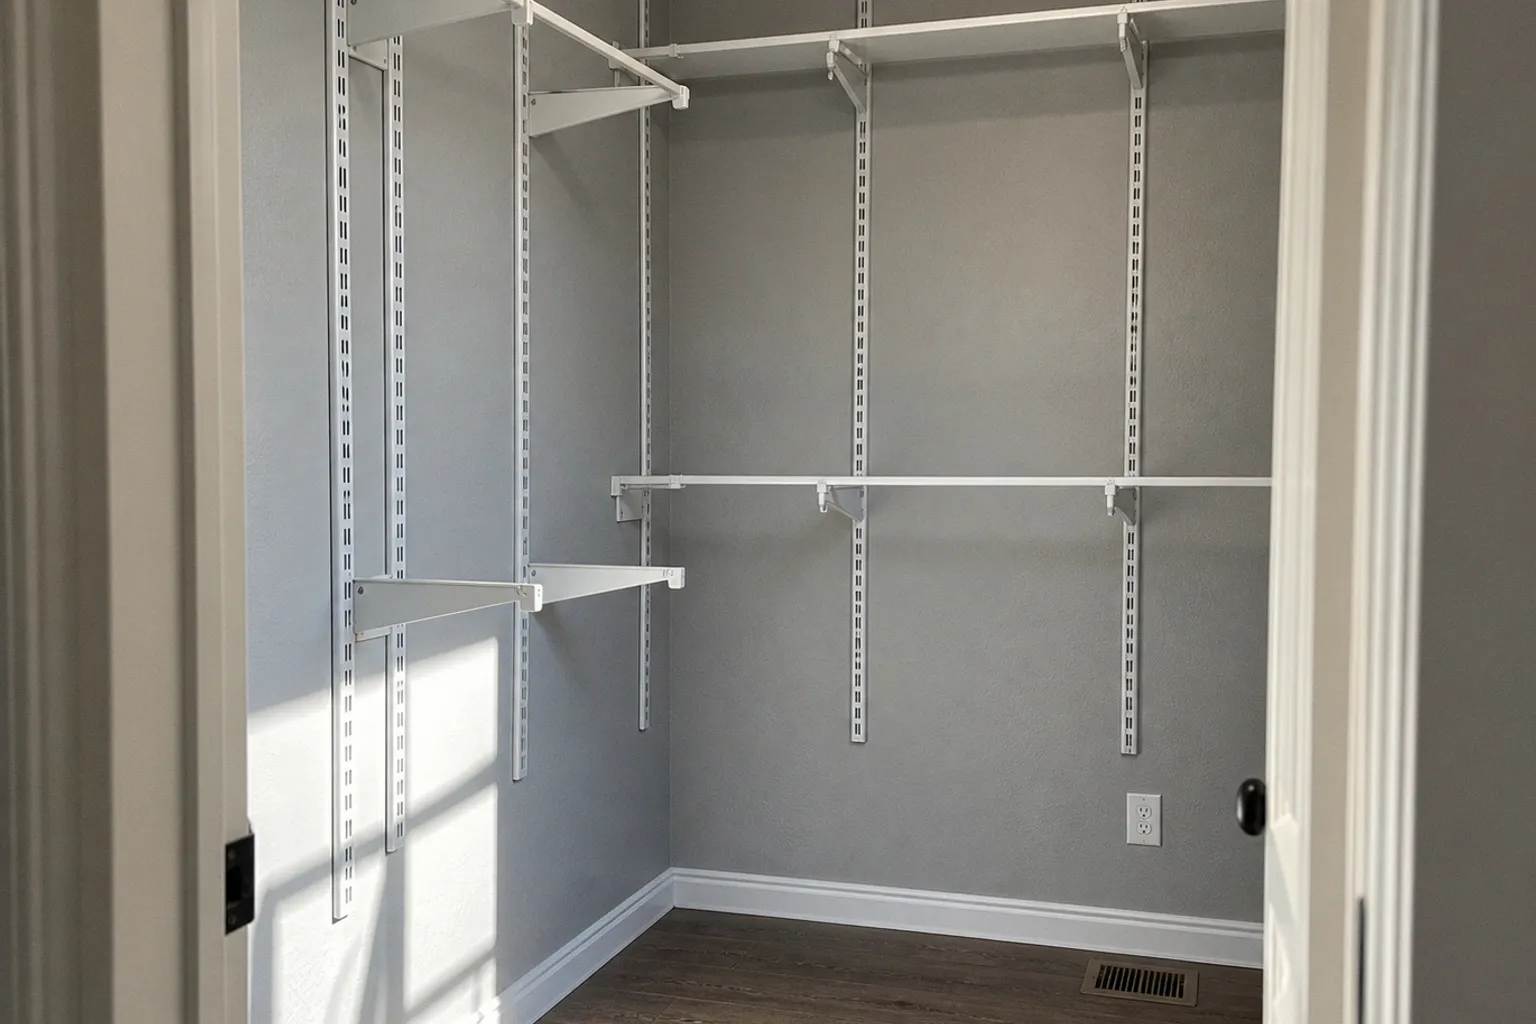
In real life, that coat sleeve has about an inch of breathing room before it hits the door trim. So when clients ask me why their new system feels claustrophobic by March, I don't start with the brand or the finish. I start with the tape measure, the baseboard, and the electrical outlet they forgot about. Planning a home closet storage system is roughly 70% preparation and 30% swearing at a level that won't make your partner concerned.
That's the honest split. The glossy installation videos skip the prep because it's tedious — measuring around obstacles, emptying the space, painting, waiting for paint to dry, dealing with baseboards that some genius installed slightly proud of the drywall. But every shortcut taken before the panels go up compounds into a system that fights you every morning.
This checklist is the prep work that actually decides whether your modular closet earns its footprint or just sits there looking expensive.
Precision Measuring: Calculating Depth and Clearance Requirements
The first number everyone quotes is "14 inches." That's the standard system panel depth — the actual shelf or hanging rod bracket. But quoting 14 inches as the depth you need for hanging clothes is the single most common planning mistake I see. It ignores the hanger itself.
A 14-inch shelf or rod bracket means your clothing projects 10 to 12 inches beyond the front of that shelf. Do the math: you need 24 to 26 inches of total clearance from the back wall for clothes to hang properly, with enough sleeve room to actually slide a hanger back and forth without it catching on the shelf above or the panel beside it.
Let me state this clearly, because manufacturers rarely will:
A 14-inch system panel needs 24 to 26 inches of room from the wall to hang clothes without turning your closet into a tangle of sleeves.
If your closet is shallower than that — a common situation in older homes where builders treated closets as afterthoughts — you don't have a "shallow closet problem." You have a different product category problem. Trying to retrofit a standard 14-inch system into a 20-inch-deep closet means every shirt is going to brush the door, and every long coat is going to fold itself in half the moment you close it.
What I do on site:
- Measure the wall-to-wall depth at three points: the back wall, the door opening, and midway. Older houses aren't square. A closet that's 26 inches deep at the back might only be 23 at the front because of settling or sloppy framing.
- Note the door swing. Bi-fold doors eat less space than hinged doors, but they still need clearance to fold flat. Sliding doors eat the least but limit access to one side.
- Account for the upper shelf. If you're planning a top shelf for bins, suitcases, or out-of-season storage, it should be at least 14 to 16 inches deep. Anything less and you're stacking sweater boxes on their sides to fit them.
The "I have a small closet" crowd often tries to solve depth problems by going vertical — adding a second hanging rod below the first. That works for shirts, sure. It does not work for pants, dresses, or anything longer than 30 inches. Plan your vertical zones around what you actually wear, not what fits a mood board.
Identifying Architectural Obstacles and Fixed Infrastructure
Closets don't exist in a vacuum. They exist in houses, and houses have things in them. Outlets. Light switches. Floor vents. Window sills that intrude three inches into the wall plane. Attic access panels disguised as ceiling drywall until you push a box into them at midnight.
The single biggest reason custom closet installations get ugly halfway through is that someone measured the empty space and ignored everything attached to the walls. So before you order a single panel, walk the closet with a notepad and catalog every fixed obstacle:
- Electrical outlets and light switches. You can't cover an outlet with a panel. You can't run a hanging rod through a switch box. Either the system gets designed around them, or an electrician gets called mid-installation, which is the most expensive way to add a $20 remodel box.
- Floor and wall vents. HVAC returns and supplies live in closets more often than people realize. Blocking one with a floor-mounted tower is a great way to overwork your furnace and shorten the life of your compressor.
- Windows. If your closet has one — and some bedroom reach-ins do — the sill depth and trim profile will eat into your vertical and horizontal space.
- Attic access ladders or panels. Pull-down stairs hidden behind a closet door are a classic surprise. They need the full swing clearance to deploy, which means no floor-mounted unit in front of them, and usually no fixed shelving within the arc.
- Baseboards. More on these in a minute, because they deserve their own section.
The point is: measure around obstacles, not just between walls. A 48-inch-wide closet with a centered outlet doesn't give you a 48-inch run of continuous panel space. It gives you two 22-inch runs with a gap in the middle. That's a different system entirely.
Strategic Decluttering and Surface Preparation Protocols
Here's where the glamorous part of closet planning ends and the grunt work begins. Before any panel goes up, the closet has to be empty, clean, and ready. Not "mostly empty." Not "I shoved the sweaters to one side." Empty.
I learned this the hard way. Walking into a closet still half-full of garment bags means you spend the first hour playing Tetris with the client's stuff, nothing gets installed straight, and the whole job runs twice as long as it should. Avoid that scene.
The prep sequence:
1. Completely empty the closet. Everything goes elsewhere — another room, the bed, the hallway. If you're using this as a decluttering opportunity, do it before emptying, not after. Trying to decide what to keep while standing in an empty closet with a box in your hand leads to keeping everything.
2. Remove existing hardware. That means old rods, brackets, cleats, screws — anything left from the previous setup. Pull every anchor. If an anchor won't come out cleanly, drive it flush instead of leaving a proud head that will fight your new panel.
3. Wipe down the walls and floor. Dust, lint, cobwebs, the mysterious sticky spot behind where the dresser used to live. New panels against dusty walls don't sit flat. Adhesive-backed trims don't stick to grime.
4. For floor-mounted vertical panels, remove baseboards behind where the unit will sit. This is the part people skip. The panel sits flush against the wall; the baseboard sits proud of the wall. You can't have both. Some systems ship with rear notches to clear baseboards. Most don't. Check before you install, not after.
5. Inspect the wall surface. Hollow drywall behind a closet panel is a future disaster. Anchors pull out, panels sag, rods bow. If your walls are standard residential drywall over wood studs, you're probably fine with the included hardware. If you hit steel studs, or you feel the wall flex when you push on it, stop and figure out what's behind there before you commit to a layout.
Wall Finishing and Timing for Optimal Hardware Mounting
Closet systems are hung on walls. Walls need to be in their final finished state before hardware goes in. This sounds obvious, but I've watched professional painters and professional installers argue about it on more than one job.
The rule:
Finish painting at least two full days before closet system installation. Anything less, and your anchors are drilling into paint that hasn't cured — which cracks the skin around the hole and weakens the mount.
Two days is the minimum. If you've used a high-gloss or a low-VOC enamel, give it three. The paint needs to be hard, not just dry to the touch.
What goes on the wall before install:
- Final paint color. Not primer. Not a first coat you'll "touch up later." Touch-up paint under a mounted panel never matches the surrounding wall because of lighting, sheen variation, and the fact that no one ever leaves the exact same can.
- Any wallpaper. If your closet is wallpapered, get it up and dried before you install. Wallpaper paste and mounting hardware are not friends.
- Texture patches. Anchor holes from the old system, dings, cracks. All of these should be filled, sanded, and primed before the new layout goes up. Filling them after the panels are mounted means you'll be doing it with a putty knife and a flashlight at an angle, which is a great way to get a patch that looks like a patch.
What does NOT need to happen before install:
- Floor finishing. If you're getting new flooring in the bedroom, do it after the closet system goes in. Otherwise, you'll be taping off freshly finished floors while drilling, and your floor guy will look at you the way you'd look at someone who put ketchup on a steak.
The timing thing matters more than people think. Rushing paint and then mounting hardware is how you end up with hairline cracks radiating from every anchor point six months later. The wall moves; paint that's still curing moves with it differently than paint that's fully bonded.
Managing Baseboards and Floor-Mounted Unit Alignment
Baseboards are the final boss of closet installation. They're the last thing the trim carpenter did, often with the wrong saw, and they were never meant to cooperate with a modular storage system.
Here's the deal: floor-mounted vertical panels need to sit plumb and square against the wall. A baseboard that's proud of the wall by half an inch forces the panel to tilt forward at the top, or leaves a gap behind the panel that collects dust and small items for eternity.
Three approaches, in order of preference:
1. Remove the baseboard behind the unit. Cleanest result. The panel sits flush against the wall. You can either not replace the baseboard (and live with the gap) or cut it flush with the panel edges and reinstall the cut pieces outside the unit's footprint. This is what I do on almost every job.
2. Notch the panel rear. Some higher-end systems ship with rear baseboard notches pre-cut, or with templates for cutting them on site. If your system has this option, use it. Measure the baseboard depth and profile first. Quarter-round baseboards are forgiving. Tall colonial baseboards are a different animal.
3. Shoe molding around the unit. Cheapest, fastest, laziest. You run a piece of quarter-round or shoe molding along the seam where the panel meets the floor, and you cover the baseboard gap. It works. It looks like a workaround. It also traps every dust bunny that ever lived.
What you should not do: install the panel over the baseboard and hope nobody notices. They will notice. The panel will rock slightly when loaded. Over time, the rock becomes a wobble, and the wobble becomes a complaint.
One more thing on alignment. Before you anchor a single vertical, drop a plumb line from the ceiling mount point. Walls are not vertical, especially in older homes. If you trust the floor to set your vertical alignment, and your floor is out of level by a quarter inch over six feet, your whole tower is leaning by the time it reaches the top shelf. A four-foot level on the wall beats a tape measure on the floor every single time.
The Reality Check Before You Order
A few last things I'd put on every installer's pre-flight list. Some of these are uncomfortable. That's the point.
- Measure twice, then measure again the next day. Bring the same tape. Stand in the same spot. Numbers don't lie, but they don't tell the whole story either.
- Check the hardware against your wall type. Standard wood studs behind drywall: fine. Steel studs: you need different anchors, and the manufacturer may not include them. Plaster over lath: expect drilling to take three times as long. Concrete or masonry behind drywall: you need a hammer drill and masonry bits the kit didn't ship with.
- Read the load rating. Closet systems have weight limits for hanging rods and shelves. The limit is usually per linear foot, not per total rod. A 6-foot rod at the typical rating is going to handle a normal wardrobe, but a row of winter coats can chew through that allowance faster than you'd think.
- Plan for the door. A fully loaded closet with a door that scrapes the new shelving is a closet you'll stop opening all the way within a week. Check door clearance with the system mocked up in cardboard before you commit.
- Have a plan for the stuff that won't fit. A new closet system reorganizes what you have. It doesn't delete it. If you downsized from a deep reach-in to a smarter layout and you still have too many shoes, that's a separate problem. The shelving won't fix it.
Buy the layout that fits the room. Don't rearrange the room to fit the layout you saw online. Measure the real depth, respect the obstacles, finish the paint, deal with the baseboards, and double-check the wall type. Get those five things right, and the actual installation — the part everyone films — goes smoothly. Skip them, and you'll be the next person posting on a forum asking why their brand-new modular closet system already feels wrong by the second week.