Walk-in closet island racks: pre-installation checklist
A walk-in closet island rack looks harmless on a floor plan. Draw a rectangle in the middle, add drawers, perhaps a hanging garment rail or decorative display surface, and the room suddenly resembles a boutique showroom.
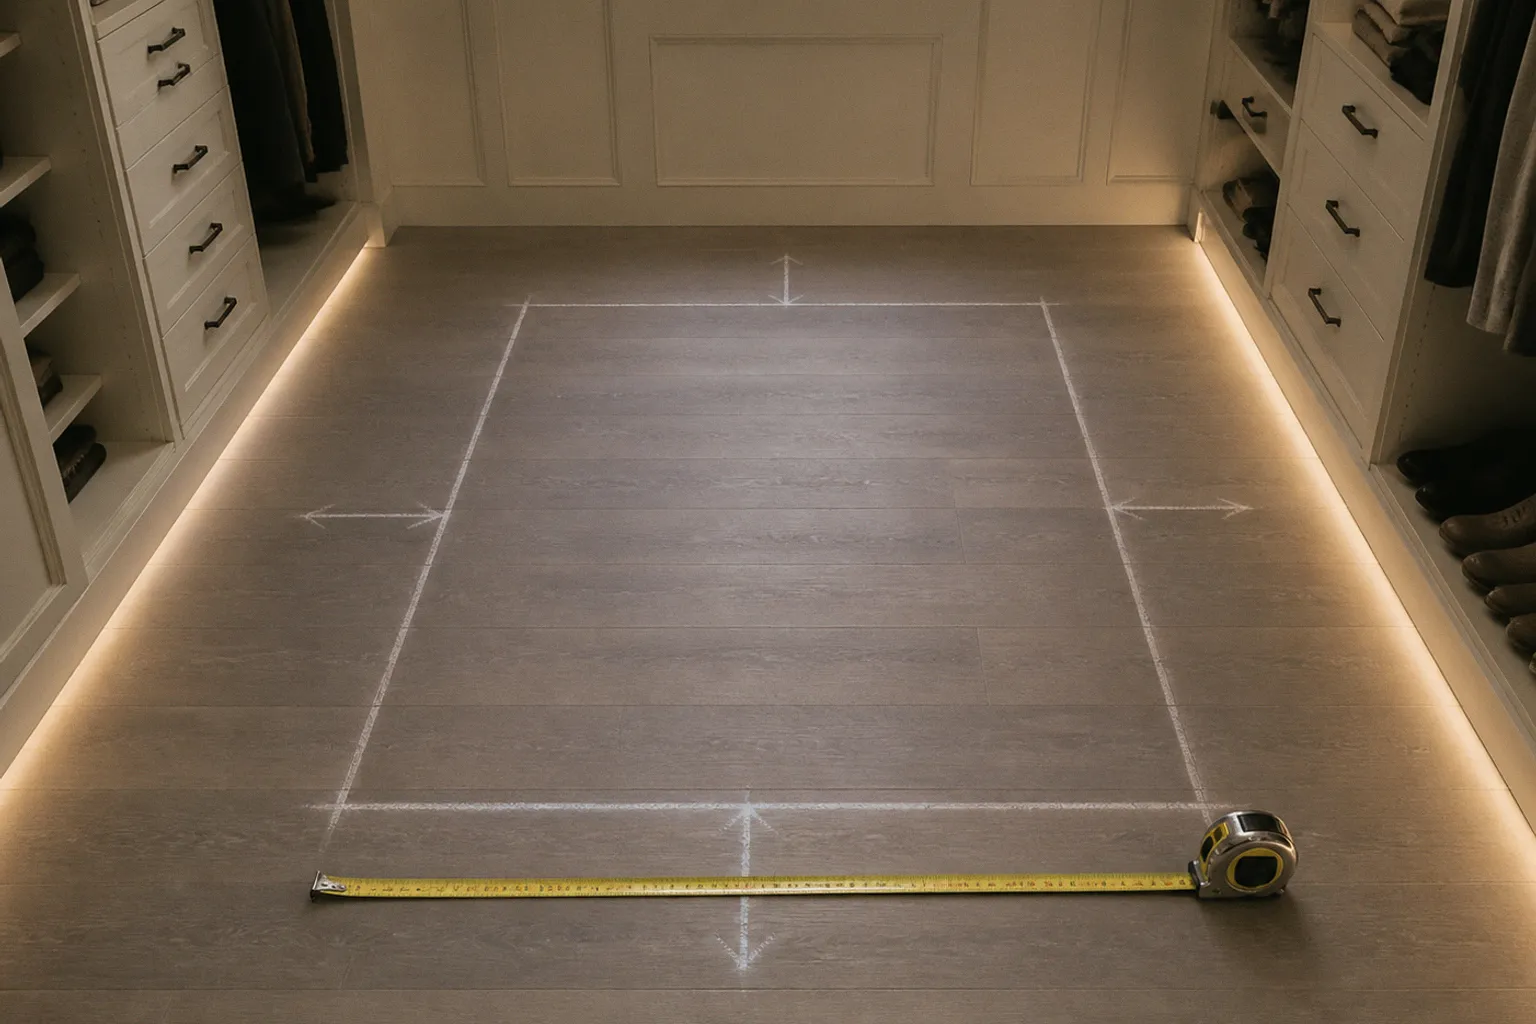
Then the island arrives.
The doors stop opening properly. Drawers hit opposite cabinetry. Two people cannot pass without turning sideways. Clothes on the wall-mounted rods lose their clearance, and the expensive centerpiece becomes a very attractive obstruction. This is the usual failure of walk in closet island rack planning: the island is measured as furniture, while the closet is experienced as circulation space.
I approach these installations from the less glamorous end. I measure the clearance, check where hands and doors actually travel, and assume that the product photograph has left out something inconvenient. Usually, it has.
An island does not occupy only its cabinet footprint. It occupies every inch needed to walk, reach, open, turn, and retrieve.
Start with the room footprint, not the island catalog
The first question is not which finish you want. It is whether the room has enough usable area after the wall storage is installed.
A walk-in closet generally needs a total room footprint of at least 8 × 8 feet to accommodate a central storage island alongside surrounding storage. A more comfortable planning range is approximately 10 × 12 feet, particularly when the room includes hanging sections on multiple walls, drawers, doors, or a central island with storage on both sides.
That distinction matters. An 8 × 8-foot room is not equivalent to a 10 × 12-foot room just because both technically contain a rectangle in the middle. The smaller room has much less tolerance for irregular walls, projecting trim, deep cabinetry, and drawer fronts that extend farther than expected.
Before choosing a closet island garment rack, record the room’s finished dimensions:
- Measure wall to wall after drywall, flooring, baseboards, and other permanent finishes are in place.
- Note columns, radiators, vents, outlets, doors, window casings, and any section of wall that cannot accept cabinetry.
- Measure the door swing and the usable opening, not simply the nominal door width.
- Identify whether the walls are straight and parallel. A room that is slightly out of square can consume more clearance than the island specification suggests.
- Mark the position of every existing hanging rod and shelving unit.
- Record ceiling height if the island includes a tall display element or if vertical storage is part of the layout.
The usable footprint is the space left after these fixed elements are accounted for. That is the number that should control the island dimensions.
A common mistake is to measure the empty room before installing wall storage, then purchase an island based on that optimistic number. It is the spatial equivalent of budgeting before reading the invoice.
The quick footprint calculation
For a simple island with storage on opposing walls, think in layers:
1. Wall-mounted hanging storage requires approximately 24 inches of depth.
2. The island itself commonly ranges from 24 to 36 inches in depth.
3. The circulation zone around the island should be 30 to 36 inches on each side.
4. Full drawer pull-outs may need up to 30 inches of additional front clearance.
If a 24-inch-deep hanging section faces a 36-inch-deep island, the room already needs 60 inches before the walking zone is added. With 30 inches of clearance on both sides, the practical width requirement reaches approximately 120 inches, or 10 feet.
That is why a compact-looking island can require a surprisingly generous room. The cabinet is only one part of the calculation; the surrounding air is functional space.
Calculate clearance as working space, not decorative breathing room
The accepted planning range around a closet island is 30 to 36 inches, or roughly 76 to 91 centimeters, on all sides. This is the minimum practical zone for walking and using the surrounding storage without constant interference.
Thirty inches can work in a carefully controlled layout. Thirty-six inches gives the room more tolerance when the closet includes drawers, deeper hanging garments, or two people using the space at once. If the island has drawers on opposing sides, I lean toward the wider end of the range because the clearance must serve more than one purpose.
There are at least four different movements to account for:
- Walking past the island.
- Standing in front of a drawer or cabinet.
- Opening the drawer or door fully.
- Turning or stepping back while holding clothing, shoes, or a storage bin.
A plan that accommodates only the first movement is not finished. It is merely technically drawable.
Clearance around a freestanding closet island
The term “freestanding” can create false confidence. A freestanding closet island may not be fixed to the wall, but it still requires a stable position, a usable perimeter, and enough room to prevent accidental contact with surrounding components.
Measure from the furthest projection of each object. That may be the cabinet face, a drawer handle, a door edge, a shelf lip, or a decorative trim piece. Do not measure from the cabinet carcass if the hardware extends beyond it.
For a basic layout, use this sequence:
1. Mark the maximum island footprint on the floor with painter’s tape.
2. Mark the wall storage depth on the opposing sides.
3. Create a 30-inch perimeter around the island.
4. Extend the tape line in front of every drawer to show its full travel.
5. Open the closet door and any nearby cabinet doors.
6. Walk the marked route while carrying a folded garment or storage basket.
7. Repeat the movement from the opposite direction.
The tape test is not sophisticated. It is better than discovering a collision after installation, which is also a tape test but much more expensive.
If the island is intended primarily for folded clothing and has no deep drawers, the lower clearance range may be workable. If it includes full-extension drawers, doors on both sides, or a garment rack that adds hanging depth, 36 inches is the safer target.
The real test is not whether you can pass the island. It is whether you can pass it while a drawer is open and your hands are full.
Account for hanging garment depth and wall obstructions
Standard hanging garments require approximately 24 inches of clearance from the wall or storage back panel. That dimension is easy to underestimate because clothing is soft and compressible. The hardware is not.
Hangers, sleeves, suit jackets, and the occasional garment that refuses to remain inside its assigned zone all occupy the front of the rod. If an island sits opposite hanging storage, the total room width must include the full 24-inch hanging allowance, the island depth, and the movement zone between them.
This is where many closet island garment rack dimensions become misleading. A product listing may describe the island as 24 inches deep, but that does not tell you how much space the clothes on the other side need. It also may not include knobs, pulls, countertop overhangs, or a display rail.
Wall storage can be deeper than expected
Built-in closet systems often include several layers of projection:
- The cabinet or shelving box.
- The face frame or trim.
- Drawer pulls.
- Hanging garments.
- Shoe shelves or angled display units.
- Crown molding, side panels, or decorative end caps.
The island must be positioned relative to the furthest point in this assembly. A 24-inch hanging allowance is a planning baseline, not permission to ignore the garments themselves.
If the island includes a garment rail, display rack, or open shelving, check whether its contents project into the walkway. Open storage is visually lighter but physically less disciplined. A garment sleeve hanging into the path still occupies space, even if the rack looks airy and minimalist.
Retrofitting an existing closet
Retrofitting is usually where the optimistic dimensions fail.
Existing closets tend to contain fixed rods, uneven wall surfaces, trim that was not designed around a central island, and electrical outlets placed wherever the wall happened to be available. Moving the island may solve one collision while creating another. The plan must therefore begin with an as-built measurement rather than a standard room diagram.
For a retrofit, I would mark:
- The actual front edge of every rod and shelf.
- The full swing of doors and drawers.
- The location of wall outlets and switches.
- Any floor transition that could affect the island’s level.
- Areas where baseboards prevent the island from sitting flush.
- The route needed to bring the island into the room.
That last point is routinely ignored. A unit that fits the finished room may not fit through the closet door, hallway, stair turn, or elevator. Modular construction helps, but only if the modules are sized for the route and can be assembled without turning the room into a temporary workshop.
Drawer extension tolerances are where elegant plans become unusable
Drawers are not decorative lines on a rendering. They are horizontal objects that occupy the room when open.
Built-in drawers generally require a cabinet depth of approximately 24 inches, while full extension can need up to 30 inches of clearance in front. The exact travel depends on the hardware and cabinet construction, but the planning principle is straightforward: the clearance in front of the drawer must be treated as occupied space whenever the drawer is open.
This creates several collision scenarios:
- An island drawer blocks the opposite wall drawers.
- An open drawer reduces the usable walkway to a narrow slot.
- Two drawers on opposing sides cannot be opened at the same time.
- A drawer handle catches clothing passing behind the user.
- A drawer opens into a door swing or blocks access to a nearby hanging section.
The most practical way to test this is to draw the drawer’s full travel on the floor plan, then extend the same projection into the physical room with tape. Do not stop at the manufacturer’s cabinet depth. Confirm the drawer front, handle, and any soft-close hardware projection.
One-sided versus two-sided storage
A double-sided island offers more storage, but it also doubles the number of access conflicts. The decision is less about maximum capacity than about how the room will be used.
| Island configuration | Main advantage | Main spatial penalty | Best fit |
|---|---|---|---|
| One-sided drawers | Easier circulation and simpler access | Lower storage capacity | Narrower walk-in closets and single-user rooms |
| Drawers on both sides | More folded-clothing storage in the same footprint | Requires stronger clearance discipline | Larger rooms with at least 36-inch working zones |
| Open shelving | Visual lightness and quick access | Contents can project into walkways | Display-led layouts and frequently used items |
| Hanging rail section | Useful for outfits, scarves, or short garments | Adds garment depth and can narrow the aisle | Boutique-style storage with generous room width |
| Fixed countertop with base storage | Clean surface for folding and accessories | Less flexible after installation | Stable layouts where the island position is unlikely to change |
A two-sided island is not automatically more efficient. If one side cannot be opened without blocking the other, the nominal storage gain is partly theoretical. A drawer that must remain closed to preserve circulation is expensive scenery.
Choose island dimensions after the clearance math
Standard closet islands commonly range from 24 to 36 inches in depth and 36 to 72 inches in length. Those dimensions are useful as a starting range, not a target to fill at any cost.
The correct island may be shorter than the catalog maximum. It may also be shallower, especially when the room has hanging storage on opposing walls. A 24-inch-deep island can preserve a meaningful amount of clearance compared with a 36-inch model, particularly when the island does not need to accommodate oversized drawers or deep bins.
Length affects circulation differently from depth. A longer island can make the room feel divided into two separate corridors, while a shorter island may leave better cross-access at the ends. The end clearances should be considered alongside the side clearances, particularly if the island sits near a doorway or a wall-mounted shoe section.
Use verticality carefully
Vertical storage is attractive because it increases capacity without increasing the floor footprint. That is the good part. The less good part is that a tall central element can interfere with sightlines, light, and access to surrounding storage.
Before specifying a high display rack or upper shelving, check:
- Whether the unit blocks light from a window or ceiling fixture.
- Whether the top shelves can be reached without leaning across drawers.
- Whether the room feels divided into narrow channels.
- Whether tall clothing or decorative objects overhang into the walkway.
- Whether the island can be assembled and moved into place at its final height.
Verticality is useful when it replaces unnecessary width or depth. It is not a magic exemption from clearance requirements. A tall obstruction is still an obstruction, just one with better marketing photography.
Modular versus fixed construction
For residential organization, modularity usually earns its keep when the room may change. A modular island can be shortened, relocated, or reconfigured more easily than a fully fixed built-in. That flexibility is particularly valuable in a retrofit where the final layout has not been proven through daily use.
Fixed cabinetry has its strengths: a cleaner fitted appearance, more consistent alignment, and often better use of irregular wall conditions. But it also makes mistakes permanent. If the clearance is wrong, the mistake is now part of the joinery.
I prefer to settle the footprint and access pattern before committing to fixed construction. A temporary taped layout, cardboard mock-up, or modular base can expose problems that a polished elevation drawing will politely conceal.
Build the walk-in closet island layout around actual use
The best layout depends on what the island is expected to do.
An island used for folded clothing needs accessible drawers and enough standing space to sort items. An island used as a decorative display rack may prioritize open shelving, a countertop, or a garment rail. A household sharing the closet needs more passing tolerance than a single user who retrieves one category at a time.
Map the high-frequency actions:
- Pulling out daily clothing.
- Sorting laundry.
- Folding garments.
- Choosing accessories.
- Reaching shoes or lower storage.
- Carrying items into and out of the room.
- Opening the closet door while another drawer is extended.
Then position the most frequently used storage where access is easiest. Deep, low-frequency storage can occupy less convenient zones. Daily drawers should not require a sideways shuffle around a countertop corner.
For a boutique closet island rack setup, display value can easily take over the plan. Open rails and decorative shelves look good because they make the storage visible. They also expose every protruding hanger, scarf, and loosely folded item to the circulation path. If the room is tight, enclosed drawers may provide less visual drama but more reliable clearance.
This is the part that glossy planning guides tend to skip: storage is not efficient merely because it is present. It is efficient when the user can reach it without moving three other things first.
A practical pre-installation sequence
I would complete the planning in this order rather than beginning with finishes or hardware:
1. Measure the finished room.
Use the actual wall-to-wall dimensions and record every permanent obstruction.
2. Map the existing storage.
Include the full 24-inch hanging allowance where rods face the proposed island.
3. Choose the minimum workable island footprint.
Start with the smallest depth and length that serve the intended storage function.
4. Add a 30-inch clearance zone.
Increase it toward 36 inches where drawers, doors, or two-person circulation are involved.
5. Draw the full drawer extension.
Allow up to 30 inches in front of built-in drawers where full pull-out is expected.
6. Test opposing access.
Open drawers and doors on both sides of the room. If the layout works only when one side remains closed, document that limitation before installation.
7. Check the entry route.
Confirm that the island components can reach the room through every turn and opening.
8. Test the layout at floor level.
Painter’s tape is sufficient for the first test. It is much cheaper than cutting finished cabinetry.
9. Decide whether the island should be modular.
If the room is being retrofitted or the storage pattern is still evolving, preserve the option to reconfigure.
10. Only then finalize the material and hardware package.
A beautiful island with the wrong footprint is still the wrong island.
The final reality check before purchase
A good walk in closet island rack planning document should answer practical questions, not just show a centered rectangle.
Before ordering, I would want the following confirmed in writing or on the working plan:
- The room provides at least an approximately 30-inch perimeter clearance, with 36 inches preferred where drawers or two-person use demand it.
- The proposed island dimensions sit within the room’s actual footprint after wall storage is included.
- The 24-inch hanging depth allowance has been included wherever clothing rods face the island.
- Full drawer travel has been measured, with up to 30 inches of front clearance allowed where applicable.
- Opposing drawers and doors have been tested for collisions.
- Handles, trim, countertop overhangs, and open garments are included in the projection measurements.
- The island’s length leaves usable end access rather than creating two narrow dead-end corridors.
- The delivery and assembly route has been checked, not assumed.
- Any anchoring, floor leveling, or electrical work is treated as a site-specific matter rather than a universal product promise.
- The storage configuration matches actual use: drawers for folded clothing, rails for garments that need hanging space, and open displays only where their contents will not invade the walkway.
- The layout remains tolerable when the room is occupied by a person, an open drawer, and a basket of clothing—the real operating conditions, not the showroom version.
A closet island should improve access, not turn access into a negotiation. The most successful installations are rarely the largest ones. They are the ones that respect clearance, preserve movement, and use modularity where the room’s future is uncertain.
Measure the air around the cabinet. That is where the usability lives.