Retail display rack sightlines: common layout traps
Retail display rack sightline mistakes are usually treated as visual merchandising errors. That is incomplete. They are also failures of geometry, circulation control, and fixture specification.
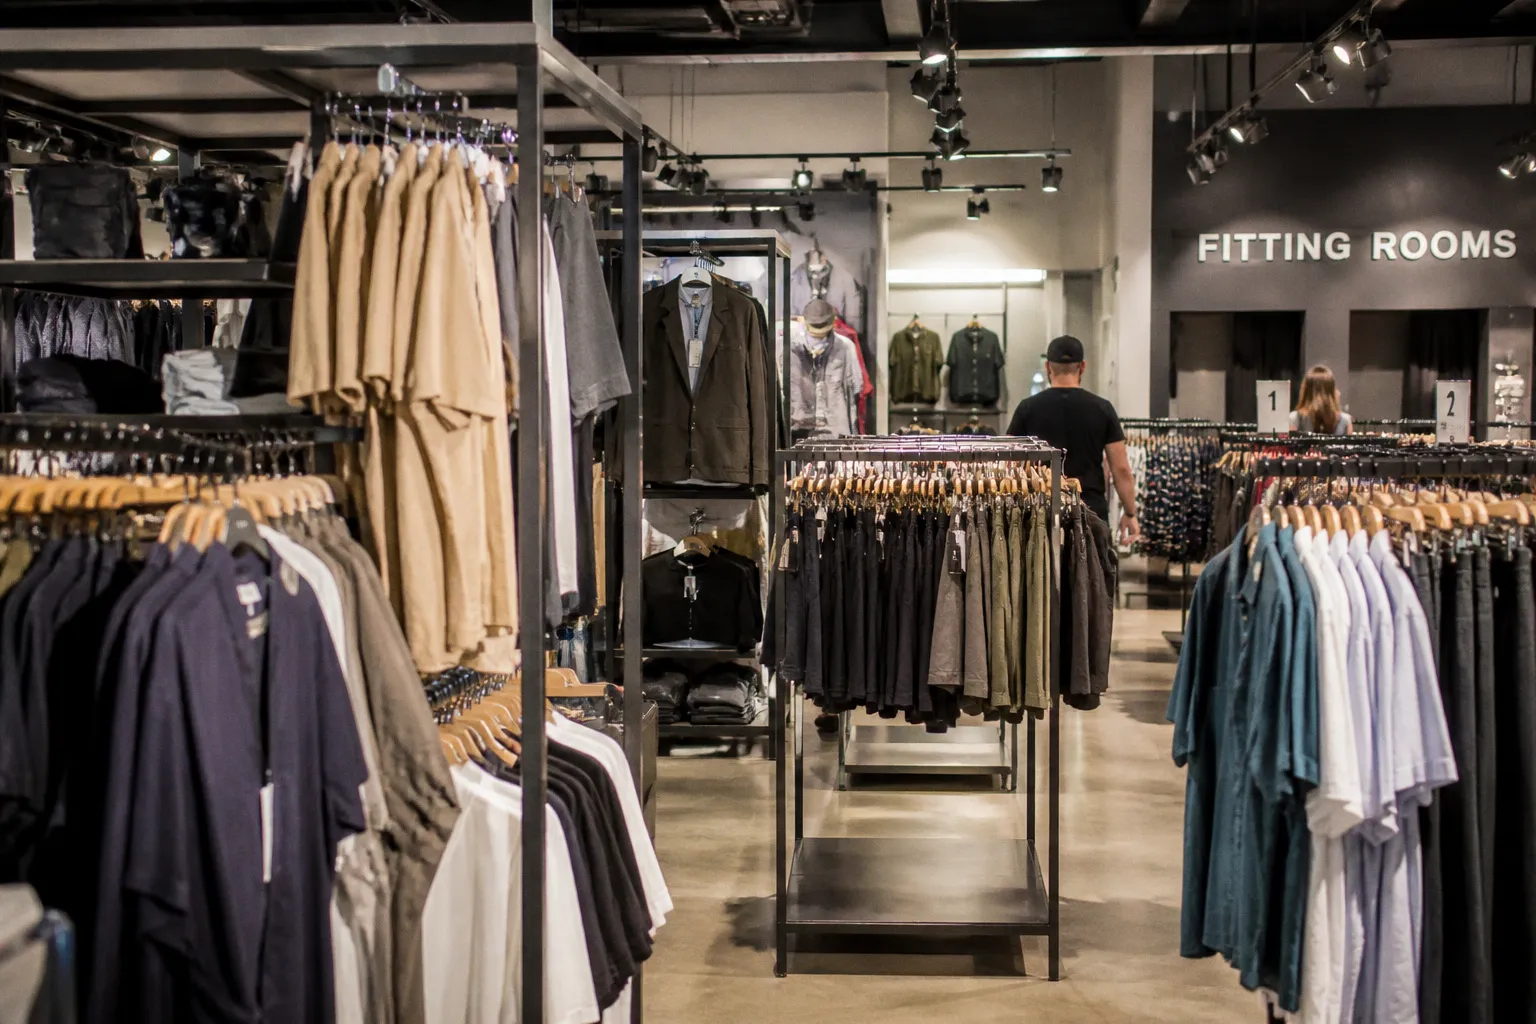
Retail Display Rack Sightline Mistakes: Layout Traps
A rack that blocks a customer’s view of the sales floor changes the path through the store. A rack that exceeds the usable visual field suppresses product discovery behind it. A rack placed in the entrance decompression zone occupies floor area without receiving equivalent attention. A rack loaded beyond its intended capacity may deflect, tilt, or require additional bracing, which further reduces usable aisle width and sightline quality.
The relevant variables are measurable: fixture height, aisle clearance, eye-level placement, viewing angle, rack depth, load distribution, and distance from the entrance. The most common retail display rack sightline mistakes occur when these variables are handled as isolated design choices instead of as one structural and behavioral system.
The Decompression Zone: Why Front-of-Store Racks Fail
The first 5 to 15 feet inside a store entrance is a poor location for promotional racks, folded-garment tables, and dense accessory fixtures. This area functions as a decompression zone. Customers are still transitioning from the exterior environment, adjusting to lighting, temperature, store geometry, and competing visual signals.
A rack positioned in this zone can be physically visible without being cognitively processed. That distinction matters. The fixture occupies floor space and may carry promotional inventory, but the shopper’s attention is directed toward orientation rather than product evaluation.
The failure is often misdiagnosed as weak signage or poor product appeal. The actual problem is placement. A display can be technically within the customer’s field of view while remaining outside the customer’s active attention.
The entrance zone also has a second defect: it is a high-conflict area for circulation. Customers enter in groups, pause to orient themselves, adjust bags or clothing, and avoid opposing traffic. A rack projecting into this space creates a local obstruction. Even when the rack does not violate a formal accessibility requirement, it can narrow the effective path and force a lateral movement before the shopper has established a route.
This affects customer pathing in three ways:
1. It compresses the entry path. Customers move around the rack rather than toward merchandise deeper in the store.
2. It fragments the first sightline. The shopper sees the fixture at close range but loses a clear view of the store’s primary departments.
3. It creates premature decision load. Multiple products presented before orientation can be ignored as visual noise.
Promotional racks should normally begin beyond the decompression zone unless the fixture is deliberately low, open, and used to direct movement rather than to carry dense product. The distinction between a directional fixture and a selling fixture is structural as well as commercial. A low rail, sign frame, or open basket has a different sightline effect from a deep, fully stocked garment rack.
Entry rack geometry
The depth of a fixture is often more disruptive than its width. A rack only 48 inches wide can still obstruct circulation if it extends far enough into the walking path or is positioned perpendicular to the natural entry line. Garment racks with projecting arms, side hangers, and irregular loads create additional intrusion beyond the nominal base footprint.
A practical entry review should record:
- distance from the threshold to the first stocked fixture;
- total rack depth, including merchandise projection;
- clear path width on both sides of the fixture;
- height of the top rail and loaded product;
- direct sightline from the entrance to the store’s primary merchandise zones;
- location of queueing, fitting-room, and promotional traffic.
The rack should be assessed in its loaded condition. An empty frame may preserve a clear sightline. A fully stocked frame can create a continuous visual wall. Long garments, hanging signs, stacked cartons, and top shelves all increase the effective obstruction height.
A rack inside the decompression zone is often visible to the customer and invisible to the sale.
This does not mean that every front-of-store fixture is defective. Low-profile units can establish a visual anchor without closing the store. The failure occurs when the entrance is used as immediate storage rather than as the first controlled segment of the customer path.
The 72-Inch Barrier: Managing Fixture Height for Open Sightlines
Fixture height is the primary variable in retail sightline control. Units above 72 inches, or 183 cm, create visual barriers when installed near the front of the store, at aisle fronts, or in central floor positions. They obscure merchandise behind them and divide the sales floor into enclosed visual compartments.
The 72-inch threshold is not a universal legal limit. It is a sightline control reference. Local accessibility rules, fire requirements, egress conditions, and landlord standards must be assessed separately. A tall rack may be acceptable along a perimeter wall while producing severe layout friction in the central floor.
Standard floor-standing retail displays are commonly limited to approximately 48 to 60 inches, or 122 to 152 cm, when storewide visibility is required. These heights allow customers to see across the floor while still providing usable product capacity. Boutique open-concept layouts may use low-profile units below 66 inches, or 168 cm, where the objective is to preserve broad visual continuity.
The relevant comparison is not simply short rack versus tall rack. It is rack height relative to position.
| Fixture position | Typical sightline effect | Suitable height strategy | Primary failure mode |
|---|---|---|---|
| First 5–15 feet from entry | High obstruction during customer orientation | Low, open, or deferred fixture | Product is ignored and entry path is compressed |
| Aisle front or central floor | Blocks views into deeper departments | Approximately 48–60 in where visibility is required | Creates visual barriers and dead-end perception |
| Open-concept boutique floor | Preserves broad views between zones | Below 66 in for low-profile planning | Excessive height fragments the floor |
| Perimeter wall | Adds vertical density without blocking cross-store views | Units above 72 in may be used selectively | Overloading or poor anchorage creates structural risk |
| Endcap near a major path | Controls direction and attention | Moderate height with open lateral views | Blocks the next destination and diverts traffic |
The perimeter is the correct location for most high-density storage and display. Tall garment storage, boxed inventory, and wall-mounted systems can use vertical volume without cutting across the customer’s principal view corridors. The central floor should carry the fixtures that support navigation and product comparison, not the fixtures that maximize raw storage.
Height is not the only obstruction
A rack measuring 60 inches can still produce a 72-inch visual barrier if merchandise, signage, or stacked packaging extends above the frame. The loaded profile must be specified. The following elements routinely increase effective height:
- top-mounted promotional boards;
- hanging banners and oversized price cards;
- garments suspended above the nominal rail;
- cartons or reserve stock stored on upper shelves;
- mannequin components or decorative assemblies;
- angled shelves that project upward into the sightline.
The same principle applies to rack density. Two units at 60 inches with a 12-inch gap may preserve some visual permeability. Four units connected into a continuous bank can behave as a solid partition. Sightline quality depends on the ratio of open area to obstruction, not on the height of a single frame alone.
Structural implications of tall fixtures
Tall racks carry a higher overturning risk because the load centroid is farther from the floor. The risk increases when heavy product is stored above the main rail or when customers pull garments from one side of a mobile unit. A rack that is stable when evenly loaded can become unstable when the load shifts laterally.
The engineering review should include:
- base depth relative to total height;
- anchorage method for wall or floor connection;
- location of the center of gravity after loading;
- lateral bracing between uprights;
- allowable shelf or rail load;
- deflection under working load;
- corrosion condition at joints and fasteners.
Material selection does not solve a sightline problem, but it can prevent the fixture from becoming a greater obstruction after installation. Thin-gauge steel that bows under load may require additional intermediate supports. Additional supports can reduce clear openings and produce more visual clutter. Zinc-plated components are suitable for many dry retail interiors, but cut edges, exposed welds, and damaged plating remain corrosion initiation points. Epoxy-polyester powder coating provides a different surface system and must be evaluated for impact damage, cleaning chemicals, and humidity rather than selected by color.
The 15-Degree Visual Cone and the Strike Zone
The natural standing viewing area is concentrated around eye level. A vertical cone of approximately 15 degrees above and below eye level, producing a roughly 30 cm visual comfort zone, captures the area most readily inspected without deliberate head movement.
The commercial implication is direct: high-margin or high-priority products placed outside this zone require more visual effort. The product is not necessarily unseen. It is simply less likely to receive immediate attention during normal movement.
The practical strike zone is approximately 50 to 54 inches from the floor, or 127 to 137 cm. Research summarized for retail environments associates eye-level placement with sales contributions up to approximately 35% higher than placement outside the line of sight. This is not a guaranteed increase for every product. Product demand, price, packaging contrast, lighting, category familiarity, and adjacency remain active variables.
The strike zone should therefore be allocated, not filled indiscriminately.
Product placement by vertical position
- 50–54 inches: Priority products, high-margin items, new launches, and products requiring rapid recognition.
- Below the strike zone: Heavy goods, replenishment stock, larger folded items, and products selected after category recognition.
- Above the strike zone: Low-frequency items, reserve stock, seasonal overflow, or products supported by clear category signage.
- Near floor level: Bulky goods or products requiring customer handling, provided the retrieval action does not obstruct the aisle.
In garment storage systems, the top rail often sits close to the visual strike zone. That makes the rail position commercially useful but mechanically sensitive. If the rail is placed too high, the product moves above the natural viewing area. If it is placed too low, long garments drag, fold against the base, or require excessive rack depth to avoid floor contact.
Garment length must be considered with the frame. A rack that carries shirts and jackets can use a different clear height from a rack carrying dresses, coats, or full-length uniforms. The lower clearance must account for the garment hem, hanger geometry, and customer access. A technically strong rack can still fail as a display if its product envelope creates a dense lower curtain.
Eye level does not mean every product at one height
Uniform eye-level placement creates a new failure: visual monotony. If every rail, shelf, sign, and product face occupies the same vertical band, categories merge. Customers receive no hierarchy between entry item, core range, accessory, and replenishment stock.
The better arrangement uses controlled variation:
- one dominant product line within the strike zone;
- secondary products below or adjacent to it;
- signage above the merchandise without exceeding the sightline limit;
- open gaps that preserve views toward the next department.
This is not decorative variation. It is a method of separating product groups without constructing solid visual barriers.
Identifying and Eliminating In-Store Layout Dead Zones
Retail store layout dead zones are areas where customers pass without entering, pause without browsing, or cannot see the next relevant product destination. They are often created by rack placement rather than by a lack of inventory.
A dead zone can form behind a tall endcap, between two deep fixtures, beside a column, at the back of a queue, or in a corner where the customer path loses continuity. It may contain merchandise and still operate commercially as unused space.
The forensic indicators are consistent:
1. The next destination is not visible from the current position. Customers cannot read the route through the department.
2. The fixture blocks lateral movement. A customer must reverse direction or make a sharp turn to continue.
3. Product faces are turned away from the dominant path. The rack is stocked, but its selling surface is outside the normal approach angle.
4. The aisle terminates at a dense visual mass. Customers interpret the area as storage or a boundary.
5. The rack depth exceeds the adjacent circulation logic. The fixture creates a pocket that is too narrow for comfortable browsing.
6. Promotional information accumulates at one node. Several signs and racks compete for the same visual field while other zones remain unmarked.
The solution is not always to remove the fixture. Reorientation can restore the path. A rack parallel to the main circulation line may block less of the store than the same rack placed perpendicular to it. An open-sided garment rack can preserve a diagonal sightline where a solid-backed gondola would create a barrier.
The aisle-front trap
Aisle fronts are high-value positions because they receive passing traffic. They are also common obstruction points. A tall rack placed at the front of an aisle hides the contents beyond the first bay. Customers see the obstruction before they see the category.
A lower endcap can work as a directional marker. A high endcap works differently. It creates a boundary and forces the customer to make a choice without sufficient visual information. That can be useful at the perimeter or at the end of a deliberate route. It is damaging when placed before a core department that depends on discovery.
The fixture should be evaluated from the approach angle, not from the aisle centerline alone. A customer entering from the left may see a clear rack face while a customer approaching from the main entrance sees its solid back, upright posts, and signage supports. The two conditions are commercially different.
Rack spacing and effective aisle width
Nominal aisle width is not the same as usable aisle width. Product projection, rack feet, wheel housings, guard rails, and customer movement all consume the available envelope. A rack with a 24-inch base may produce a wider obstruction once garments extend beyond the rail and customers stop to inspect them.
Do not specify spacing from frame to frame only. Measure the active product boundary and the expected standing position of a browsing customer. The browsing position is part of the circulation system. If the customer stands in the aisle to compare two garments, the remaining path must still support movement in the opposite direction.
Formal accessibility requirements remain jurisdiction-specific. General sightline recommendations should not be presented as universal legal standards. The engineering task is to preserve the required clear path while preventing fixture geometry from making the path functionally unusable.
A clear aisle is not defined by the distance between steel uprights. It is defined by the movement envelope around the loaded fixture.
Balancing Perimeter Density with Central Floor Visibility
The strongest layout pattern for mixed retail display and garment storage is usually asymmetric: higher density at the perimeter, lower obstruction in the central floor, and controlled visual links between departments.
Perimeter walls can support tall systems because they do not normally interrupt cross-store sightlines. Central fixtures should be lower or more open because they operate inside the customer’s visual field. The mistake is to apply one rack type uniformly across both locations.
This is where load capacity and merchandising logic intersect. Wall systems can carry more vertical inventory, but only if the wall substrate, anchors, uprights, brackets, and load paths are specified for the actual load. A shelf rated for distributed loading may not tolerate a concentrated stack at one end. A garment rail rated for evenly distributed hanging weight may deflect when a heavy group of coats is pulled toward the center.
The design must distinguish between:
- uniformly distributed load across a shelf or rail;
- concentrated load from cartons or folded stacks;
- impact load from customer handling;
- eccentric load from one-sided hanging;
- lateral load from a customer pulling a garment;
- dynamic load on mobile or rolling racks.
A rack that deflects changes more than its structural alignment. It alters the visual plane of the merchandise. Sagging shelves, leaning uprights, and uneven rails create irregular product presentation and can cause adjacent fixtures to encroach on the path.
Material and finish selection for retail interiors
Most commercial display racks use coated or plated steel because the material provides predictable strength, weldability, and repeatable geometry. The surface system still affects service life.
Zinc-plated steel provides sacrificial corrosion protection where the coating remains continuous. It is vulnerable at cut edges, drilled modifications, damaged areas, and poorly protected weld zones.
Epoxy-polyester powder coating provides a thicker finished film and can resist normal indoor abrasion and cleaning exposure when properly applied. It is not immune to impact damage. Once the coating is breached, corrosion can develop beneath or around the damaged area depending on humidity and contamination.
Uncoated or lightly protected steel should be restricted to controlled dry interiors and maintained against moisture, salts, and aggressive cleaning compounds.
The relevant selection sequence is:
- establish the working load and load distribution;
- determine the required span and deflection limit;
- select the steel section and gauge;
- specify the connection and bracing system;
- select the finish for the actual humidity and cleaning environment;
- verify that accessories do not project into the customer path.
A visually open rack with inadequate lateral stiffness is not a valid solution. It may preserve sightlines during installation and fail after repeated loading cycles. Conversely, a heavily braced rack may meet the load requirement while creating unnecessary visual density. Structural members must be placed where they support the load without occupying the principal product and circulation fields.
Central floor planning
Central floor fixtures should perform a limited number of tasks. They may separate categories, present priority products, direct customer movement, or provide a controlled amount of accessible stock. They should not be expected to carry the full inventory burden of the store.
A workable central-floor arrangement generally follows these rules:
- keep the highest fixtures at the perimeter;
- maintain low or open central units where long sightlines are needed;
- reserve the 50–54-inch strike zone for selected products rather than all products;
- keep the entrance decompression zone visually and physically open;
- prevent endcaps from hiding the next major department;
- position promotional racks after the customer has entered the primary path;
- use transparent or open-sided construction where a full-height element is unavoidable;
- inspect the layout with the rack fully stocked, not empty.
A Forensic Method for Correcting Sightline Errors
Sightline correction should begin with a measured floor plan and a loaded fixture schedule. Product categories alone do not provide enough information. The same rack behaves differently with shirts, coats, boxed footwear, folded denim, or packaged accessories.
Record each fixture’s:
- overall height and width;
- base depth and product projection;
- shelf or rail elevations;
- working load by level;
- center of gravity under normal loading;
- anchorage and bracing condition;
- distance from entry, aisle front, and adjacent fixtures;
- visual relationship to major category destinations.
Then inspect the floor from the customer’s actual approach routes. Use standing eye level as the reference, not an elevated plan view. The objective is to identify where the view is interrupted, where the next destination disappears, and where a customer must enter a narrow pocket to access merchandise.
A useful correction sequence is:
1. Remove or relocate fixtures in the first 5–15 feet of entry. Preserve orientation before introducing promotional density.
2. Move units above 72 inches to perimeter positions. If they remain central, reduce height or open the visual plane.
3. Reallocate the 50–54-inch strike zone. Place priority merchandise there and move low-priority stock outside it.
4. Rotate aisle-front racks. Align the open side with the dominant customer approach.
5. Reduce product projection. The loaded envelope, not the frame, controls effective clearance.
6. Break continuous visual walls. Use controlled gaps or lower intermediate units.
7. Verify structural stability after modification. Relocation can change anchorage, base loading, and overturning resistance.
8. Reinspect after full stocking. Garment length, packaging, signage, and reserve inventory can invalidate an empty-floor assessment.
The output should be a route through the store, not merely a set of compliant rack positions. Customers need to see enough of the next zone to continue moving while retaining a clear view of the product currently presented. That requires a sequence of partially overlapping sightlines. A rack should introduce the next category before the customer reaches it, not conceal the category until the customer is already inside the department.
Industry findings published in early 2025 reported that nearly half of consumers had left a store without purchasing because of poor visual merchandising and layout friction. The same body of reporting recorded 73.4% dissatisfaction with in-store visual presentation. These figures do not establish a universal conversion penalty for every rack configuration. They do establish that layout friction is not a minor aesthetic defect. It can terminate the shopping path.
The Rule Set for Retail Display Rack Sightlines
Retail display rack sightline mistakes are reduced by applying a small number of dimensional rules consistently:
- Keep the entry decompression zone free of dense, tall fixtures.
- Treat 48–60 inches as the normal working range for floor displays that must preserve cross-store visibility.
- Restrict units above 72 inches, or 183 cm, to perimeter locations unless a specific sightline analysis supports another position.
- Use the 50–54-inch, or 127–137 cm, vertical band for priority merchandise.
- Evaluate the 15-degree visual cone around standing eye level when assigning product and signage positions.
- Measure the loaded product envelope, not only the steel frame.
- Separate central-floor merchandising from perimeter inventory storage.
- Inspect aisle fronts from every major approach direction.
- Calculate load, deflection, bracing, and anchorage before adding height or reducing base depth.
- Recheck every sightline after stocking, signage installation, and seasonal fixture changes.
The definitive recommendation is simple. Use tall, high-capacity display racks where the perimeter can absorb their height. Use lower, open, structurally stable fixtures in the central floor and near the entry. Place priority merchandise within the eye-to-waist strike zone. Keep the customer’s next destination visible.
A retail rack is not successful because it holds product. It is successful when its load path remains stable, its material system survives the environment, and its geometry supports uninterrupted movement toward the next sale.