Minimalist clothes racks: bedroom prep checklist
That twelve-inch-deep “minimalist” rack you've been eyeing? It may be telling you only half the story. Most product pages measure the frame and call that the depth. But a frame is not a garment.
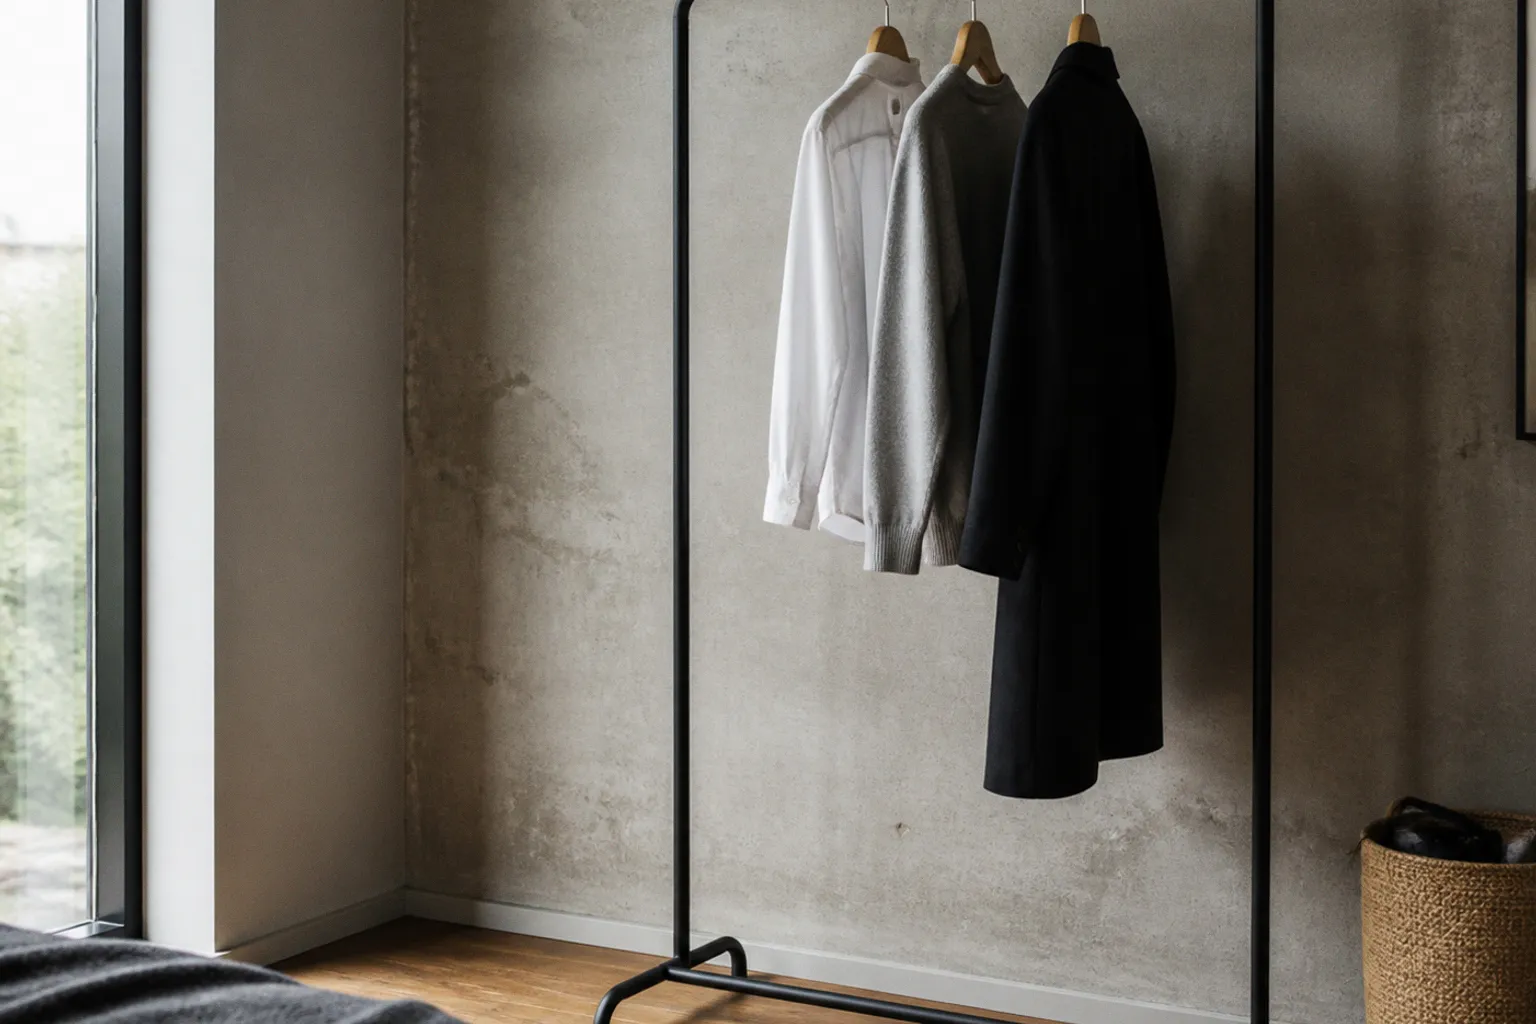
A standard adult coat hanger measures roughly seventeen inches across the shoulders, the hook projects farther forward, and the moment you drape a wool overcoat over it, the clothes can occupy more than twenty-two inches from the wall to the outermost edge.
That is the number your bedroom has to accommodate. Not the slim steel rectangle shown in the product photo.
A rack can have a shallow frame and still fail as a storage solution if the hangers force clothes into the wall, a nightstand, or the edge of a door. Minimalism is not about making the hardware as narrow as possible. It is about removing the wasted movement around it: no crushed shoulders, no blocked door swing, no rail mounted so high that it needs a step stool, no freestanding unit that tips when a winter coat goes on the end.
A twelve-inch-deep rack is only minimalist when the hanger and the garment still have somewhere to go.
Spatial Geometry and Hanger Clearance Requirements
Hangers are the silent variable nobody accounts for. The frame depth on most garment racks — whether it's a wall-mounted steel pipe or a compact freestanding model — runs somewhere between ten and fourteen inches. That is the visible hardware. The working depth, the space your clothes actually consume, is governed by the hanger, the shoulder width of the garment, and the way the fabric drapes.
For a single-tier installation, plan on roughly twenty-two to twenty-four inches of total front-to-back clearance, or about fifty-five to sixty centimeters. That measurement should run from the finished wall surface to the furthest point of the loaded garment, not simply from the wall to the back of the rack.
Anything less and clothes begin compressing against whatever sits behind them: the wall, a nightstand, the edge of a door, or the headboard. Compression is not only an aesthetic problem. Crushed shoulders can misshape blazers, wrinkle button-downs, and force heavier knits into permanent folds. A coat that cannot hang freely also makes the rack harder to use; every garment becomes something you have to pull forward before you can see it.
The safest way to plan a minimalist bedroom clothes rack setup is to measure the actual hanging zone in two stages:
1. Measure the frame or mounting hardware from the wall outward.
2. Add the space required by a representative hanger carrying the heaviest garment you expect to store.
Use more than a shirt for the second measurement. A lightweight blouse will make almost any rack look efficient. A padded hanger with a jacket, sweater, or coat gives you a more honest picture of the operational footprint.
Why “Slim Profile” Listings Mislead
A twelve-inch-deep rack can absolutely exist as hardware. It may be well made and perfectly suitable for a narrow entryway or a small display. It just does not automatically provide a twelve-inch-deep clothes-storage solution. The hanger projects forward, the garment has shoulder bulk, and coats need room to fall without being pushed sideways.
If a listing celebrates “compact depth” but does not state the working footprint with a loaded hanger, assume the number refers to the frame. Product photography with empty hangers tells you almost nothing about how the rack behaves with a raincoat, thick cardigan, or full skirt.
This distinction matters especially in bedrooms, where the rack often competes with furniture on all four sides. A unit may fit between the bed and the wall as an object, yet leave no usable passage once clothing is hanging. The same problem appears beside a dresser: the metal frame fits, but open drawers collide with the garments.
Before choosing a location, mark the proposed rack footprint on the floor with painter’s tape. Then extend the tape to the intended outer edge of the clothes. Walk past it, open the bedroom door, pull out nearby drawers, and stand where you normally dress. If the taped boundary interrupts those movements, the rack is too large for that position, regardless of what its product page calls “space-saving.”
The Rack Is Not the Whole Storage Zone
A garment rack needs a small amount of operating space around it. You need to reach the rail from the front, separate hangers with one hand, and remove a garment without dragging it across another surface. That is why bedroom garment rack space planning should include movement, not just the dimensions of the steel or wood structure.
The room also has to absorb the irregular shapes created by clothing. A shirt may stay close to the hanger. A coat sleeve will not. A long cardigan can swing beyond the rail, and a pair of trousers folded over a hanger may extend differently from a dress on a shoulder-shaped hanger.
This is where a supposedly minimalist arrangement either works or starts looking improvised. The rack should have a clear visual boundary, but the garments should not be forced into a rigid one. Leave enough room for the wardrobe you actually own, not the empty, monochrome collection shown in a styling photograph.
A useful way to test the location is to temporarily hang the largest three or four pieces you expect to keep there. Include one bulky item, one longer item, and one piece that needs to be removed frequently. Measure the outer edge again after the fabric settles. Clothes do not hang as a perfect vertical plane, especially when several hangers are pushed together.
Also account for the direction in which the rack will be approached. A rack placed beside the bed may be perfectly accessible from the foot of the bed and awkward from the side. A unit near a door can be easy to reach when the door is closed but unusable when the door is open. These are not failures of the rack itself. They are failures of the bedroom layout.
Optimizing Rail Heights for Single and Double-Tier Systems
Bar height gets fudged constantly. Retail renders show racks at whatever elevation looks pleasing, and specification sheets do not always disclose whether the listed height refers to the top of the unit, the center of the rod, or the underside of the rail. That distinction matters when you are planning around a tall headboard, a sloped ceiling, or a person who does not want to reach above shoulder level every morning.
For a single-tier installation, the center of the rod generally works well between sixty and sixty-six inches from the finished floor. That range is high enough for many coats, dresses, and trousers to hang without dragging, while remaining reachable for most adults without a step stool.
The exact point within that range depends on the wardrobe and the room:
- Move toward the lower end when the rack is used daily and accessibility matters more than maximum hem clearance.
- Move toward the upper end when the rack carries longer garments or sits above a low storage bench.
- Check the finished garment length rather than relying on the rail height alone. A dress that clears the floor on paper may still brush a rug, basket, or baseboard.
- Measure from the finished floor, not from the top of a rug or temporary platform that may later be removed.
A rail mounted too low turns the floor into a second shelf. Hems collect dust, garments catch on storage baskets, and the lower portion of the rack becomes difficult to clean around. A rail mounted too high solves those problems by creating an accessibility problem instead. The best height is the one that leaves garments clear while keeping the clothes within a comfortable reach.
Double-Tier Math
Double-tier racks look efficient because they use the same horizontal footprint twice. That efficiency is real, but it is not free. The vertical spacing has to be planned around the garments on both rails.
For a supported double-tier layout, position the lower rail approximately thirty-five to forty inches above the finished floor and the upper rail approximately seventy to eighty inches above the finished floor. These positions are intended for short-hanging garments on both levels, such as shirts, blouses, lightweight jackets, and folded trousers on suitable hangers.
The useful question is not simply whether the upper rail can be mounted at eighty inches. It is whether the room leaves enough uninterrupted space for the garments below it and enough clearance above the top rail for the ceiling, crown molding, lighting, or a shelf. The upper rail also needs to remain reachable in ordinary use. If the top tier can only be accessed with a step stool, the rack is storing clothes rather than helping you prepare them.
The lower rail should be checked against the floor, a rug, or any storage element below it. If the rack includes a shelf, measure to the shelf surface rather than assuming the floor is the relevant endpoint. The upper rail should be checked against the lower rail and the clothing hanging below it. A nominal distance between bars can look generous until a padded jacket occupies the lower tier.
| Parameter | Single-Tier | Double-Tier |
|---|---|---|
| Typical rod position | 60–66 in from the finished floor | Lower rail: 35–40 in; upper rail: 70–80 in |
| Intended garment mix | Full-length coats, dresses, trousers, or one flexible rotation | Shirts, blouses, light jackets, and other short garments on both levels |
| Clearance to check | From the rail to the floor or the first obstruction | From the lower rail to the floor or shelf, and from the upper rail to the lower hanging zone |
| Floor footprint | Compact single bar | Similar horizontal footprint with greater vertical capacity |
| Accessibility | Usually reachable without bending or stooping | Lower rail is easy to reach; upper rail may require a deliberate reach |
| Main limitation | Less capacity in the same wall width | Requires suitable ceiling height and disciplined garment sorting |
The table is deliberately less flattering to the double-tier option than a product listing will be. A double-tier rack is not automatically the better minimalist wardrobe rack dimensions choice. It works when the room has enough vertical volume and the wardrobe is mostly short-hanging. It works poorly when the owner wants to combine a high rail of shirts with a lower rail of long coats.
If the ceiling cannot accommodate the upper rail at a usable height within the seventy-to-eighty-inch range, use a single bar at a comfortable height instead. One well-positioned rail is usually calmer and more useful than two crowded rails that require constant rearranging.
Double-tier storage only saves space when both rails preserve usable hanging clearance for the garments they are meant to carry.
Designing Around Shelves and Drawers
Some racks add a shelf below the rail, and that changes the height calculation. The lower garment no longer hangs to the floor; it hangs toward the shelf surface. Measure from the rail to the top of the shelf, not to the floor, and preserve enough clearance for shirts to hang without bunching.
A shelf can also become the first obstruction for the upper tier. A folded blanket, storage box, or stack of shoes placed on it reduces the effective clearance even though the rack dimensions have not changed. Treat the shelf as occupied when planning the system. Minimalist furniture tends to become dense storage very quickly once the room is in use.
Double-tier systems also need a clear division of garment types. Put the shortest, most frequently used pieces on the lower rail if reaching them is a priority. Reserve the upper rail for garments that can be reached safely and do not need to be inspected one by one every morning. A rail full of nearly identical shirts may tolerate the upper position better than a rail holding layered outfits, accessories, and delicate pieces.
Structural Integrity: Stud Anchoring and Load Capacity
A rack's load rating is meaningful only when the mounting method and the wall structure support it. A number printed on a package may describe the capacity of the rail, bracket, or anchor under specific conditions. It does not guarantee that a piece of drywall can carry a heavily loaded wardrobe over time.
For wall-mounted racks, the most reliable arrangement is to fasten the brackets into structural framing with appropriate screws or lag hardware. The critical point is not merely using a stronger screw. The fastener needs to bite into a stud or another properly prepared structural support rather than relying on the face of the drywall.
A seasonal working wardrobe can become surprisingly heavy. Shirts contribute little individually, while sweaters, denim, shoes stored on attached shelves, and winter coats accumulate weight quickly. The load also changes during use: garments are pulled from one end, pushed to the other, and sometimes hung unevenly on a single bracket. That movement creates leverage that a static package test does not fully represent.
Plan for the rack at its heaviest realistic condition, not its neatest condition on installation day. Ask how it will be used six months later:
- Will thick coats share the rail with lighter clothes?
- Will a shelf carry folded jeans, bags, or shoes?
- Will the rack be used by children who pull several garments forward at once?
- Will one end routinely hold more weight than the other?
- Does the manufacturer’s rating apply to the complete assembled unit or only to one component?
Finding the Studs Without Guessing
Residential wall framing is often laid out with studs typically sixteen inches on center, but that spacing is not universal. Older construction, exterior walls, remodelled sections, corners, door openings, plumbing runs, and nonstandard framing can all change the pattern. Treat sixteen inches as a common starting point, not a promise.
Verify the actual stud locations before you choose the rack or drill the wall. A magnetic stud finder can help locate the fasteners holding drywall to the framing. An electronic finder may also be useful, but any tool should be confirmed with a second check rather than treated as infallible. Look for a consistent vertical line of fastening points, test with a small pilot hole where appropriate, and account for the possibility of wiring or plumbing before drilling deeply.
Mark the center of each confirmed stud, not just its approximate edge. Then compare those locations with the mounting holes on the rack. If the holes do not line up, the solution is not to force the bracket into the nearest empty patch of drywall. Choose a rack with a mounting plate that spans the available studs, install a suitable structural backer where the wall construction allows it, or select a freestanding unit.
A rack designed around the wall is better than a rack that merely fits the wall’s measurements. This is one of the less glamorous parts of freestanding clothes rack prep, but it prevents the most expensive failure: a loaded rail pulled out of the wall, damaged clothing, damaged paint, and hardware that has to be replaced twice.
Freestanding Racks: Floor Stability Replaces Wall Support
For freestanding units, the calculation shifts. Weight transfers to the floor through the base, and the main concern becomes tip-over stability rather than anchor pull-out. The rack should have a base wide enough for its height and for the depth of the loaded garments. A tall, narrow frame with a light base may look elegant when empty and become unstable as soon as heavy items are placed at one end.
Check the floor as carefully as the rack. A thick rug can make a lightweight unit rock. Uneven flooring can leave one foot carrying most of the load. A bed, dresser, or wall may stop the rack from falling in one direction while making it harder to access from that side; that is not the same as a stable design.
If the rack is used in a household with children or pets, consider whether it can be secured to the wall as an anti-tip measure without making the rail’s primary load dependent on drywall. A freestanding rack still needs a realistic load limit, even when an additional safety strap is present.
Weight distribution matters more than a showroom photograph suggests. Place heavier coats closer to the supports rather than at the extreme end of a long rail. Keep shelves from becoming a catch-all for books, bags, and shoes unless the manufacturer includes that use in the rated capacity. If the unit wobbles when empty, loading it is not a design test you need to perform.
Wall Clearance and Preventing Surface Abrasion
The distance between the rail and the wall is not a decorative detail. It determines whether the clothing hangs freely or spends the day rubbing against paint, textured plaster, baseboards, and whatever else is behind the rack.
As a planning range, allow roughly twelve to sixteen inches between the rail and the finished wall surface, then confirm the total depth with a loaded hanger. Twelve inches is the tight end. It may work for lightweight clothing and a carefully controlled arrangement, but it leaves little tolerance for bulky garments or a wall with trim.
Sixteen inches is more forgiving. It gives a heavy coat room to swing without constantly touching the surface and makes it easier to separate hangers with one hand. It also increases the room’s total occupied depth, which is why the wall clearance and the front edge of the garment have to be considered together rather than measured as separate product specifications.
Baseboards complicate wall-mounted installations. If the rack stops above a thick baseboard, the lower portion may sit closer to the wall than the rail does. If the brackets project over the trim, the rack may tilt or fail to sit flush. Measure the wall profile at the actual mounting height and note any chair rail, molding, outlet cover, radiator, or uneven plaster that changes the plane.
Protecting the Wall and the Clothes
Abrasion happens gradually. The first week may leave no mark. After months of coats brushing the same painted area, the wall can develop a dull strip, dark transfer, or polished patch. Rough masonry, exposed fasteners, and sharp bracket edges can damage fabric even faster.
Before installation, inspect every surface that a garment could touch:
- Check the back of the rack for burrs, unfinished welds, and protruding screw ends.
- Look at the wall behind the rail, including textured paint and decorative trim.
- Confirm that hooks and hanger shoulders do not push sleeves into corners.
- Keep fabric away from hot radiators, heaters, and exposed electrical fixtures.
- Use manufacturer-approved pads or spacers where they protect a contact point without reducing structural stability.
Do not solve a clearance problem by padding the rack until it becomes soft or unstable. A felt strip may protect paint at a light contact point, but it cannot replace adequate depth or a properly supported bracket. If a garment touches the wall while the rack is correctly loaded, the geometry needs to change.
The same principle applies to freestanding units. A painted wall may appear to stabilize the rack, but repeated movement can scuff both the wall and the frame. If the rack is intended to stand near a wall, leave enough space to clean behind it and to see whether the frame is slowly shifting. A unit that rests against the wall is not automatically a wall-mounted unit.
Doors, Drawers, and the Daily Path
A rack should be tested under ordinary bedroom movement, not only from the angle at which it looks best. Open the closet door. Open the bedroom door. Pull out the dresser drawer. Move a laundry basket through the room. Sit on the bed and stand up again. The outer edge of the clothes must coexist with those actions.
The most common planning error is to measure the rack against a closed door or closed drawer. Once either opens, the usable room becomes smaller. Long garments can also catch on door hardware, while a crowded rail can block a light switch or make the nearest outlet difficult to reach.
A practical arrangement often leaves one side of the rack visually and physically calmer than the other. That may mean placing the rail parallel to the longest wall, keeping the open end away from a door, or choosing a shorter rack so the final hanger does not sit directly beside a passage. Minimalism is partly an inventory decision and partly a circulation decision.
Lighting Standards for Functional Wardrobe Visibility
A clothes rack can be perfectly dimensioned and still fail at the moment you need to choose an outfit. If the garments sit in the shadow of a wardrobe, behind a tall headboard, or under a bright ceiling fixture, color and texture become difficult to judge. Black trousers merge with navy. Similar neutrals become indistinguishable. Small stains and fabric wear disappear until you are already outside.
Functional wardrobe lighting should illuminate the front of the garments rather than create a bright patch on the wall behind them. A ceiling fixture directly above the rack may leave the clothing faces in shadow, especially when the rail is deep or the hangers are tightly packed. A light positioned slightly in front of the rack usually gives more useful visibility.
The goal is even light across the hanging zone. Avoid relying on a single narrow beam that makes one end of the rail clear and leaves the other in darkness. A linear fixture, a broad wall light, or several properly spaced sources can work better than a decorative point light. The exact fitting depends on the room, but the placement should follow the clothes rather than the visual center of the wall.
Color Recognition Matters
The bedroom is not a retail showroom, and it does not need showroom glare. It does need light that lets you distinguish colors and surfaces with reasonable confidence. Warm, dim light can make cream appear yellow and dark green appear black. Very cool light can make skin tones and natural fabrics look harsh while still failing to reveal shadows between garments.
When selecting a lamp or integrated fixture, look for a color quality suitable for dressing and a color temperature that matches the rest of the room. Consistency matters if the rack is near a mirror: the clothes should not look one color at the rail and another once you reach the window.
Shadows are especially disruptive on a crowded rail. One garment can block the light from the next, creating dark vertical gaps. Leave enough spacing between heavy pieces for the light to reach the fabric, and avoid treating the rail as a compressed wall of clothes. A little visual separation improves both visibility and access.
Mounting Lights Without Creating a New Problem
Lighting must not reduce the clearance that the rack needs. A wall light installed behind the rail can become an obstruction for hangers. A lamp mounted too close to the top tier can interfere with hooks, sleeves, and the upper rail. Cords can catch on the frame or become another item competing for floor space.
Before fixing a light in place, hang the largest garments and observe where their shoulders and sleeves move. Mark the areas that remain clear during normal use. Keep heat-producing fixtures away from fabric and make sure the installation does not place a cord where it can be pulled by a moving garment or passing person.
If the rack is freestanding, a nearby floor lamp may be easier to position than a hardwired fixture, but it still needs a stable base and a protected cable route. Do not place a lamp where the rack’s footprint, a chair, or an open drawer can knock it over. The cleanest arrangement is the one that provides light without adding an extra obstacle to the same circulation path you measured earlier.
Putting the Bedroom Prep Together
The measurements work as a sequence. First establish how far the clothing will project into the room. Then decide whether the wardrobe needs one rail or two. After that, match the mounting method to the wall or floor, protect the surfaces, and add lighting that helps rather than crowds the hanging zone.
Do not begin with the rack’s advertised width and height. Begin with the bedroom’s fixed constraints:
- The finished wall surface, including baseboards, molding, outlets, and uneven sections.
- The full front-to-back depth of the loaded garments, not just the frame.
- The door, drawer, bed, and walking clearances that must remain usable.
- The rail height required by the garment mix and the people using the room.
- The location of confirmed studs or the stability of the freestanding base.
- The position of the light source relative to the front of the clothing.
For a single-tier arrangement, a rod center around sixty to sixty-six inches can suit a flexible mix of garments, provided the hems clear the floor and nearby furniture. For a double-tier arrangement, the lower rail belongs around thirty-five to forty inches and the upper rail around seventy to eighty inches when both levels are reserved for short-hanging pieces. Those ranges are not interchangeable, and they are not a reason to force a two-level system into a room without enough vertical space.
A minimalist bedroom clothes rack setup should make the next action obvious: reach, slide, choose, and leave. If the rack requires you to fight the door, compress the coats, bend around a shelf, or climb for everyday clothes, its clean appearance is doing all the work. The better solution may be a wider wall-mounted rail, a shorter single-tier unit, or a freestanding rack with a deeper and more stable base.
The right rack is not the smallest one that fits the bedroom. It is the one that leaves the room usable after the clothes are on it.
That is the preparation the product photograph cannot do for you. Measure the garments, reserve the working clearance, place each rail where its wardrobe can actually hang, and treat structure, surface protection, and light as part of the storage system. The result will look minimalist because it functions cleanly—not because the hardware was made to disappear.