Minimalist clothes rack setup: bedroom layout roadmap
A minimalist bedroom clothes rack layout fails most often through geometry, not decoration. The rack is installed too close to the wall, its usable depth is underestimated, or its length occupies too much of the wall.
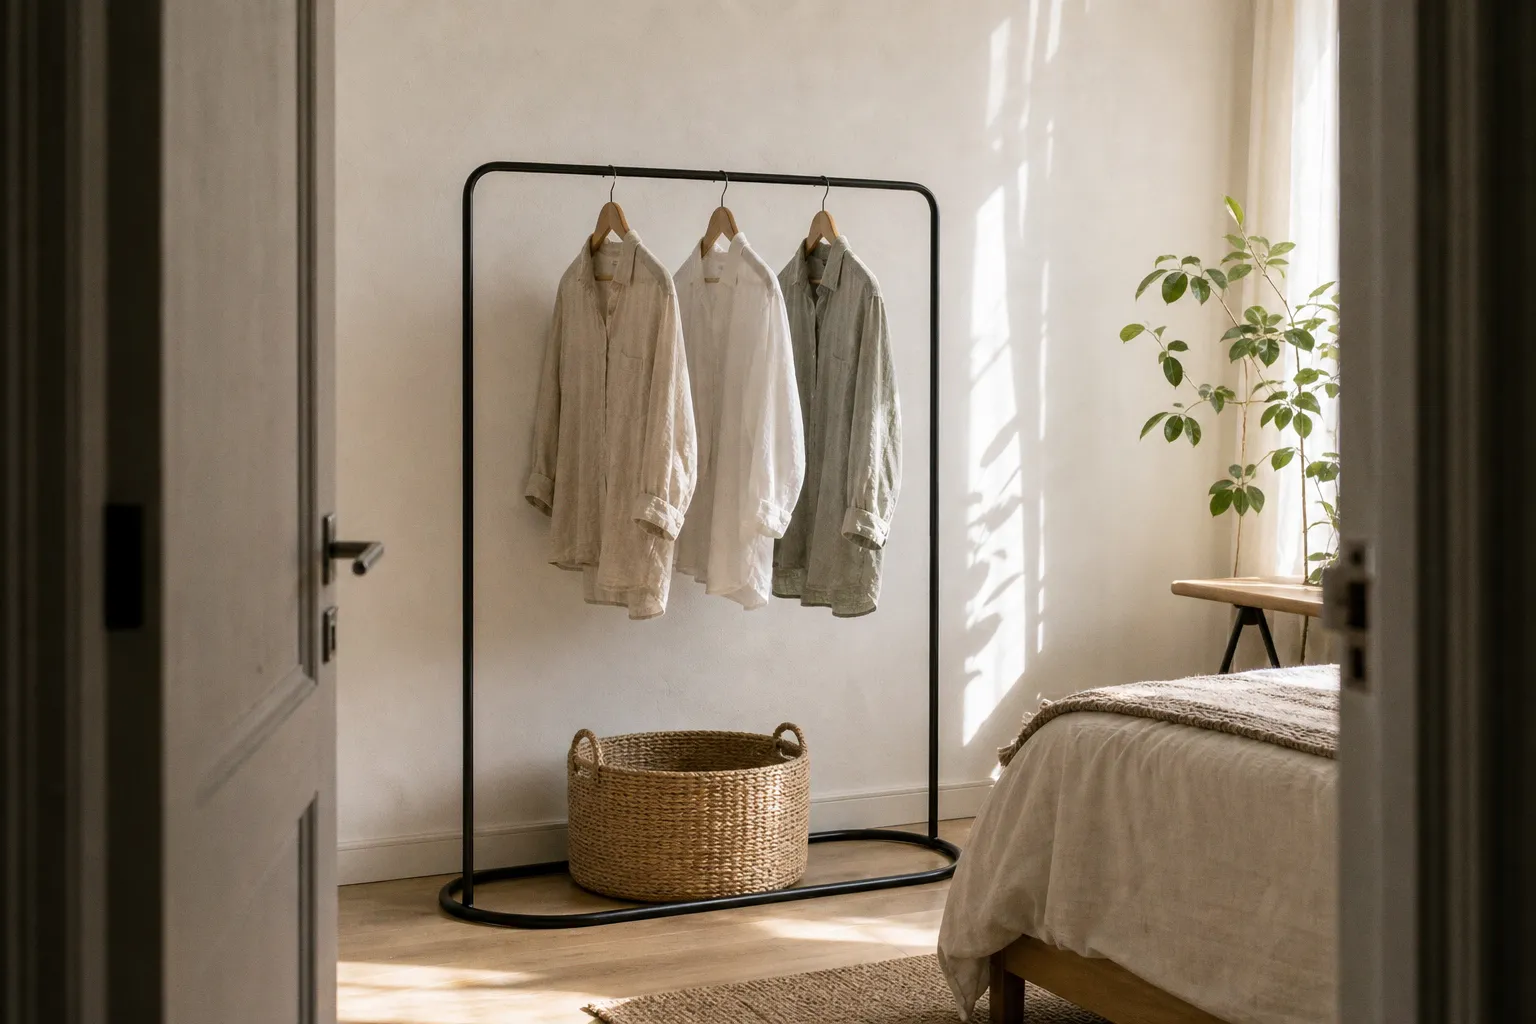
The result is compressed garments, obstructed circulation, unstable loading, and a storage system that visually dominates the room.
The controlling dimensions are straightforward: maintain 12–16 inches (30–40 cm) between the garment rail and the wall, reserve 22–24 inches (55–60 cm) of total depth for adult hangers, and limit a wall-mounted rack to approximately 60–70% of the wall’s running length in a small bedroom. These values form the base geometry. The remaining decisions concern load path, vertical drops, lighting, and the distribution of stored items.
Spatial geometry: define the rack before choosing the wall
A clothes rack occupies more space than its steel or aluminum frame suggests. The structural frame may be only 12 inches deep, but adult hangers typically require a total clearance of at least 22–24 inches. Coats, padded jackets, and garments with shoulder structure can project farther. Doors and drawers add another layer of interference.
For a functional bedroom garment rack placement, measure from the finished wall surface to the furthest moving or stored component. Do not measure only the tube or shelf depth. A rack positioned 12–16 inches from the wall permits the hanger body to clear the wall and creates enough air volume to reduce garment compression. This distance also prevents sleeves and hems from rubbing against painted surfaces.
The 22–24 inch depth requirement applies to the complete operating zone:
- The wall-to-rod distance must accommodate hanger hooks and shoulder width.
- The garment face must remain clear of doors, bedside tables, and circulation routes.
- A shelf above the rod must not project far enough to contact the clothing below.
- The rack base must remain inside the same footprint as the upper frame, unless the base is deliberately widened for anti-tip performance.
- Any curtain, sliding panel, or cabinet door must be measured in its open position.
A layout that technically fits a rack but leaves less than 24 inches of passage is not a storage solution. It is an obstruction with a load attached to it. In a walk-in closet, parallel racks should retain 24–28 inches (61–73 cm) of central clearance. The lower value is usable for direct passage. The upper value provides better access when garments are being removed from both sides.
Wall-mounted versus freestanding geometry
The choice between a wall-mounted clothes rail and a freestanding closet organizer changes the failure mode. A wall-mounted rack transfers vertical load into brackets, fasteners, and the wall structure. A freestanding rack transfers load through the uprights into a base that must resist overturning.
A wall-mounted rack anchored into two wall studs, typically spaced 16 inches on center, can support approximately 50–80 lbs under the stated conditions. The actual capacity still depends on bracket spacing, tube section, fastener type, and eccentric loading. A load placed at the front edge of a shelf produces more overturning moment than the same load placed directly over the bracket line.
Drywall anchors alone provide a lower margin. A practical safe capacity is approximately 20–35 lbs for a properly selected anchor system, but that range should not be treated as a substitute for stud attachment. Winter coats, bags, and dense garments create concentrated loads. Repeated loading also produces cyclic stress at the fastener hole. Pull-out failure is not announced by a gradual reduction in convenience. It occurs when the substrate loses engagement.
Freestanding racks have a different constraint. The base diameter or effective footprint should be at least 40% of the total rack height to reduce tip-over risk. A 60-inch-tall unit therefore requires an effective base diameter of at least 24 inches where the design relies on a circular footprint. For rectangular bases, use the narrowest resisting dimension, not the larger dimension, when evaluating stability.
The rack must be dimensioned as a loaded structure, not as an empty frame.
Proportional balance: apply the 60–70% wall-length rule
In a small bedroom, the rack should occupy approximately 60–70% of the available wall length. This ratio controls visual mass and preserves usable wall area for doors, lighting, artwork, or vertical breathing room. More significantly, it limits the temptation to load every available inch with garments.
A rack that spans the full wall creates two technical problems. First, the ends often become inaccessible because the bed, door swing, or adjacent furniture blocks them. Second, the continuous horizontal rail encourages overloading. The rack begins as a short hanging zone and becomes a full wardrobe without any corresponding increase in bracket capacity or floor clearance.
Use the wall’s running length as the reference dimension:
| Wall length | Recommended rack length at 60–70% | Practical implication |
|---|---|---|
| 72 in | 43–50 in | Suitable for a compact hanging zone |
| 84 in | 50–59 in | Leaves measurable side clearance |
| 96 in | 58–67 in | Allows a larger wardrobe with controlled mass |
| 120 in | 72–84 in | Suitable for a longer system if anchoring is distributed |
These are planning values, not product specifications. A rack should not be extended beyond the manufacturer’s tested span merely because the wall allows it. Long unsupported rails deflect under load. The deflection may remain within the elastic range, but the permanent visual sag signals that the system is operating near its limit.
For a small bedroom clothing rack layout, place the rack on the longest uninterrupted wall where possible. Avoid locating the rail behind the door swing. Maintain enough side clearance to remove garments without striking the wall or adjacent furniture. The rack should also remain clear of heat sources. Radiators and forced-air outlets accelerate dust movement, dry natural fibers, and can create local thermal variation that affects finishes and stored materials.
Load distribution along the rail
Garments do not generate a uniform load. Coats, denim, leather, shoes, and bags weigh substantially more per linear inch than shirts. If dense garments are grouped at one end, the rail experiences an uneven bending moment and the mounting hardware sees asymmetric shear.
Distribute mass across the full supported span. Place heavier items near brackets or uprights. Keep bags off unsupported end sections. Do not use a clothing rail as a general-purpose shelf unless the shelf and its brackets are designed for that load case.
A simple allocation model improves both stability and access:
- Approximately 60% of the storage volume for hanging garments.
- Approximately 20% for folded items in shelves or drawers.
- Approximately 20% for accessories and shoes.
This is not a decorative formula. It limits the amount of suspended weight and prevents the lower part of the room from becoming an uncontrolled secondary storage zone. Folded garments should be carried by shelves or drawers rather than hung from the rail. Shoes and bags should remain below the rail or in a separate cabinet so that their concentrated loads do not migrate to the upper frame.
Vertical ergonomics: calculate rod heights from garment drops
The vertical layout determines whether the rack is a usable storage system or a compressed display bar. Long dresses and coats require a clear vertical drop of 60–65 inches (150–170 cm). Shirts and trousers require approximately 58–60 inches. These dimensions include the garment length, hanger, and a lower clearance zone.
For double-hanging systems, position the lower rod at 35–40 inches and the upper rod at 70–75 inches. The exact position depends on the user’s reach, ceiling height, and whether the lower section stores shirts, trousers, or shorter garments. The lower rail should not be placed so close to a bench or drawer that the garment hem contacts the surface.
The following arrangement is structurally and operationally coherent:
| Rack configuration | Lower zone | Upper zone | Suitable contents |
|---|---|---|---|
| Single long-hang rail | No lower rod | 60–65 in clear drop | Coats, dresses, long jackets |
| Single short-hang rail | No lower rod | 58–60 in clear drop | Shirts, trousers, skirts |
| Double-hang rack | 35–40 in rod height | 70–75 in rod height | Shirts, folded trousers, shorter garments |
| Rail with overhead shelf | Rod below shelf | Shelf 10–12 in deep | Seasonal items, folded textiles, boxes |
A shelf directly above a clothing rod should generally be 10–12 inches deep. Greater depth increases the probability of contact with hangers and restricts access to the rear of the shelf. Less depth reduces usable storage volume and can create an unstable edge for folded items.
The vertical drop must be measured from the underside of the shelf, ceiling, or upper rail to the nearest obstruction. A nominal 60-inch space is not a 60-inch garment drop if the rack includes a thick shelf, bracket, or decorative top frame. Structural components consume clearance.
Long-hang and double-hang zones should not be mixed without a clear transition. Long garments placed above a lower rail will strike the lower rail or the floor. Garments that contact the floor accumulate dust and impose a repeated bending load on the hanger. The resulting deformation is small per item but persistent across a high-density wardrobe.
Visual anchoring is also a stability problem
An open rack has a high center of mass once loaded. Its visual balance improves when a low, heavier element is placed beneath it, but the lower element must not interfere with garment clearance or circulation. A bench, console, or low drawer unit can serve as a physical and visual anchor.
Use a lower-to-upper mass ratio of approximately 1:1 or 2:3. The lower element should not be a narrow object that appears disconnected from the rack footprint. Its width should relate to the rack length, and its depth should remain within the 22–24 inch operating zone unless the room provides additional passage.
The lower element has three technical functions:
1. It receives shoes, folded garments, or storage boxes that would otherwise be suspended from the rail.
2. It lowers the visual center of mass of the installation.
3. It can reduce accidental contact with the lower portion of a freestanding frame.
It does not automatically improve structural stability. A bench that is merely placed under a rack does not prevent a wall-mounted rail from pulling out of weak anchors. It does not stop a freestanding unit from tipping unless the frame is positively connected to it or to the wall. Treat visual anchoring and mechanical anchoring as separate systems.
For freestanding units, use an anti-tip connection where the manufacturer provides one. The restraint should transfer lateral force into a stud or another verified structural element. A narrow rack with a large garment load at the front has greater overturning demand than the empty assembly indicates. The center of gravity moves forward as garments are added, particularly when the back of the rack remains unloaded.
Avoiding interference with the bedroom envelope
Place the lower anchor outside the door swing and maintain a clear line to the bed. The minimum passage between parallel storage systems is 24 inches. Increase it toward 28 inches where the user must turn, open drawers, or handle long garments.
The rack should not terminate directly against a corner unless the corner has been measured for hanger rotation. Hangers need lateral movement. A garment can be technically within the rail length but unusable if the wall at the end prevents the hanger hook from rotating out of the rod.
Corner conditions also concentrate dust and reduce access for cleaning. Open wardrobes require regular reorganization because their loads remain visible and accessible. This is a maintenance requirement, not a stylistic preference. Dust accumulation at the wall contact points and base joints can conceal corrosion or loosened fasteners.
Materials and finishes: the bedroom is a low-corrosion environment, not a zero-corrosion environment
Residential bedrooms generally impose lower corrosion demand than commercial laundries, bathrooms, or exterior applications. They still contain humidity, skin oils, cleaning chemicals, and particulate contamination. The material and finish should match the expected exposure.
Zinc-plated carbon steel provides a sacrificial zinc coating that protects the underlying steel until the coating is damaged or consumed. It is suitable for many dry interior applications. Cut edges, drilled holes, and scratched surfaces remain vulnerable because the coating is discontinuous at the damage point.
Powder-coated steel uses a cured polymer layer. An epoxy-polyester coating provides a harder and more chemically resistant surface than a low-grade decorative coating, but the finish remains dependent on substrate preparation, film thickness, and impact resistance. A chipped coating exposes steel to localized oxidation. The defect should be cleaned and repaired rather than ignored.
Stainless steel provides stronger corrosion resistance, but the alloy designation matters. Generic “stainless” labeling is not a structural specification. Tube wall thickness, weld quality, and grade determine performance. A thin-wall stainless tube can carry less bending load than a thicker carbon-steel tube with an epoxy-polyester finish.
Aluminum reduces dead load and resists red rust, but it has a lower elastic modulus than steel. Under the same geometry and load, an aluminum rail can deflect more. It may also be more sensitive to thread damage at fastened connections. Material selection must therefore include section size, not only corrosion behavior.
For an interior clothes rack, inspect these areas before installation:
- Weld toes, where incomplete fusion or sharp geometry can create stress concentration.
- Bracket holes, where oversized clearance can permit movement.
- Tube ends, where open sections collect dust and moisture.
- Coating damage around screws and wall contact points.
- Plastic feet, which can creep under sustained compressive load.
- Threaded joints, which can loosen under repeated lateral movement.
Do not treat a coated surface as proof of load capacity. A finish prevents or delays chemical degradation. It does not increase tensile strength, bracket stiffness, or stud engagement.
A corrosion-resistant finish extends service life. It does not compensate for weak anchoring or an undersized section.
Lighting the open wardrobe without distorting material decisions
Lighting affects how garments are evaluated, but it also affects how accurately the rack and its contents can be inspected. LEDs with a Color Rendering Index of 90 or higher, a color temperature of 3000–3500K, and approximately 300–500 lux on the garments provide useful color fidelity without producing a cold, high-contrast bedroom environment.
Mount the light so that it illuminates the garment face rather than the top of the rail. A light placed behind the clothing creates shadow zones at the wall and conceals dust, coating damage, and crowded hangers. A light placed too close to the front can produce glare from chrome, zinc-plated, or powder-coated components.
The electrical installation must not intrude into the rack’s operating zone. Maintain clearances from hangers and moving doors. Keep the driver and cable route accessible for replacement. Heat output from modern LED systems is limited, but enclosed fixtures can still create local temperature rise. Do not place high-output fixtures directly against textiles or within a confined shelf cavity without thermal clearance.
Lighting also reveals structural defects. A rail that appears level under diffuse room lighting may show deflection under a linear LED source. If the rail line changes visibly after loading, remove part of the load and inspect the brackets, fasteners, and wall substrate. Do not correct a sagging rail by tightening a visible screw without identifying the underlying movement.
A field sequence for the installation
A reliable minimalist bedroom clothes rack layout can be established with a short sequence of measurements. The sequence prevents the common error of buying a rack first and attempting to force the room around it.
1. Measure the wall and the operating envelope. Record wall length, ceiling height, door swing, bed position, radiator location, and the depth available in front of the wall.
2. Set the rack length. Use 60–70% of the wall length in a small room unless the manufacturer specifies a different layout requirement.
3. Set the total depth. Reserve 22–24 inches for adult hangers, including the wall clearance, garment face, and any front obstruction.
4. Choose the structural type. Use stud-mounted brackets for wall systems where the load exceeds the reliable capacity of drywall anchors. Use a wide, restrained base for freestanding systems.
5. Assign garment zones. Reserve 60–65 inches for long garments, 58–60 inches for short-hang garments, and 35–40 plus 70–75 inches for double-hanging configurations.
6. Place shelves and lower storage. Keep an overhead shelf around 10–12 inches deep and move shoes, bags, and folded textiles away from the hanging rail.
7. Calculate the load. Estimate the combined mass of garments, hangers, shelves, and accessories. Place dense items near structural supports.
8. Inspect after loading. Check rail deflection, bracket movement, fastener pull-out, base rocking, and contact between garments and walls or floor.
9. Recheck at intervals. Powder-coated or zinc-plated components still require inspection at joints, cut edges, and fasteners. Loosened connections should be corrected before the rack is reloaded.
The installation should be tested in its loaded state. An empty rack demonstrates geometry. A loaded rack demonstrates structural behavior.
The definitive layout rule
Use a wall-mounted rack when the wall contains verified structural attachment points and the expected load can be distributed across at least two supports. Use drywall anchors only for light loads within their tested capacity. Do not assign winter coats, bags, or dense textile storage to a drywall-only system without a conservative capacity calculation.
Use a freestanding rack when drilling is restricted or the wall substrate is uncertain, but select a base whose narrowest resisting dimension is at least 40% of the rack height and add anti-tip restraint where available. Keep the heaviest garments low and near the uprights. Do not extend the rail beyond its tested span.
For most residential rooms, the correct route is therefore defined by five limits: 12–16 inches of wall clearance, 22–24 inches of total rack depth, 60–70% of wall length, 24–28 inches of passage between parallel systems, and a load path that terminates in studs or a stable base. The material finish, lighting, and lower console follow those constraints. They do not replace them.
A minimalist clothes rack setup succeeds when the structure disappears into the room because its geometry remains controlled under load. The rule is simple: size the rack for the garments, anchor it for the actual substrate, and preserve circulation after the wardrobe is full.